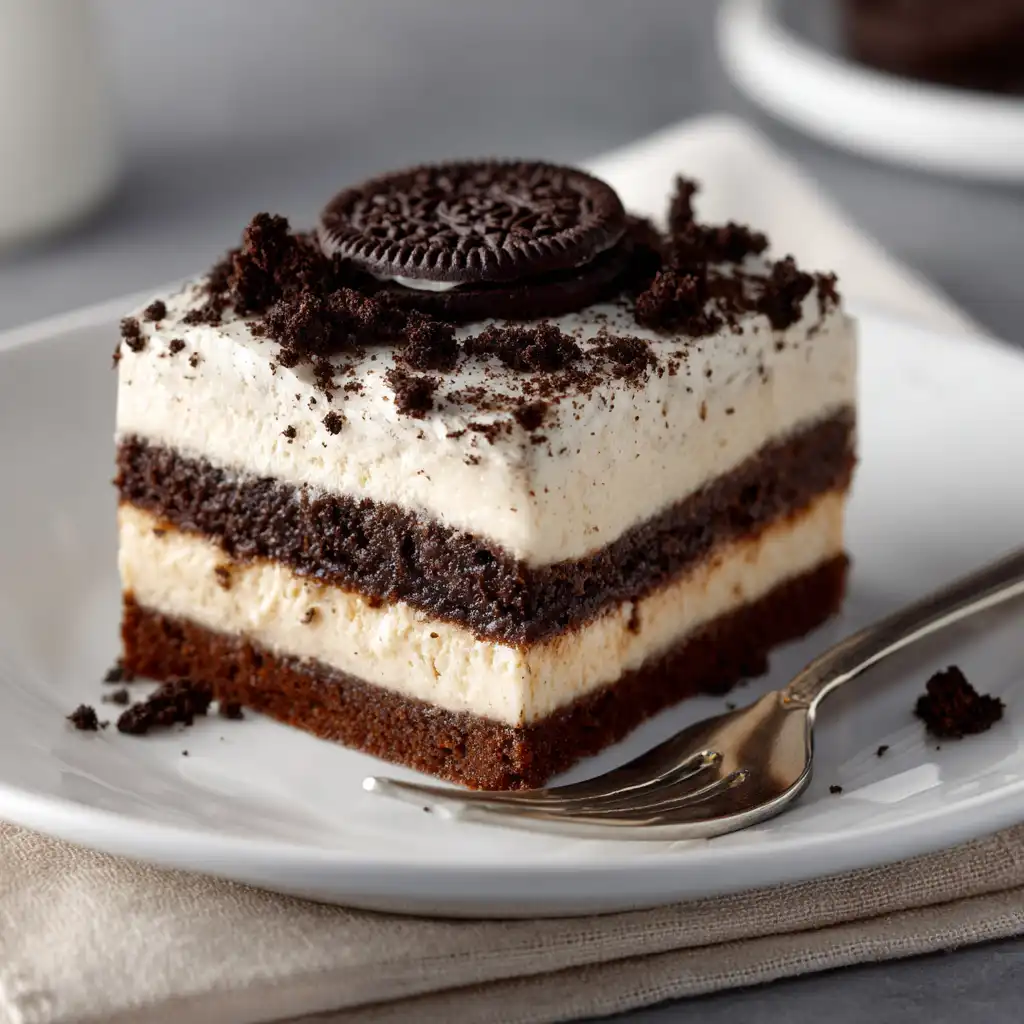
Oreo cheesecake bars are a dream come true for anyone who loves the combination of chocolate cookies and creamy filling. These treats offer the rich, tangy flavor of a traditional cheesecake but in a much more convenient, portable form. You do not need to worry about complicated water baths or long cooling times in the oven. With a crunchy cookie crust and a velvety center, these oreo cheesecake bars are sure to become a favorite in your household for any occasion.
Table of Contents
Why Everyone Loves Oreo Cheesecake Bars
There is something special about the way oreo cheesecake bars bring people together. The familiar taste of the chocolate sandwich cookie creates a sense of nostalgia that guests of all ages enjoy. Unlike a whole cake, oreo cheesecake bars are easy to slice into small or large portions, making them perfect for parties, office gatherings, or school events. The balance of the salty-sweet crust and the smooth, airy filling makes every bite of these oreo cheesecake bars feel like a decadent indulgence.
The Convenience of Bar Desserts
One of the biggest advantages of making oreo cheesecake bars is how much time you save compared to a full-sized cake. Traditional cheesecakes can be finicky and prone to cracking, but the bar format is much more forgiving. You simply bake them in a square or rectangular pan and cut them once they are cold. If you enjoy handheld treats that are easy to serve, you might also want to try these chocolate-chip cookie bars for your next baking session. Both recipes are great for when you need a crowd-pleasing dessert without the stress of perfect presentation.
A Hit at Every Gathering
When you bring a tray of oreo cheesecake bars to a potluck, they are usually the first thing to disappear. The striking black and white layers look professional and appetizing on any dessert table. Because these oreo cheesecake bars are dense and rich, a little goes a long way, allowing you to feed a large group with just one batch. We feature many similar crowd-pleasers in our desserts category, where we focus on recipes that are both simple to make and impressive to serve to your friends and family.
Print
The Best Homemade Oreo Cheesecake Bars
A decadent dessert featuring a crunchy chocolate cookie crust and a velvety cream cheese center loaded with Oreo chunks. These portable bars are easier to make than a traditional cheesecake and perfect for any gathering.
- Total Time: 5 hours 5 minutes
- Yield: 16 bars 1x
Ingredients
- 36 Oreo cookies, finely crushed
- 5 tablespoons unsalted butter, melted
- 24 ounces cream cheese, softened to room temperature
- 3/4 cup granulated sugar
- 3/4 cup sour cream
- 1 teaspoon vanilla extract
- 3 large eggs, room temperature
- 12 Oreo cookies, coarsely chopped for the filling and topping
Instructions
- Preheat the oven: Heat your oven to 325°F (160°C) and line an 8×8 inch baking pan with parchment paper.
- Create the crust: Combine crushed cookies and melted butter in a bowl until the mixture resembles wet sand.
- Press and bake: Press the mixture firmly into the bottom of the pan and bake for 10 minutes.
- Beat cream cheese: Using an electric mixer, beat the cream cheese and sugar together until completely smooth.
- Mix wet ingredients: Add the sour cream and vanilla extract, mixing until well combined and airy.
- Incorporate the eggs: Add eggs one at a time on low speed, mixing just until the yellow disappears.
- Fold in cookies: Gently fold half of the chopped Oreos into the cheesecake batter with a spatula.
- Bake the bars: Pour the batter over the crust, top with remaining cookies, and bake for 40-45 minutes.
- Cool and chill: Let the bars cool to room temperature before refrigerating for at least 4 hours.
- Slice and serve: Use the parchment paper to lift the bars out and cut into even squares.
Notes
Ensure all dairy ingredients are at room temperature to prevent lumps in the cheesecake filling.
- Prep Time: 20 minutes
- Cook Time: 45 minutes
- Category: Desserts
- Method: Baking
- Cuisine: American
- Diet: Vegetarian
Nutrition
- Serving Size: 1 bar
- Calories: 385 kcal
- Sugar: 26 g
- Sodium: 290 mg
- Fat: 28 g
- Saturated Fat: 15 g
- Unsaturated Fat: 11 g
- Trans Fat: 0.1 g
- Carbohydrates: 32 g
- Fiber: 1 g
- Protein: 5 g
- Cholesterol: 85 mg
Keywords: Oreo, Cheesecake Bars, Chocolate, Cookies and Cream, Party Dessert
Essential Ingredients for Oreo Cheesecake Bars
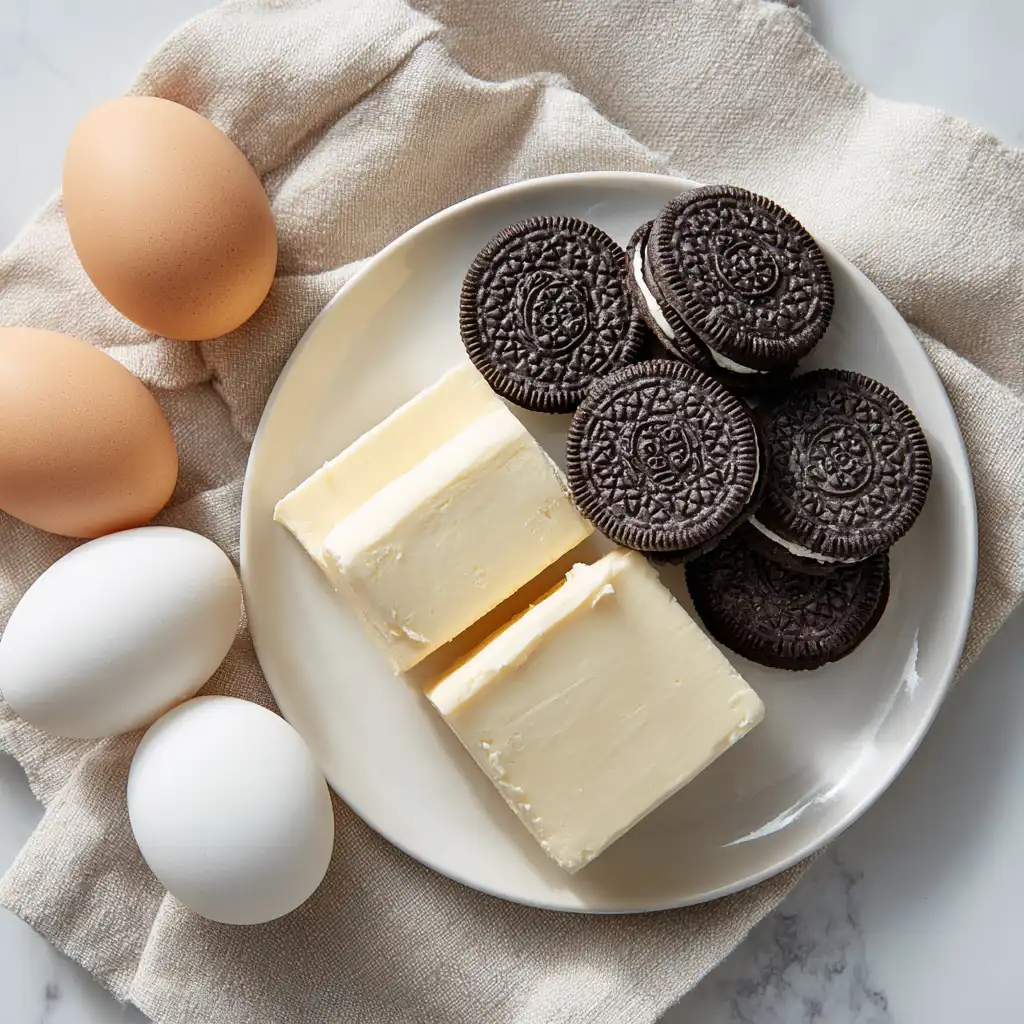
To make the best oreo cheesecake bars, you only need a few high-quality ingredients. The star, of course, is the chocolate sandwich cookie. You will use these cookies for both the base and the topping to give the oreo cheesecake bars maximum flavor. Along with the cookies, you will need bricks of full-fat cream cheese, granulated sugar, large eggs, and a touch of vanilla. Using high-fat ingredients is key because it gives the oreo cheesecake bars that signature creamy texture that people crave.
Selecting the Best Cookies
While most people use the classic version for their oreo cheesecake bars, you can actually use any variety of sandwich cookie you like. According to the Oreo cookie page on Wikipedia, this brand has been around since 1912 and offers dozens of different flavors and filling thicknesses. For the most stable crust in your oreo cheesecake bars, the standard filling amount usually works best. If you choose a “Double Stuf” variety, you may need to reduce the amount of melted butter you add to the crust to prevent it from becoming too greasy.
The Role of Cream Cheese
The texture of your oreo cheesecake bars depends heavily on the type of cream cheese you choose. It is very important to use the blocks of cheese rather than the whipped versions sold in tubs. Tub cheese contains more air and water, which can prevent your oreo cheesecake bars from setting firmly. For the smoothest batter, make sure your cream cheese is at room temperature before you start mixing. Cold cheese stays in lumps, which can ruin the look and feel of your finished oreo cheesecake bars once they are baked.
Tips for a Perfectly Crunchy Crust
The foundation of any good bar dessert is the crust. For oreo cheesecake bars, you want a base that is thick enough to hold up the filling but not so hard that it is difficult to bite through. To achieve this, grind your cookies into a very fine sand-like consistency. If the pieces are too large, the crust for your oreo cheesecake bars will crumble when you try to lift them out of the pan. Adding a small amount of melted butter helps the crumbs stick together and creates a rich, buttery flavor that complements the chocolate.
Pre-Baking the Base
A common mistake when making oreo cheesecake bars is pouring the batter directly onto a raw crust. If you do this, the crust often absorbs moisture from the filling and becomes soggy. By pre-baking the cookie base for just eight to ten minutes, you “set” the crumbs. This creates a barrier that keeps the bottom of your oreo cheesecake bars crisp and delicious. Let the crust cool for a few minutes while you prepare the filling so that it doesn’t cook the bottom of the cheesecake layer too quickly.
Pressing the Crumbs Evenly
To make sure every one of your oreo cheesecake bars has an even layer of crust, use the bottom of a flat measuring cup or a glass to press the crumbs down. Start in the center and work your way to the edges. You want the crust to be tightly packed so that it forms a solid platform for the cream cheese. If the edges are thinner than the middle, those oreo cheesecake bars might break apart. Taking an extra minute to level the crust makes a huge difference in the final quality of the dessert.
How to Mix the Creamy Filling

Mixing the filling for oreo cheesecake bars is a delicate process that requires patience. You want to beat the cream cheese and sugar until they are completely smooth and glossy. This is the stage where you can be a bit more vigorous with your mixer. However, once you begin adding the eggs, you must change your approach. Over-mixing the eggs adds too much air to the batter, which can cause the oreo cheesecake bars to puff up like a souffle and then collapse, leading to deep cracks on the surface.
Incorporating the Eggs Correctly
When adding eggs to your oreo cheesecake bars, do them one at a time. Mix on the lowest speed possible just until the yellow of the yolk disappears. This technique keeps the batter for the oreo cheesecake bars dense and creamy. If you see a few small bubbles on top of the batter after mixing, you can gently tap the bowl on the counter to release them. This step helps prevent tiny holes from forming inside your oreo cheesecake bars as they bake in the oven.
Adding the Cookie Chunks
The final step in the filling process is adding the extra cookie pieces. For the best texture in your oreo cheesecake bars, chop the cookies roughly by hand rather than using a food processor. This leaves you with some large chunks and some small crumbs, providing a nice variety in every bite. Fold these in gently with a spatula instead of using the electric mixer. This keeps the white filling from turning completely grey and preserves the beautiful speckled look of the oreo cheesecake bars.
Step-by-Step Instructions for Oreo Cheesecake Bars
- Step 1: Prep the Oven and Pan – Heat your oven to 325°F and line an 8-inch square baking pan with parchment paper for easy removal.
- Step 2: Crush the Cookie Base – Pulse 24 chocolate sandwich cookies in a blender or food processor until they are fine crumbs.
- Step 3: Mix the Crust Ingredients – Stir the cookie crumbs together with 5 tablespoons of melted butter until the mixture is well combined.
- Step 4: Press and Pre-Bake – Firmly press the crumbs into the bottom of the pan and bake for 8 minutes before letting it cool.
- Step 5: Cream the Main Filling – Beat two 8-ounce blocks of room-temperature cream cheese with 1/2 cup of sugar until the mix is smooth.
- Step 6: Add Eggs and Vanilla – Mix in two large eggs one at a time on low speed and then stir in 1 teaspoon of vanilla.
- Step 7: Fold in Extra Cookies – Gently fold in 10 to 12 roughly chopped cookies into the batter using a rubber spatula.
- Step 8: Bake Until Set – Pour the batter over the cooled crust and bake for 35 to 40 minutes until the edges are firm.
- Step 9: Cool and Chill – Let the pan sit at room temperature for an hour then refrigerate for at least four hours or overnight.
- Step 10: Slice and Serve – Lift the parchment paper to remove the block and cut into squares using a sharp, clean knife.
Comparison of Common Pan Sizes
If you want to change the size of your batch, you may need to adjust the baking time. Smaller pans lead to thicker oreo cheesecake bars that take longer to cook through, while larger pans result in thinner bars that bake much faster. Below is a quick guide to help you plan your baking session.
| Pan Size | Cookie Count (Crust) | Cream Cheese Amount | Estimated Bake Time |
|---|---|---|---|
| 8×8 Inch Square | 24 Cookies | 16 oz (2 blocks) | 35-40 Minutes |
| 9×9 Inch Square | 30 Cookies | 24 oz (3 blocks) | 40-45 Minutes |
| 9×13 Inch Rectangle | 48 Cookies | 32 oz (4 blocks) | 45-50 Minutes |
Secrets to Slicing and Presentation

To get those perfectly clean edges on your oreo cheesecake bars, you need to be careful with how you cut them. If you try to slice the bars while they are still slightly warm, the filling will stick to the knife and create a mess. Always wait until the oreo cheesecake bars are fully chilled. Using a knife that has been dipped in hot water and then wiped dry before every single cut will give you the cleanest results. This prevents the dark crust from smudging into the white cheesecake layer.
Garnishing Your Dessert
While oreo cheesecake bars look great on their own, a few simple garnishes can make them look even better. You can drizzle a bit of melted chocolate over the top or add a small dollop of whipped cream to each square. Placing a mini sandwich cookie on top of each bar is another fun way to indicate the flavor. If you enjoy desserts with a cream cheese base and want to try something even richer, these cream cheese brownies are a fantastic alternative that also looks beautiful on a serving platter.
Serving Temperature Matters
Most people prefer to eat oreo cheesecake bars cold, directly from the refrigerator. This is when the texture is at its firmest and most satisfying. However, if you prefer a softer, more mousse-like consistency, you can let the oreo cheesecake bars sit at room temperature for about fifteen to twenty minutes before serving. Just be careful not to leave them out for more than two hours, as the dairy content needs to stay cool to remain safe for consumption.
Storage and Freezing Tips
Because these oreo cheesecake bars contain cream cheese and eggs, they must be stored in the refrigerator. Place them in an airtight container to prevent them from picking up any odors from other foods in the fridge. When stored properly, your oreo cheesecake bars will stay fresh and delicious for four to five days. If you find that the crust starts to soften over time, you can place a small piece of paper towel in the container to help absorb any excess moisture.
Freezing for Later
If you have a lot of leftovers or want to bake in advance, oreo cheesecake bars freeze beautifully. Wrap each individual bar in plastic wrap and then place them all in a heavy-duty freezer bag. They will keep their quality for up to three months. To thaw, simply move a few oreo cheesecake bars to the refrigerator the night before you plan to eat them. This is a great way to always have a high-quality dessert ready for unexpected guests or late-night cravings.
Planning Your Baking Schedule
If you are making these for an event, I recommend making the oreo cheesecake bars a full day in advance. The flavor of the cheesecake actually improves as it sits, and the texture becomes much more stable. This also takes the pressure off you on the day of the party. If you are looking for other chocolate-heavy treats that can be made ahead of time, our list of the best brownie recipes provides many options that store just as well as these bars.
Troubleshooting Common Issues
Even though oreo cheesecake bars are easier than whole cakes, things can sometimes go wrong. If your bars have large cracks on top, it usually means the oven was too hot or the eggs were over-mixed. You can easily hide these cracks with a bit of extra crushed cookie or chocolate sauce. If the crust is too hard to cut, you might have pressed it down too firmly or used too much butter. Next time, try a lighter touch when forming the base of your oreo cheesecake bars.
Preventing a Soggy Bottom
A soggy crust is often the result of not baking the base long enough or using cookies with too much cream filling. Make sure you follow the pre-baking step closely. Also, check that your oven is actually reaching the correct temperature by using an oven thermometer. If the oreo cheesecake bars are underbaked, the center will stay wet and cause the crust to lose its crunch. Taking these small precautions will help you achieve perfect oreo cheesecake bars every time you bake.
Dealing with Lumpy Batter
If you end up with lumps in your filling, it is almost always because the cream cheese was too cold. To fix this, you can try to strain the batter through a fine-mesh sieve before adding the chopped cookies. This will catch the hard pieces of cheese and give you a smooth texture. However, it is much easier to just plan ahead and let the ingredients sit on the counter for a few hours. Smooth batter is the secret to professional-looking oreo cheesecake bars that melt in your mouth.
FAQs
Can I use different types of cookies for the crust?
Yes, you can use golden sandwich cookies, mint-flavored ones, or even peanut butter cookies to change the flavor of your oreo cheesecake bars. Just keep the total weight of the cookies the same to ensure the crust has the right thickness.
Do I need to remove the cream filling from the cookies?
No, you should leave the cream filling in the cookies when you crush them. The filling helps the crust stick together and adds extra sweetness and creaminess to the base of the oreo cheesecake bars.
Why did my cheesecake bars turn grey?
If the filling looks grey, it is usually because the cookies were crushed too finely or mixed too vigorously into the batter. For a white filling with black speckles, fold in roughly chopped pieces of cookies at the very end by hand.
How long can oreo cheesecake bars sit out?
Because they contain dairy, oreo cheesecake bars should not be left at room temperature for more than two hours. If you are serving them at a party, try to keep the platter on a bed of ice or bring out small batches at a time.
Can I make these oreo cheesecake bars gluten-free?
Yes, many brands now offer gluten-free chocolate sandwich cookies. You can use those as a direct substitute for the standard cookies to make gluten-free oreo cheesecake bars that taste just as good as the original version.
Conclusion
Oreo cheesecake bars are the ultimate treat for any dessert lover. They combine the iconic crunch of the world’s favorite cookie with the smooth, tangy richness of homemade cheesecake. By following these simple steps and tips, you can create a dessert that looks and tastes like it came from a professional bakery. Whether you are making them for a special event or just a weekend snack, these oreo cheesecake bars are sure to bring a smile to everyone’s face. Happy baking!


