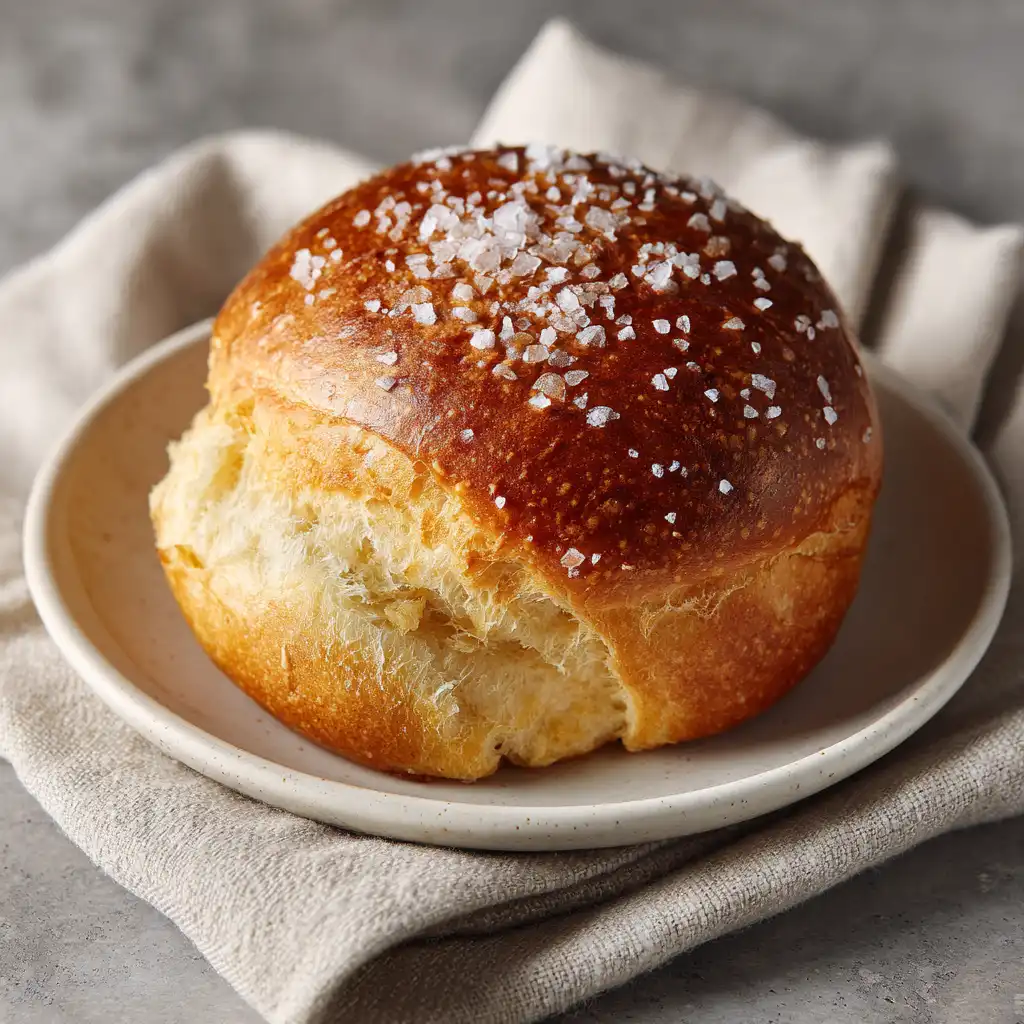
Salt Bread has taken the world of baking by storm, capturing the hearts of pastry lovers from Tokyo to Seoul and beyond. This simple yet sophisticated roll offers a perfect balance of a crunchy exterior, a soft and chewy interior, and a surprising burst of melted butter at its core. If you are looking for a bread that pairs perfectly with your morning coffee or serves as a comforting afternoon snack, this trendy treat is the answer. Let’s look at how you can make this bakery favorite in your own kitchen.
Table of Contents
The Fascinating Rise of Salt Bread
From Humble Origins to Global Fame
While many people recently discovered Salt Bread through social media trends in Korea, its roots actually trace back to Japan. Known there as “Shio Pan,” this bread was first created in a small bakery in Ehime Prefecture. The baker wanted to create a roll that would stay fresh and tasty even in the heat of summer. By adding a generous amount of salt on top, he created a snack that helped replenish minerals lost through sweating while providing a delicious, savory experience. The concept eventually traveled to South Korea, where it became a massive sensation under the name “Sogeum-ppang.” Today, you can find people lining up for hours just to get a warm bag of these buttery rolls.
The Unique Texture Profile
What makes Salt Bread stand out from a standard dinner roll is the contrast in textures. Unlike a soft brioche or a dense sourdough, this bread features a thin, crispy crust that shatters slightly when you bite into it. Inside, the crumb is light and airy, but with a distinct chewiness that keeps you coming back for more.
The most magical part is the hollow center, created when a stick of butter melts into the dough during the baking process. This creates a “fried” bottom that is incredibly rich and flavorful, making every bite an experience of different sensations. According to King Arthur Baking’s guide to Shio Pan, the hydration levels and the way the butter is wrapped inside are the keys to achieving this specific internal structure.
Why Simplicity Wins Every Time
In an era of over-the-top desserts and complex pastries, Salt Bread wins because it focuses on high-quality, basic ingredients. It does not rely on heavy frostings or sugary fillings. Instead, it highlights the natural sweetness of the flour, the richness of the butter, and the sharpness of the salt. This simplicity makes it versatile enough to be eaten at any time of day. Whether you are enjoying it as a quick breakfast on the go or serving it alongside a hearty soup for dinner, its understated elegance never feels out of place.
Print
Mastering the Art of Salt Bread: A Golden, Buttery Guide
A trendy Japanese-style ‘Shio Pan’ roll characterized by a thin, crispy crust, a soft chewy interior, and a hollow center filled with melted butter.
- Total Time: 105 minutes
- Yield: 8 rolls 1x
Ingredients
- 250g Bread flour
- 50g Cake flour
- 5g Instant dry yeast
- 20g Granulated sugar
- 5g Fine sea salt
- 180ml Lukewarm milk
- 20g Unsalted butter, room temperature (for dough)
- 80g Cold salted butter, cut into 8 sticks (for filling)
- 1 tablespoon Flaky sea salt (for topping)
Instructions
- Prepare the base dough: Combine the bread flour, cake flour, yeast, sugar, and fine salt in a large mixing bowl.
- Knead the dough mixture: Add the lukewarm milk and knead for 10 minutes, incorporating the room-temperature butter halfway through.
- Allow the first rise: Place the dough in a greased bowl and cover it for 60 minutes until doubled in size.
- Divide and rest dough: Punch down the dough and divide it into 8 equal pieces, shaping them into smooth balls for 15 minutes.
- Form the carrot shapes: Roll each dough ball into a long, tapered cone or carrot shape about 10 inches long.
- Wrap the butter sticks: Place a cold butter stick at the wide end and roll the dough tightly toward the tip.
- Proof until doubled size: Arrange the rolls on a parchment-lined baking sheet and let them rise for 45 minutes in a warm spot.
- Apply water and salt: Lightly mist the rolls with water and sprinkle a generous amount of flaky sea salt on top.
- Bake at high heat: Preheat your oven to 400°F (200°C) and bake for 12 to 15 minutes until the bottoms are golden-fried.
- Cool slightly before serving: Transfer the hot rolls to a wire rack to ensure the crust stays crispy while the center settles.
Notes
Ensure the butter filling is very cold when wrapping to prevent it from leaking out too early during the baking process.
- Prep Time: 90 minutes
- Cook Time: 15 minutes
- Category: Bread
- Method: Baking
- Cuisine: Japanese
- Diet: Vegetarian
Nutrition
- Serving Size: 1 roll
- Calories: 245 kcal
- Sugar: 3.5 g
- Sodium: 480 mg
- Fat: 12.5 g
- Saturated Fat: 8 g
- Unsaturated Fat: 4 g
- Trans Fat: 0.2 g
- Carbohydrates: 31 g
- Fiber: 1.2 g
- Protein: 4.5 g
- Cholesterol: 30 mg
Keywords: Salt Bread, Shio Pan, Sogeum-ppang, Buttery Rolls, Japanese Bakery
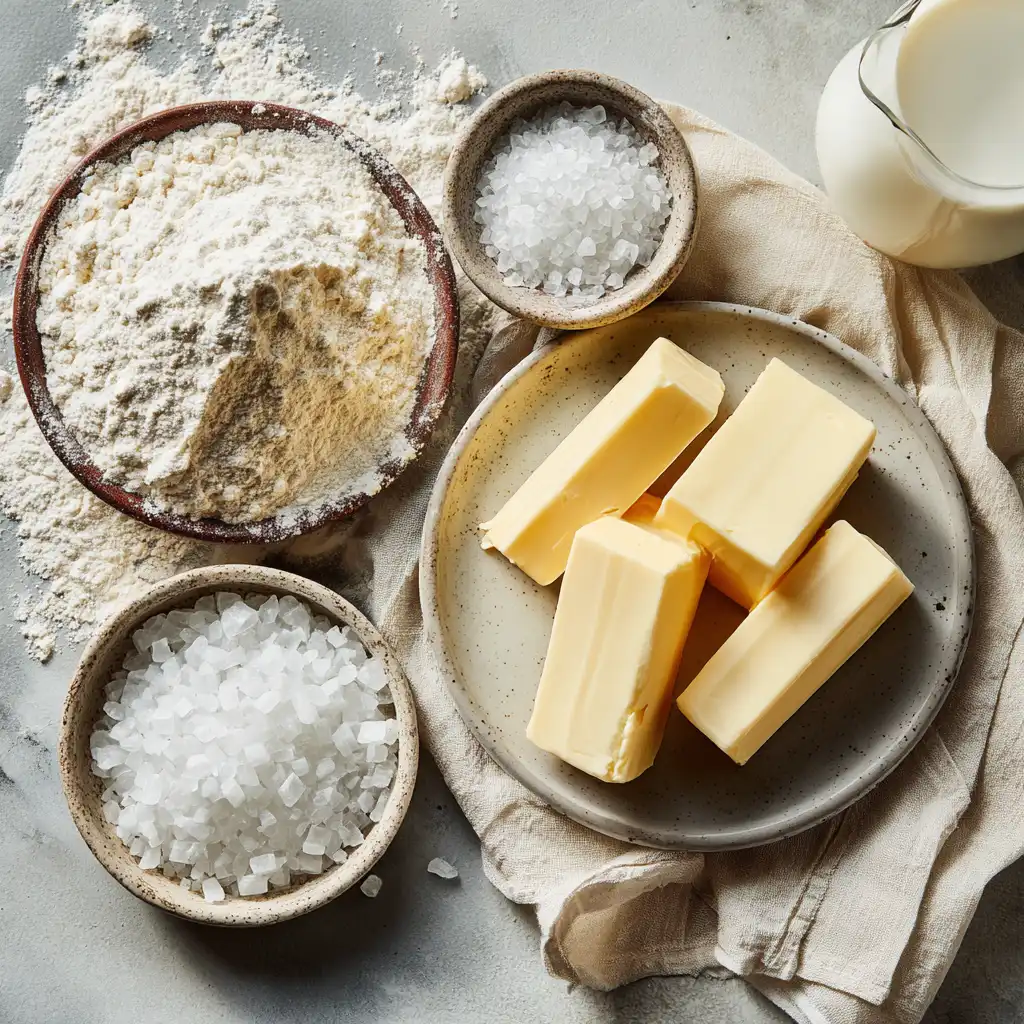
Essential Ingredients for Success
Selecting the Right Flour
The foundation of any great Salt Bread is the flour. Most bakers prefer a high-protein bread flour to achieve that signature chew. The protein content helps develop a strong gluten network, which is necessary to trap the steam generated by the melting butter. If you use all-purpose flour, the rolls might be too soft and lack the structural integrity needed to hold that beautiful crescent shape.
Some recipes call for a small percentage of rice flour or cake flour to add a bit of tenderness to the bite, but for a classic version, stick with a quality bread flour. When preparing your dough, you might find some overlap with cinnamon bread baking tips, as both rely on proper kneading to create a supple, elastic texture before the final proofing stage.
The Role of Premium Butter
Since butter is the star of the show, this is not the time to use a generic brand. European-style butter, which typically has a higher fat content and lower water content, is ideal for Salt Bread. This type of butter provides a deeper flavor and a more pronounced “fried” effect on the bottom of the roll. You will need to cut the butter into cold sticks and wrap the dough around them.
As the bread bakes, the butter melts and seeps into the bottom of the dough, essentially frying the base in its own fat. This creates a salty, buttery crust on the bottom that is perhaps the best part of the entire roll. Never substitute butter with margarine or oil, as you will lose the soul of the recipe.
Why the Salt Choice Matters
Not all salts are created equal when it comes to finishing your Salt Bread. While you use standard fine sea salt inside the dough, the topping requires something with more character. Flaky sea salt, such as Maldon, is the gold standard here. The large, flat crystals provide a satisfying crunch and a clean saltiness that doesn’t overwhelm the palate. If you use fine table salt on top, it will simply melt into the crust or taste too harsh.
According to Healthline’s guide to types of salt, different varieties have unique mineral contents and textures that change how we perceive flavor, which is why flaky salt is preferred for that perfect finish. To keep your body balanced while enjoying these savory treats, you might also be interested in a homemade electrolyte drink sea salt lemon to stay hydrated and refreshed.
The Science of Baking Salt Bread
The Importance of Temperature
Baking is a science, and Salt Bread is very sensitive to temperature. The dough needs a warm, draft-free environment to rise properly, but the butter inserts must remain cold until the moment they go into the oven. If the butter gets too soft while you are shaping the rolls, it might leak out prematurely during the proofing stage.
This leads to a messy baking sheet and a roll that lacks that characteristic hollow center. Keeping your kitchen at a moderate temperature and working quickly during the shaping process will help you achieve the best results. Professional bakers often chill the shaped rolls for a few minutes before the final bake to make sure the butter stays intact as long as possible.
Managing the Proofing Process
Proofing is where the flavor develops. For Salt Bread, a double proofing method is standard. The first rise allows the yeast to create carbon dioxide, making the dough light. The second rise happens after the rolls are shaped. You want the rolls to look puffy and feel like a soft marshmallow before they hit the oven. Over-proofing can cause the rolls to collapse, while under-proofing will result in a dense, heavy bread. Finding that “just right” moment is a skill that comes with practice, but generally, the dough should nearly double in size during the final rest. Proper timing ensures that the interior stays airy while the exterior develops that lovely golden-brown hue.
Understanding the Oven Spring
Oven spring refers to the final burst of rising that happens during the first few minutes of baking. For Salt Bread, this is assisted by the steam created as the butter melts inside. This steam pushes the walls of the dough outward, creating the “hole” in the middle. To help with the crust’s texture, some bakers like to spray a little water into the oven or use a steam-injection setting. The moisture in the air keeps the surface of the dough flexible for a few minutes longer, allowing it to expand fully before the heat sets the crust. This technique is what gives the rolls their professional, glossy appearance and thin, crackly skin.
Step-by-Step Guide to Making Salt Bread
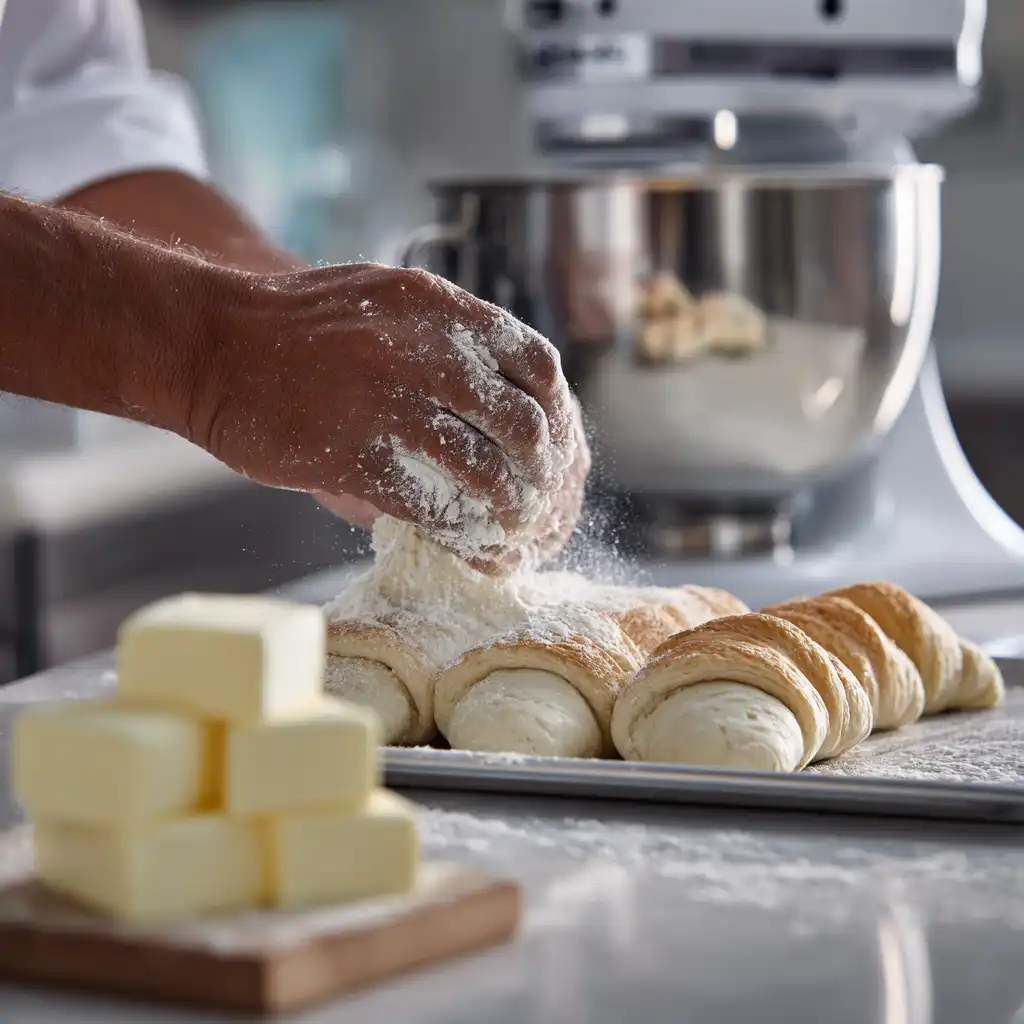
- Step 1: Mix the Dough – Combine your bread flour, yeast, sugar, milk, and a bit of softened butter in a large bowl.
- Step 2: Knead Until Smooth – Work the dough for about 10 minutes by hand or 5-7 minutes in a stand mixer until it is elastic and passes the windowpane test.
- Step 3: First Proofing – Place the dough in a lightly greased bowl, cover it with a damp cloth, and let it rise in a warm spot for about an hour.
- Step 4: Prepare the Butter – Cut cold butter into small rectangular batons, roughly 10 grams each, and keep them in the refrigerator until needed.
- Step 5: Divide and Shape – Punch down the risen dough and divide it into equal portions, then roll each piece into a long triangle or teardrop shape.
- Step 6: Wrap the Butter – Place a cold butter baton at the wide end of the triangle and roll the dough toward the tip, tucking the edges to secure the butter.
- Step 7: Final Proofing – Arrange the rolls on a baking sheet lined with parchment paper and let them rise again for 30 to 45 minutes until puffy.
- Step 8: Topping and Baking – Brush the tops with a little milk or water, sprinkle generously with flaky sea salt, and bake at 400°F (200°C) for 12-15 minutes.
Comparison: Salt Bread vs. Traditional Dinner Rolls
To help you understand why this bread is so unique, here is a quick comparison between a standard dinner roll and a classic Salt Bread roll.
| Feature | Standard Dinner Roll | Salt Bread (Shio Pan) |
|---|---|---|
| Interior Texture | Soft, uniform, and pillowy | Chewy with a hollow, buttery center |
| Crust | Thin and soft | Crispy and slightly crackly |
| Flavor Profile | Mildly sweet or neutral | Distinctly salty and rich butter flavor |
| Bottom Surface | Soft and pale | Golden-brown and “fried” in butter |
| Best Served | Side dish for main meals | Standalone snack or breakfast item |

Creative Variations to Try
Sweet and Salty Twists
While the original version is savory, many modern bakeries are experimenting with sweet additions. You can try adding a bit of condensed milk to the dough for a creamier finish or stuffing the center with a mix of butter and brown sugar. Some people even top their Salt Bread with a dusting of cocoa powder or a drizzle of honey after it comes out of the oven.
The combination of the salt on the crust and a sweet interior creates a complex flavor profile that appeals to those who love a “salted caramel” style of snack. This bread is a great addition to a weekend spread, perhaps served alongside protein pancakes no banana for a balanced and filling brunch experience.
Savory Infusions
If you want to lean further into the savory side, consider adding herbs like rosemary or thyme directly into the dough. Garlic butter can also be used for the center filling to create a roll that tastes like a gourmet garlic knot but with the superior texture of Shio Pan. Some bakers even incorporate black truffle oil or finely chopped olives into the dough for a more luxurious version. These savory rolls are perfect for making mini sandwiches or serving with a cheese platter. Just remember to keep the additions small so they do not interfere with the dough’s ability to rise and create that central air pocket.
Pairing with Drinks
The richness of Salt Bread makes it an ideal companion for a variety of beverages. In Korea, it is common to see people enjoying a warm roll with a cold, creamy latte. The saltiness of the bread cuts through the milk fat, creating a balanced palate. If you prefer something refreshing, an matcha latte iced without syrup is a fantastic choice, as the earthy notes of the green tea complement the buttery dough perfectly. For those who enjoy a bit of heat, pairing a savory herb-infused Salt Bread with a spiced tea can also be a wonderful sensory experience during the colder months.
Troubleshooting Common Baking Issues
Why Did My Butter Leak Out?
The most common problem beginners face is butter leaking out of the dough and spreading all over the baking sheet. This usually happens if the dough is not rolled tightly enough or if the ends are not tucked in properly. It can also happen if the dough has a hole or a thin spot. To prevent this, make sure your dough is well-kneaded and strong. When you roll the butter inside, give it a gentle squeeze at the edges to create a seal. However, do not be too discouraged if a little butter escapes that leaked butter is what fries the bottom of the roll, giving it that amazing crunch!
My Bread is Too Tough
If your Salt Bread feels more like a hockey puck than a pastry, you might have over-kneaded the dough or added too much flour. When measuring your flour, always use a kitchen scale for accuracy. If you use a measuring cup, you might pack too much flour in, leading to a dry dough. Additionally, make sure your oven temperature is accurate. If the oven is too cold, the bread will take too long to bake, drying out the interior before the outside can turn golden. A fast, hot bake is the secret to keeping the inside moist and chewy while the outside gets crisp.
Lack of a Hollow Center
The hollow center is the hallmark of a great Salt Bread. If your roll is solid inside, it means the butter did not create enough steam or the dough was too dense to expand. This often happens if the butter you used was too soft or if it was incorporated into the dough instead of being wrapped in a cold chunk. Make sure your butter batons are frozen or very cold right before they are wrapped. The sudden heat of the oven hitting the cold butter is what causes that rapid steam expansion. Also, check that your yeast is fresh and active, as a poor rise will prevent the dough from stretching outward.
Storing and Reheating Your Bread
Keeping it Fresh
Like most artisanal breads, Salt Bread is best enjoyed the day it is made, ideally while it is still slightly warm from the oven. However, if you have leftovers, you can store them in an airtight container at room temperature for up to two days. Do not put them in the refrigerator, as this will cause the starch to recrystallize and make the bread go stale faster. If you want to keep them longer, these rolls freeze beautifully. Wrap each roll individually in plastic wrap and place them in a freezer bag. They can stay frozen for up to a month without losing much quality.
The Best Reheating Methods
To bring back that “just-baked” magic, avoid the microwave at all costs. A microwave will make the crust soft and the interior rubbery. Instead, use an air fryer or a toaster oven. Heating a Salt Bread roll at 350°F for about 3 to 5 minutes will crisp up the exterior and melt the residual butter inside. If you are using an air fryer, 3 minutes at 320°F is usually enough to make the bread taste fresh again. This helps the bottom regain its fried texture and makes the salt crystals on top pop once more.
FAQs
Can I make Salt Bread vegan?
Yes, you can substitute the milk with a plant-based alternative like oat or soy milk. For the butter, use a high-quality vegan butter stick that is firm when cold. However, the flavor and the “fried” bottom effect may vary slightly depending on the brand of vegan butter you choose.
What is the difference between Shio Pan and Salt Bread?
They are essentially the same thing. “Shio Pan” is the Japanese name (Shio means salt, Pan means bread), while “Sogeum-ppang” is the Korean name. The recipes are very similar, although some Korean versions might be slightly larger or use more butter for a richer taste.
Can I use regular table salt for the topping?
It is not recommended. Table salt is very fine and will taste too sharp or simply disappear into the crust. Flaky sea salt or coarse kosher salt is necessary to provide the visual appeal and the specific “crunch” that defines Salt Bread.
How do I know when the dough is finished kneading?
The best way is the “windowpane test.” Take a small piece of dough and gently stretch it out. If you can stretch it thin enough to see light through it without it tearing, the gluten is well-developed, and the dough is ready for its first rise.
Why is my Salt Bread flat?
If the rolls are flat, it could be due to expired yeast or under-proofing. It could also mean the oven was not hot enough. Make sure your yeast foams up when mixed with warm liquid and that your oven is fully preheated before you put the tray inside.
Conclusion
Salt Bread is a testament to how a few simple ingredients flour, yeast, butter, and salt can be transformed into something truly extraordinary. Its rise from a local Japanese specialty to a global baking phenomenon is well-deserved, offering a unique texture and flavor that is hard to find in other rolls. By paying attention to the quality of your butter and mastering the rolling technique, you can create bakery-quality results in your own home. Whether you eat it plain or experiment with different flavors, this bread is sure to become a staple in your kitchen.


