
If you have ever stepped into a Japanese bakery, you might have noticed a tray of simple, crescent-shaped rolls topped with a few flakes of sea salt. This is salt bread, also known as shio pan. While it looks modest, one bite reveals a world of buttery goodness, a soft interior, and a surprisingly crunchy bottom. This unique roll has taken the world by storm, and for good reason. It balances salty and savory notes in a way that makes it perfect for any time of day.
Table of Contents
The Fascinating History of Salt Bread
Where It All Started
Salt bread did not come from a centuries-old tradition; it actually began quite recently in a small town in Japan. A bakery named Pain Maison in Ehime Prefecture is credited with creating the very first shio pan back in 2007. The owner wanted to create something that would appeal to both young and old customers while staying fresh during the hot summer months. By adding a bit more salt and a generous amount of butter, he created a snack that provided necessary minerals and a satisfying flavor that people could not get enough of.
The Rise of a Global Trend
From that single bakery in a quiet corner of Japan, the craze for salt bread spread rapidly across the country and eventually to Korea, Taiwan, and the United States. Its popularity grew because it offered a different experience than the typical sweet Japanese milk bread. According to local food reports on the history of Japanese snacks at The Japan Times, the simplicity of the roll is what makes it so addictive. Today, you can find variations of salt bread in almost every major city, but the classic version remains the gold standard for bread lovers everywhere.
Print
Japanese Shio Pan (Salt Bread)
A delightful Japanese bakery staple featuring a soft, milky interior, a rich buttery core, and a signature crunchy salted bottom.
- Total Time: 2 hours 25 minutes
- Yield: 8 rolls 1x
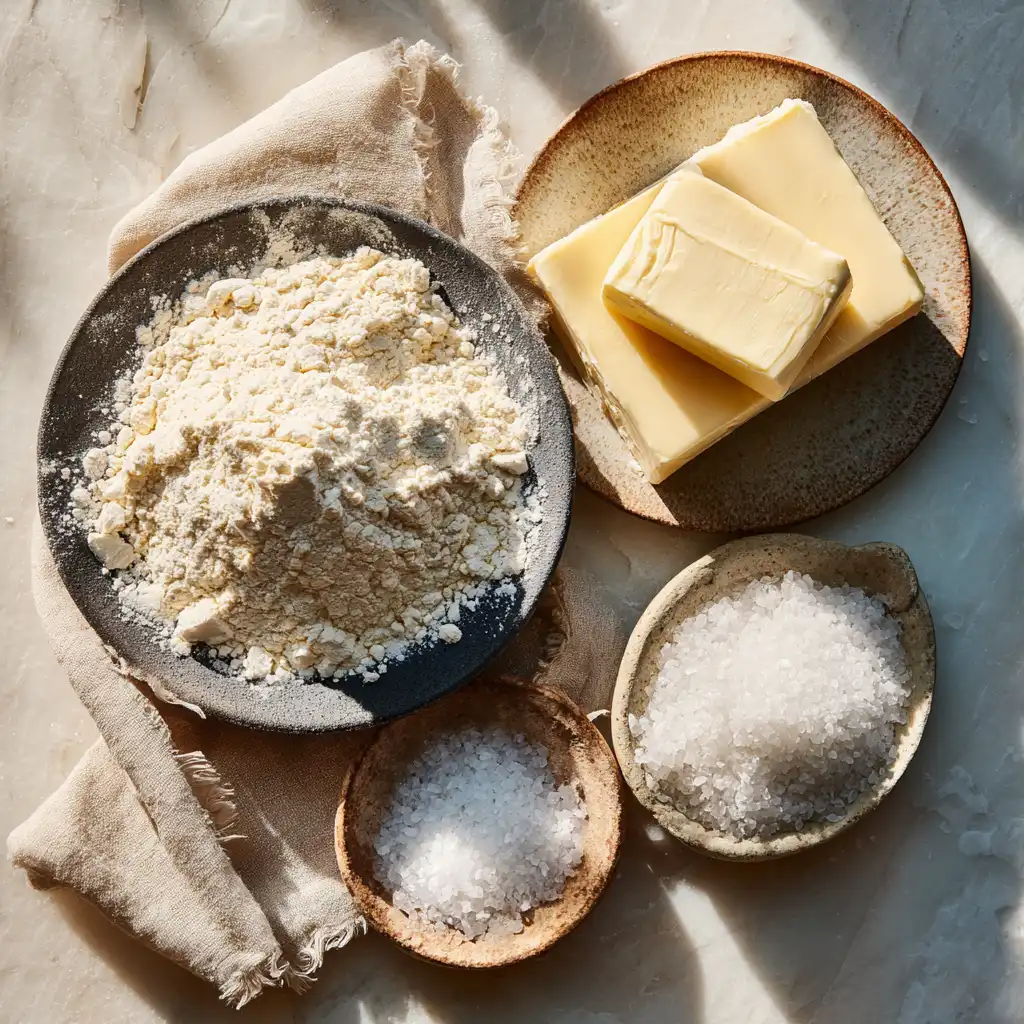
Ingredients
- 250g bread flour
- 150ml warm whole milk
- 20g granulated sugar
- 5g fine sea salt
- 4g instant dry yeast
- 20g unsalted butter, softened (for dough)
- 60g salted butter, chilled and cut into 8 strips (for filling)
- 1 large egg, beaten (for egg wash)
- Flaked sea salt (for topping)
Instructions
- Prepare the dough: Mix flour, milk, sugar, salt, and yeast in a large bowl until a shaggy dough forms.
- Knead until smooth: Incorporate the softened butter and knead for 10 minutes until the dough is elastic and smooth.
- Perform first proof: Place dough in a greased bowl, cover, and let rise in a warm spot for 60 minutes.
- Divide the dough: Punch down the dough and divide into 8 equal pieces, shaping them into smooth balls.
- Rest the dough: Cover the balls with a damp cloth and let them rest for 15 minutes to relax gluten.
- Shape into triangles: Roll each ball into a long, thin triangle shape approximately 10 inches in length.
- Fill with butter: Place one strip of chilled salted butter at the wide base of the dough triangle.
- Roll the crescents: Roll the dough tightly from the wide base toward the tip to create a crescent shape.
- Perform second proof: Place rolls on a baking sheet and let rise for 45 minutes until nearly doubled in size.
- Apply final touches: Brush the tops with egg wash and sprinkle generously with flaked sea salt.
- Bake until golden: Bake at 200°C (400°F) for 12-15 minutes until the tops are golden and bottoms are crunchy.
Notes
Ensure the filling butter is very cold when rolling to prevent it from leaking out too early during the baking process.
- Prep Time: 2 hours 10 minutes
- Cook Time: 15 minutes
- Category: Bread
- Method: Baking
- Cuisine: Japanese
- Diet: Vegetarian
Nutrition
- Serving Size: 1 roll
- Calories: 230 kcal
- Sugar: 3g
- Sodium: 480mg
- Fat: 11g
- Saturated Fat: 7g
- Unsaturated Fat: 3g
- Trans Fat: 0.3g
- Carbohydrates: 27g
- Fiber: 1g
- Protein: 5g
- Cholesterol: 35mg
Keywords: Shio Pan, Salt Bread, Japanese Bakery, Buttery Rolls, Crescent Rolls
What Makes Salt Bread So Special?
The Unique Texture
The texture of salt bread is its most defining characteristic. Unlike a standard dinner roll that is soft all the way through, this bread has three distinct layers of sensation. The top is thin and slightly crisp, the middle is airy and incredibly soft, and the bottom is nearly fried in butter. As the bread bakes, the butter tucked inside the dough melts and leaks out to the bottom of the pan. This creates a golden, crispy crust that tastes like a high-end cracker. It is this combination of textures that makes salt bread stand out from other rolls.
The Perfect Flavor Balance
Many breads lean heavily toward being either sweet or savory. Salt bread lives right in the middle. The dough itself often has a hint of sweetness from sugar and milk, which contrasts beautifully with the salted butter center and the flaky sea salt on top. This balance makes it a fantastic pairing for a variety of drinks. For instance, many people enjoy snacking on this roll while sipping a cool iced matcha latte, as the earthy tea notes complement the rich buttery finish of the bread perfectly.
Essential Ingredients for Success
Choosing the Right Flour
To get that perfect “mochi-mochi” (chewy) texture, most bakers use high-protein bread flour. This type of flour allows the dough to develop strong gluten, which holds the air bubbles created by the yeast. If you use regular all-purpose flour, your salt bread might be a bit too soft and lose its signature chew. Some people like to mix in a small amount of whole wheat flour for a nuttier taste, but for the authentic experience, stick with a high-quality white bread flour.
The Importance of Butter
Butter is the star of the show here. Because there are so few ingredients, the quality of the butter you choose will make a huge difference in the final taste. Many professional bakers prefer using European-style butter because it has a higher fat content and less water, which leads to a crispier bottom on your salt bread. Make sure your butter is cold when you wrap it into the dough; if it is too soft, it will blend into the bread instead of creating that hollow, buttery center we all love.
Selecting Your Salt
Not all salts are created equal when it comes to topping your bread. You want a salt that provides a crunch without being overwhelmingly harsh. Flaky sea salt, like Maldon, is the preferred choice. It looks beautiful on the golden crust and provides a gentle burst of flavor. Avoid using fine table salt for the topping, as it will simply melt into the dough and won’t give you that lovely visual or textural contrast that defines high-quality salt bread.
| Feature | Salt Bread (Shio Pan) | Classic Croissant | Dinner Roll |
|---|---|---|---|
| Main Fat Source | Salted Butter Center | Laminated Butter Layers | Butter or Oil in Dough |
| Texture | Crispy Bottom, Chewy Inside | Flaky and Shattery | Soft and Uniform |
| Prep Time | Medium (2-3 Hours) | High (24-48 Hours) | Low (1.5-2 Hours) |
| Primary Flavor | Salty & Buttery | Rich & Buttery | Neutral or Sweet |
How to Make Authentic Salt Bread at Home
Making salt bread at home is a rewarding process that fills your kitchen with an incredible aroma. While it takes some patience, the steps are straightforward enough for most home bakers to master with a little practice. Here is how you can create these delicious rolls in your own oven.
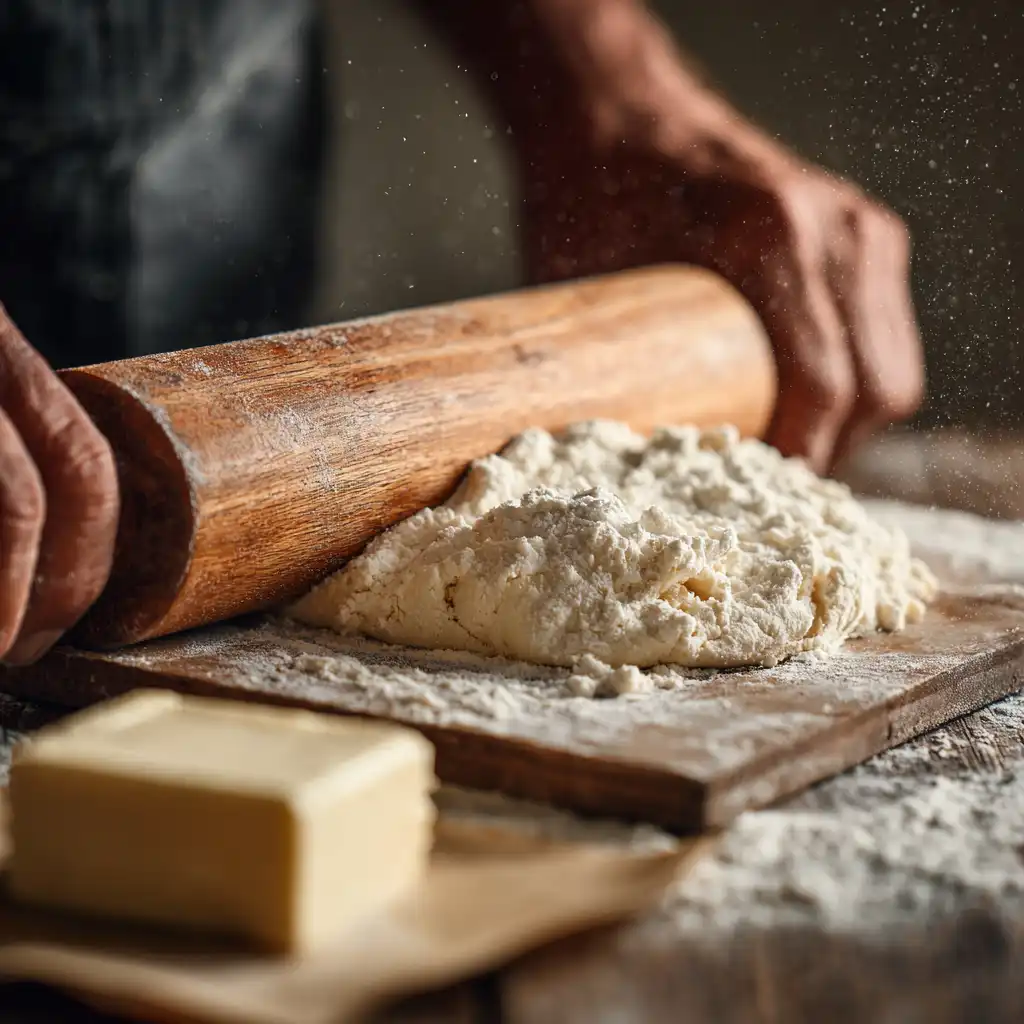
- Step 1: Mix the Dough – Combine your bread flour, yeast, sugar, salt, milk, and water in a large bowl. Stir until a shaggy dough forms, then begin the kneading process by hand or with a stand mixer until the dough is smooth and elastic.
- Step 2: First Proofing Period – Place your dough in a lightly greased bowl and cover it with a damp cloth. Let it sit in a warm, draft-free spot for about an hour or until it has doubled in size. This allows the yeast to create the airy structure needed for the bread.
- Step 3: Divide and Shape – Punch down the risen dough to release the air. Divide it into equal pieces, usually about 60 to 70 grams each. Shape them into smooth balls and let them rest for 15 minutes to relax the gluten.
- Step 4: Roll and Fill – Roll each ball into a long, thin triangle shape. Place a small stick of cold butter at the wide end of the triangle. Carefully roll the dough up toward the point, tucking the butter inside. This creates the classic crescent shape of the salt bread.
- Step 5: Second Proofing Period – Place the shaped rolls on a baking sheet lined with parchment paper. Let them rise again for another 45 to 60 minutes. They should look puffy and light before they go into the oven.
- Step 6: Topping and Baking – Lightly spray the rolls with water or a milk wash, then sprinkle your flaky sea salt on top. Bake in a preheated oven at 400°F (200°C) for about 12 to 15 minutes until the tops are golden brown and the bottoms are sizzling.
The Science of Bread Fermentation
How Yeast Works
To get the best results with your salt bread, it helps to understand what is happening inside the dough. Yeast is a living organism that feeds on the sugars in the flour. As it eats, it releases carbon dioxide gas, which gets trapped by the gluten network. This is what causes the bread to rise. Temperature is a huge factor here; if your kitchen is too cold, the yeast will work slowly. If it is too hot, the yeast might work too fast and create large, uneven bubbles. You can learn more about the biology of baking at the Exploratorium, which explains how different environments change the way dough behaves.
The Role of Steam
Many bakers like to spray their oven with a bit of water or use a steam setting when baking salt bread. Steam helps the dough expand fully before the crust sets, a process known as “oven spring.” It also helps create a thinner, crispier crust. When the moisture on the surface of the dough evaporates, it leaves behind a shiny finish that makes the salt bread look professional and appetizing.
Creative Ways to Serve Salt Bread
A Perfect Breakfast Companion
While salt bread is delicious on its own, it can also be a part of a larger meal. If you are hosting a brunch, try serving these rolls alongside other baked treats like blueberry scones. The salty-savory nature of the bread provides a nice break from the sweetness of fruit-based pastries. You can even split the rolls open and fill them with soft scrambled eggs for a gourmet breakfast sandwich that beats anything you can find at a drive-thru.
Sweet and Salty Pairings
Some people love to lean into the sweet-and-salty trend by dipping their salt bread into honey or spreading it with a bit of jam. It also works surprisingly well when served after a meal. If you usually enjoy something like a cinnamon roll casserole for a treat, you might find that the simple, clean flavors of a salted roll are a refreshing change of pace. The butteriness of the bread acts as a bridge between dessert and a savory snack.
As a Side for Dinner
Forget the standard frozen dinner rolls; salt bread is an incredible side dish for savory main courses. Its crispy bottom and soft interior make it perfect for soaking up sauces. Imagine serving a warm roll with a fresh honey garlic salmon bowl. The salt on the bread highlights the sweetness of the honey garlic sauce, making the whole meal feel more cohesive and satisfying. It is a simple way to make a weeknight dinner feel a bit more special.

Common Mistakes and How to Fix Them
Butter Leaking Out Too Early
The most common issue people face is all the butter leaking out of the salt bread before it has a chance to crisp up the bottom properly. This usually happens if the dough is not rolled tightly enough or if there are holes in the dough. To prevent this, make sure you pinch the edges of the dough firmly when you first wrap the butter. Also, using cold butter is vital. If the butter is already melting before the bread goes into the oven, it will find its way out of the seams much faster.
The Bread Is Too Dense
If your salt bread comes out heavy or tough, you might be under-proofing the dough. The second rise is just as important as the first. The rolls should feel light and look noticeably bigger before they start baking. Another culprit could be over-kneading, which can make the gluten too tight. Aim for a dough that is smooth but still has a bit of give. If you follow the timing carefully, you should end up with a roll that is airy and light.
Storing and Reheating Your Bread
Keeping It Fresh
Like most homemade breads, salt bread is best eaten the day it is made. However, if you have leftovers, store them in an airtight container at room temperature for up to two days. Avoid putting them in the refrigerator, as this can make the bread go stale faster by drawing out the moisture. If you want to keep them longer, these rolls freeze remarkably well. Just wrap each roll individually in plastic wrap and place them in a freezer bag for up to a month.
The Best Reheating Methods
To bring back that “just-baked” magic, avoid the microwave. A microwave will make the salt bread rubbery and soft. Instead, use a toaster oven or a conventional oven. Heat the rolls at 350°F (175°C) for about five minutes. This will crisp up the bottom and soften the middle again. If the top salt has dissolved, you can even add a tiny fresh sprinkle after heating to restore that signature crunch.
FAQs
Can I make salt bread without a stand mixer?
Yes, you can absolutely knead the dough by hand. It will take about 10 to 15 minutes of vigorous work to reach the desired elasticity. It is a great workout and allows you to really feel the texture of the dough as it changes.
What if I don’t have bread flour?
You can use all-purpose flour, but your salt bread will be less chewy and more like a standard soft roll. If you must use all-purpose flour, try to reduce the liquid by a tablespoon or two, as bread flour absorbs more water than all-purpose does.
Can I use unsalted butter?
You can use unsalted butter for the center, but you will lose a bit of that classic “shio” flavor. If you only have unsalted butter, consider mixing a tiny pinch of salt into the butter before you shape it into sticks for the filling.
Why did my salt melt on top of the bread?
Salt melts when it comes into contact with too much moisture. If you spray the rolls with too much water before baking, or if the humidity in your kitchen is very high, the salt might dissolve. Adding the salt right before the tray goes into the oven is the best way to prevent this.
Conclusion
Salt bread is a wonderful example of how a few simple ingredients can create something truly extraordinary. Whether you are enjoying it as a quick snack, a side for dinner, or a pairing for your favorite tea, its unique texture and balanced flavor are sure to impress. By paying attention to the quality of your butter and salt, and giving the dough the time it needs to rise, you can recreate this Japanese bakery favorite in your own home. Give it a try and see why this humble roll has become a worldwide sensation.


