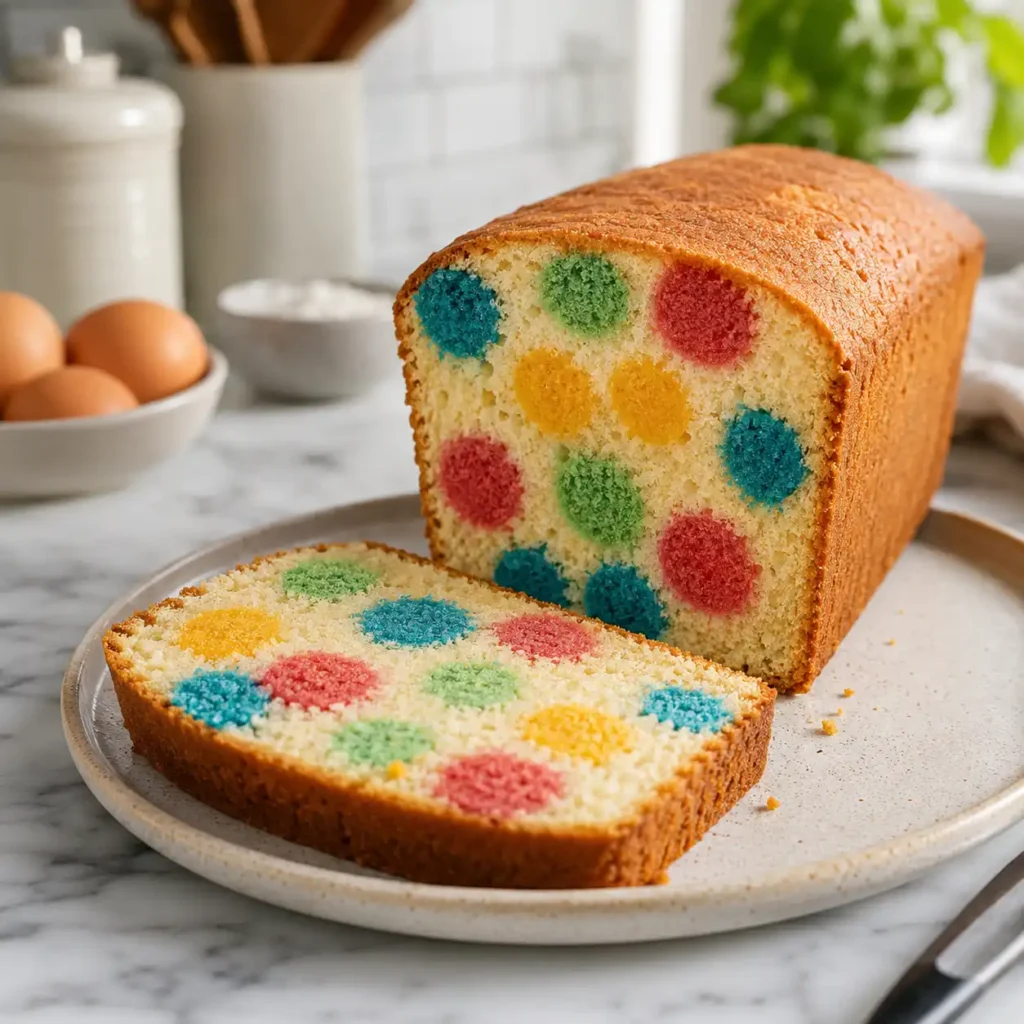
Have you ever sliced into a beautiful sponge only to find perfectly round, colorful circles staring back at you? Learning how to make dot cakes is one of the most rewarding skills for any home baker. These whimsical treats, often called hidden polka dot cakes, look like they require professional magic, but the process is quite simple once you know the secret. In this guide, we will walk through every detail of how to make dot cakes so you can wow your friends and family at your next celebration with a hidden surprise.
Table of Contents
Why Learning How to Make Dot Cakes is a Baking Game Changer
When you master how to make dot cakes, you add a huge dose of fun to your kitchen repertoire. These cakes are perfect for gender reveals, birthdays, or just a rainy afternoon activity with kids. The visual appeal of a dot cake is undeniable; it turns a standard loaf or round cake into a work of art. Beyond the looks, the technique helps you understand batter density and timing, which makes you a better baker overall. Learning how to make dot cakes allows you to play with colors and themes in a way that traditional frosting simply cannot match.
The Social Media Craze
The rise of the viral dot cake on social media platforms has made this technique more popular than ever. People love watching the “big reveal” when the first slice is removed. By learning how to make dot cakes, you can participate in these fun trends and share your own creative designs online. The bright colors and geometric precision of the dots make for stunning photos that look like they came from a high-end boutique bakery. It is a fantastic way to show off your creativity while keeping the actual recipe approachable and tasty.
Perfecting the Surprise Factor
The primary reason people want to know how to make dot cakes is the surprise factor. Unlike a standard marble cake, the dots are distinct and intentional. When you understand how to make dot cakes correctly, the “dots” stay in place and do not bleed into the surrounding sponge. This creates a clean, professional finish that surprises everyone. It is much like the excitement of finding a filling inside a jelly donut dunkin fans love, but with the beauty of a baked-in design that spans the entire length of the cake.
Print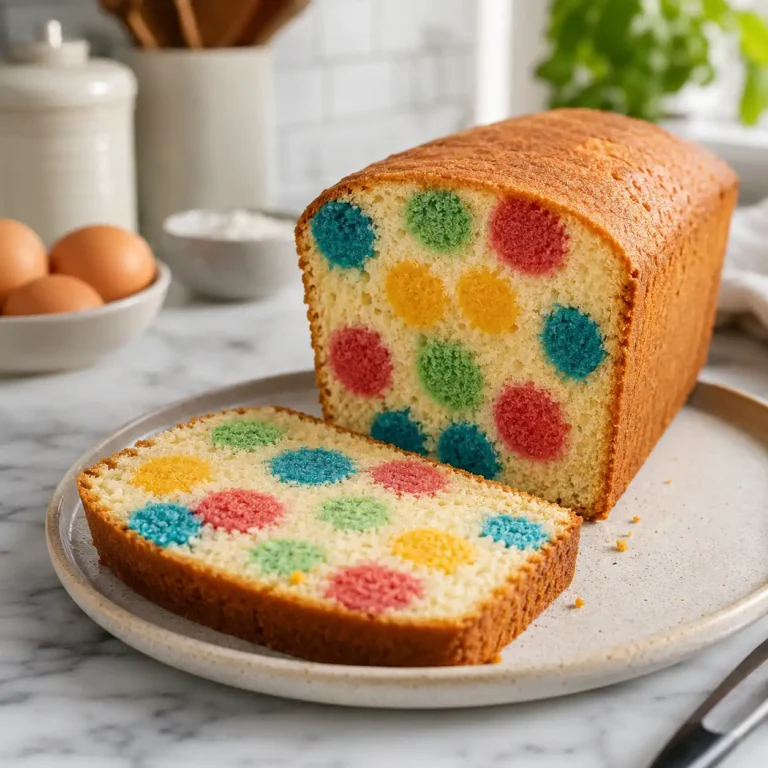
How to Make Dot Cakes: A Complete Guide to Baking Polka Dot Surprises
Unlock the secret to baking whimsical hidden polka dot cakes that will surprise and delight at any celebration. This guide makes a seemingly magical process simple for any home baker, resulting in perfectly round, colorful circles inside a beautiful sponge cake.
- Total Time: 2 hours 30 minutes
- Yield: 12 servings 1x
Ingredients
- 1 cup all-purpose flour (for dots)
- 1 tsp baking powder (for dots)
- 1/4 tsp salt (for dots)
- 1/2 cup (1 stick) unsalted butter, softened (for dots)
- 1 cup granulated sugar (for dots)
- 2 large eggs (for dots)
- 1/2 cup milk (for dots)
- 1 tsp vanilla extract (for dots)
- Gel food coloring (red, blue, green, yellow – for dots)
- 2 cups all-purpose flour (for main cake)
- 2 tsp baking powder (for main cake)
- 1/2 tsp salt (for main cake)
- 1 cup (2 sticks) unsalted butter, softened (for main cake)
- 1 3/4 cups granulated sugar (for main cake)
- 3 large eggs (for main cake)
- 1 cup milk (for main cake)
- 2 tsp vanilla extract (for main cake)
- 1 cup (2 sticks) unsalted butter, softened (for frosting)
- 4 cups powdered sugar, sifted (for frosting)
- 1/4 cup milk or heavy cream (for frosting)
- 1 tsp vanilla extract (for frosting)
Instructions
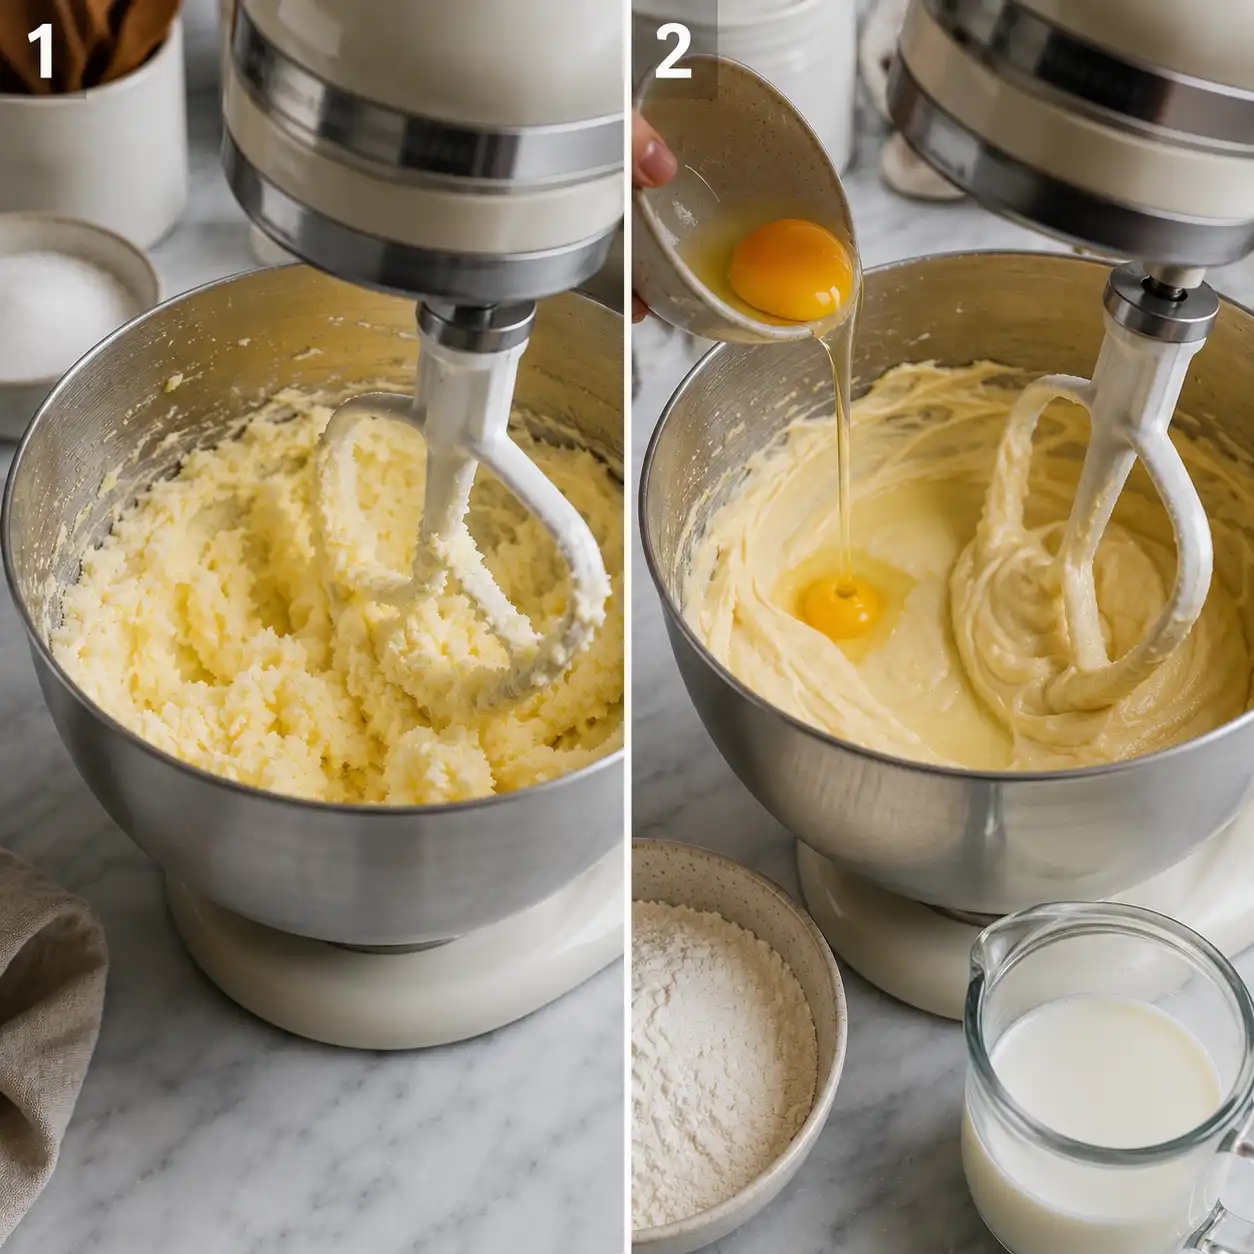
- Step 1: Prepare Dot Batter – Preheat oven to 350°F (175°C). Cream 1/2 cup butter and 1 cup sugar. Beat in 2 eggs and 1 tsp vanilla. In a separate bowl, whisk 1 cup flour, 1 tsp baking powder, and 1/4 tsp salt. Gradually add dry ingredients to wet, alternating with 1/2 cup milk, mixing until just combined. Divide batter into 3-4 bowls and color each with gel food coloring.
- Step 2: Bake Mini Cakes – Spread each colored batter thinly onto separate greased baking sheets (or into mini muffin tins). Bake for 8-10 minutes, until a toothpick comes out clean. Let cool completely.
- Step 3: Cut Dot Shapes – Once cooled, use a small round cookie cutter (approx. 1-inch diameter) to cut out individual polka dot shapes from the mini cakes. Place dots on a plate and freeze for 15-20 minutes to firm up.
- Step 4: Prepare Main Batter – Reduce oven temperature if needed. Cream 1 cup butter and 1 3/4 cups sugar. Beat in 3 eggs and 2 tsp vanilla. In a separate bowl, whisk 2 cups flour, 2 tsp baking powder, and 1/2 tsp salt. Gradually add dry ingredients to wet, alternating with 1 cup milk, mixing until just combined.
- Step 5: Layer Cake and Dots – Grease and flour a 9-inch round cake pan. Pour about one-third of the main cake batter into the bottom. Carefully arrange a layer of the frozen colored dots on top of the batter, ensuring they are evenly spaced and not touching the sides of the pan. Cover with another third of the main batter, add a second layer of dots, then top with the remaining batter.
- Step 6: Bake Main Cake – Bake the cake at 350°F (175°C) for 30-35 minutes, or until a toothpick inserted into the center comes out clean. Avoid overbaking.
- Step 7: Cool Cake – Allow the cake to cool in the pan for 10-15 minutes before inverting it onto a wire rack to cool completely. Ensure it’s fully cool before frosting.
- Step 8: Make Frosting – In a large bowl, cream 1 cup softened butter until light and fluffy. Gradually beat in 4 cups sifted powdered sugar. Add 1/4 cup milk or heavy cream and 1 tsp vanilla extract, beating until smooth and creamy. Add more milk if needed for desired consistency.
- Step 9: Frost Cake – Once the main cake is completely cool, use an offset spatula or knife to generously frost the top and sides with the buttercream.
- Step 10: Serve – Slice into the cake to reveal the beautiful, colorful polka dot surprise inside and serve immediately. Enjoy!
Notes
For best results, ensure all ingredients are at room temperature before baking. Freezing the mini cake dots briefly helps them maintain their shape when embedded in the main batter.
- Prep Time: 60 minutes
- Cook Time: 45 minutes
- Category: Dessert
- Method: Baking
- Cuisine: American
- Diet: Vegetarian
Nutrition
- Serving Size: 1 slice (approx. 1/12 of cake)
- Calories: 480 kcal
- Sugar: 60 g
- Sodium: 250 mg
- Fat: 28 g
- Saturated Fat: 16 g
- Unsaturated Fat: 10 g
- Trans Fat: 0.2 g
- Carbohydrates: 70 g
- Fiber: 1.5 g
- Protein: 5 g
- Cholesterol: 85 mg
Keywords: Dot cakes, Polka dot cake, Hidden surprise cake, Whimsical cake, Baking, Dessert, Party cake, Celebration cake
Essential Ingredients and Ratios
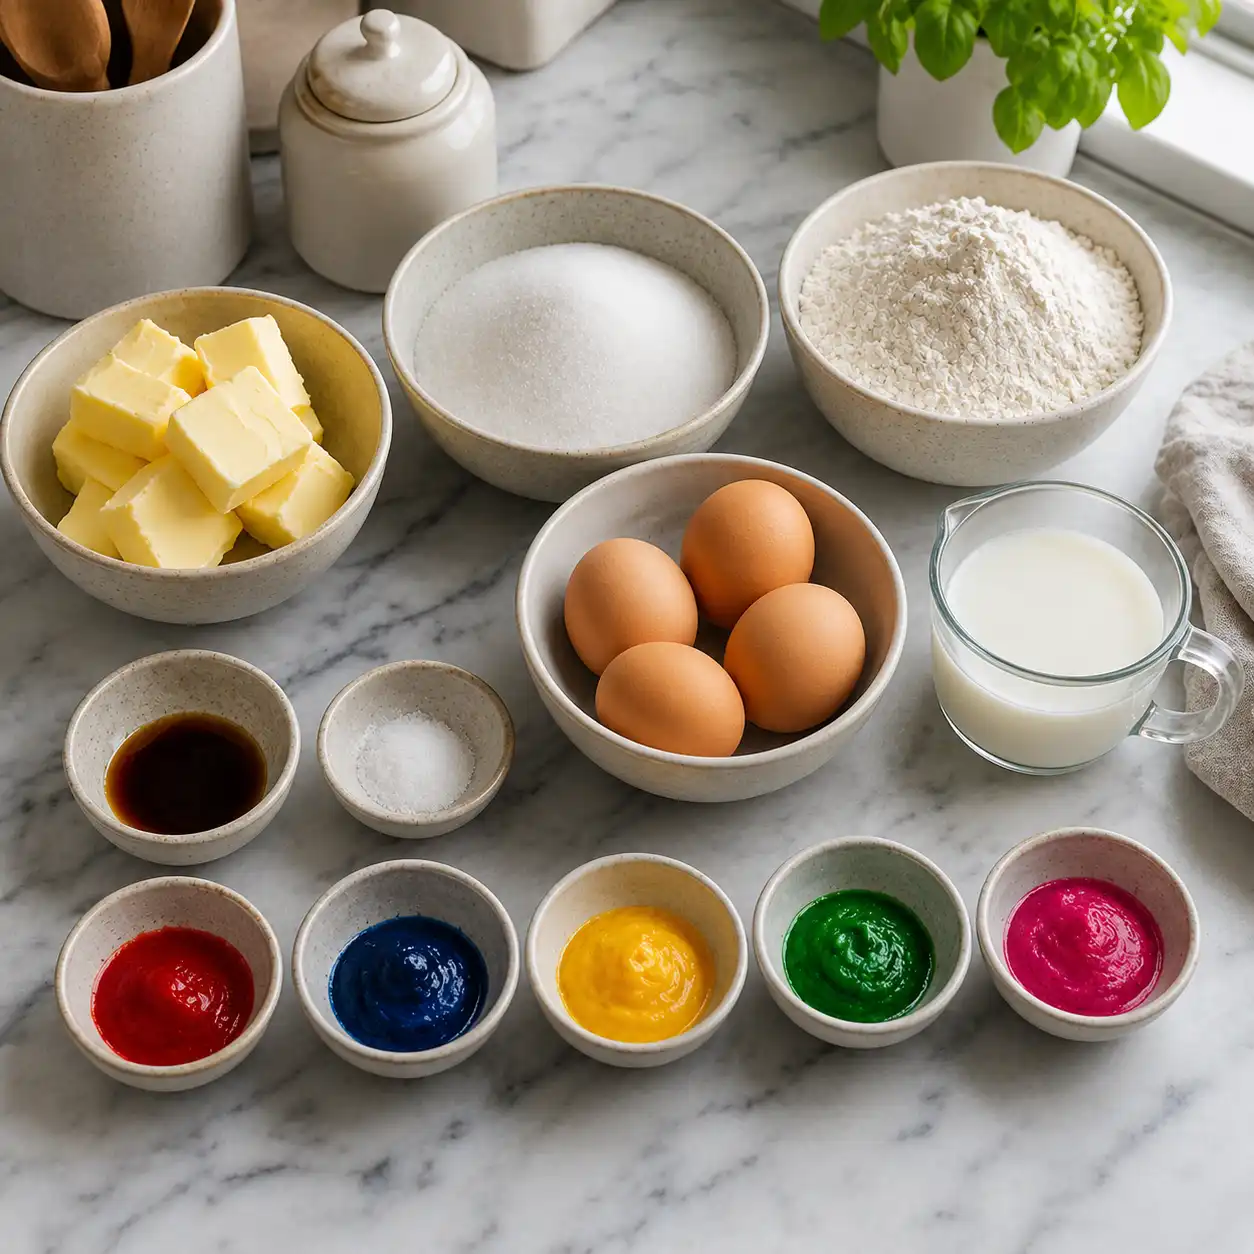
To succeed in how to make dot cakes, you need a sturdy batter. A light, airy chiffon might be too delicate to hold the pre-baked dots in place. Most experts suggest a butter-based pound cake or a thick vanilla sponge. You will need typical pantry staples: all-purpose flour, granulated sugar, unsalted butter, eggs, and whole milk. High-quality vanilla extract is also a must for a classic flavor profile. When following a dot cake recipe, pay close attention to the creaming of the butter and sugar, as this creates the structure needed for the “surprise” dots to stay suspended.
The Role of Food Coloring
Coloring is vital when learning how to make dot cakes. You want the dots to be vibrant and stand out against the main cake body. Gel food coloring is much better than liquid coloring because it provides intense pigment without changing the consistency of the batter. If you use too much liquid, your dots might become dense or rubbery. For advice on achieving the brightest hues, you can look at the Wilton guide on coloring techniques. Vibrant dots make the final result look much more professional and intentional once the cake is sliced.
Consistency is Key
The secret to how to make dot cakes lies in the consistency of both batters. If the first batter (the dots) is too soft, they will lose their shape during the second bake. If the second batter (the main cake) is too thin, the dots will sink to the bottom of the pan. Achieving the right “drop” consistency is a skill you will develop as you learn how to make dot cakes. According to the experts at King Arthur Baking on creaming butter, properly aerated butter and sugar provide the structural support required for heavy inclusions like these pre-baked cake spheres.
Step-by-Step Instructions: How to Make Dot Cakes
Follow these steps carefully to master the art of the hidden polka dot. Preparation and patience are your best friends during this process. Do not rush the cooling stages, as they are essential for keeping the shapes intact.
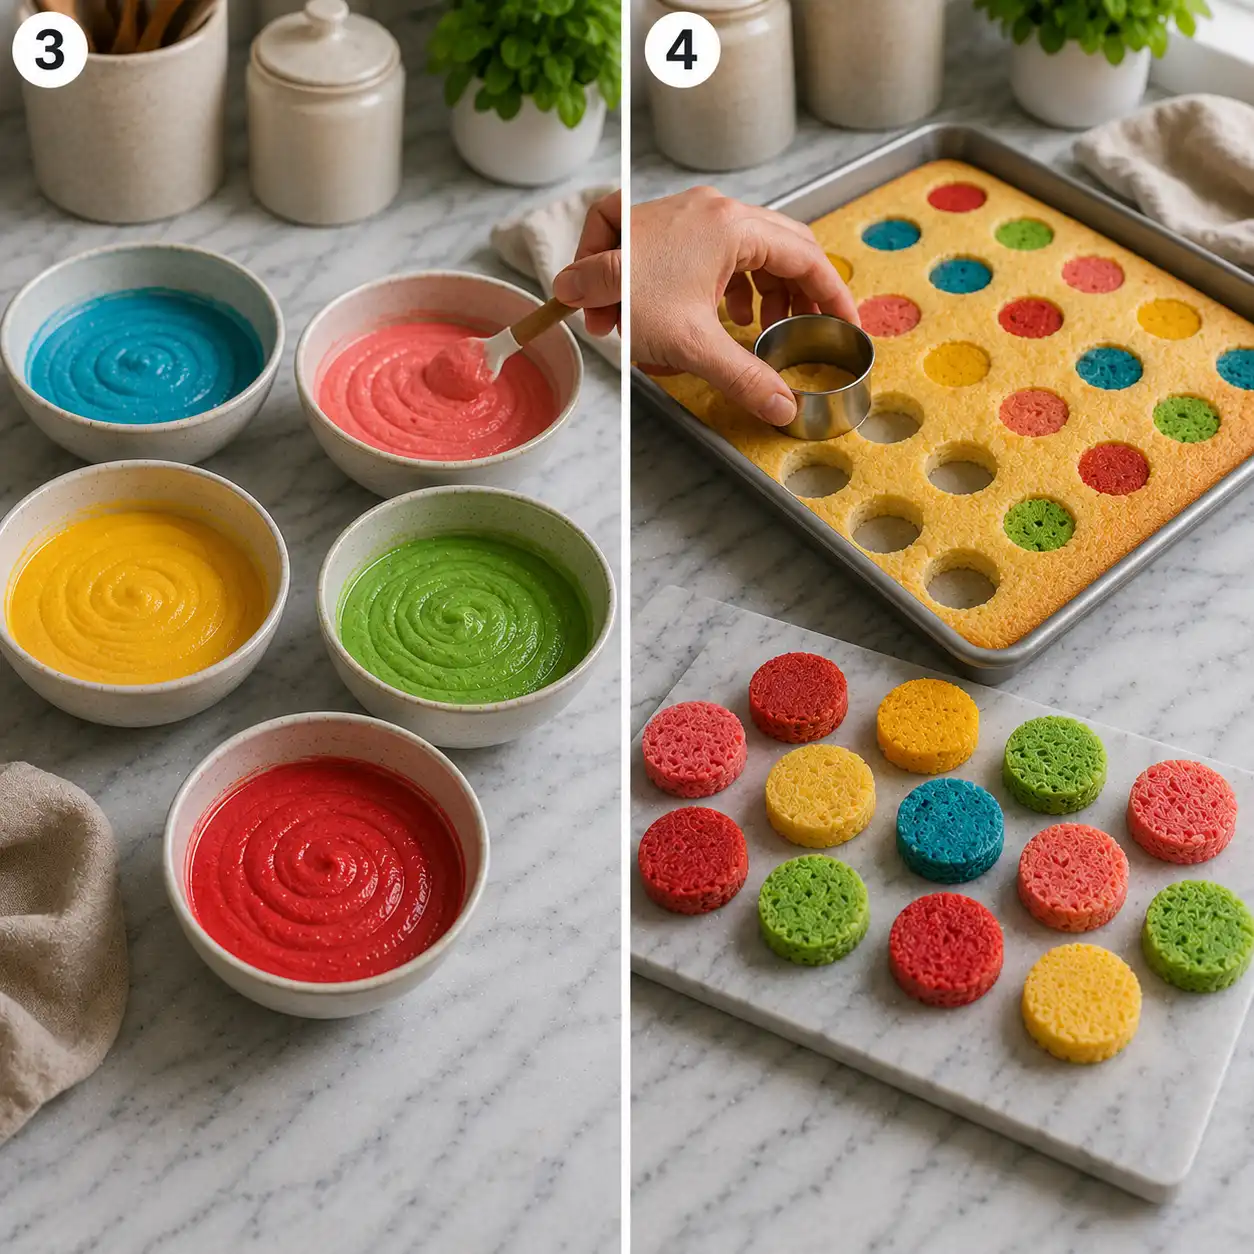
- Step 1: Bake the Dot Batter – Prepare a standard vanilla cake batter and divide it into small bowls. Add your chosen gel food colors to each bowl. Spread the colored batters into a shallow baking sheet or bake them in a dedicated cake-pop silicone mold. Bake until a toothpick comes out clean, but do not overbake.
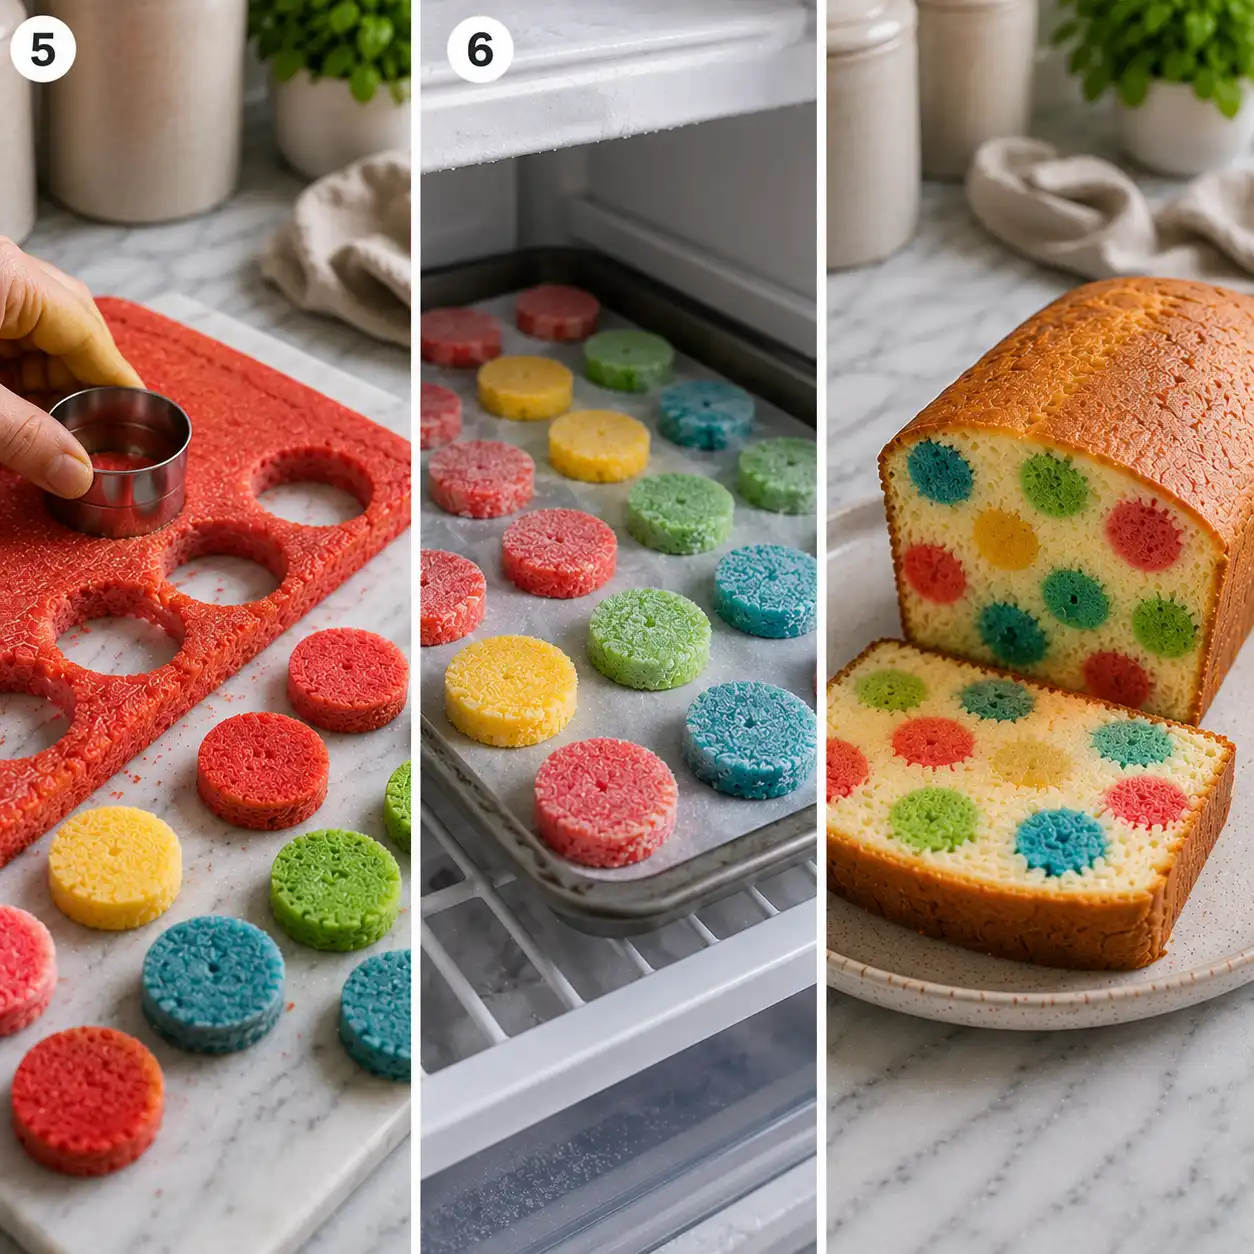
- Step 2: Cut Out the Shapes – Once the colored cake has cooled completely, use a small round cookie cutter or a melon baller to create your “dots.” If you used a cake-pop mold, your spheres are already done! Set these aside. Some bakers prefer to freeze these dots for 20 minutes to make sure they are firm.
- Step 3: Prepare the Main Batter – Mix your main cake batter (usually a contrasting color like white or light yellow). Grease and flour your main cake pan or loaf tin. Pour a very thin layer of this fresh batter just enough to cover the bottom of the pan.
- Step 4: Arrange the Dots – Carefully place your pre-baked cake dots into the thin layer of batter. You can arrange them in a single line for a loaf cake or a circular pattern for a round cake. Space them out so there is room for the main batter to flow between them.
- Step 5: Cover and Final Bake – Gently pour the remaining main batter over the dots. Use a spatula to smooth the top, being careful not to move the dots underneath. Bake the cake at the temperature specified in your recipe until the main sponge is fully cooked and golden.
- Step 6: Cool and Slice – Allow the cake to cool in the pan for 10 minutes, then move it to a wire rack. Cooling completely is vital before slicing. Once you cut into it, your beautiful hidden dots will be revealed!
Comparing Different Dot Cake Methods
When you are looking at how to make dot cakes, you might notice there are two main ways to go about it. One focuses on the hidden internal design, while the other focuses on the external frosting decoration. Both are valid ways to achieve the look, but they require different skill sets. Below is a table to help you decide which method fits your current baking goals.
| Feature | Hidden Dot Method (Internal) | Frosted Dot Method (External) |
|---|---|---|
| Difficulty Level | Medium – Requires two bakes | Easy to Medium – Piping skills |
| Visual Impact | High surprise value when sliced | Instant appeal on the outside |
| Best Pan Type | Loaf or Bundt pan | Layered round cakes |
| Primary Tools | Cookie cutters or sphere molds | Piping bags and round tips |
| Best for… | Surprise parties and reveals | Elegant celebrations and weddings |
Tips for Success with How to Make Dot Cakes
Even seasoned bakers can run into trouble when learning how to make dot cakes for the first time. The biggest issue is usually the dots floating or sinking. To prevent this, make sure your main batter is thick. If you can pour it like water, it is too thin. You want it to be thick enough that it holds its shape on a spoon. Another tip for how to make dot cakes is to use a light coating of flour on your pre-baked dots before placing them in the pan. This helps the fresh batter “grab” onto the dots, preventing them from shifting during the rise.
Temperature Matters
When studying how to make dot cakes, you must consider the temperature of your ingredients. Always use room temperature eggs and butter. If your batter is too cold, it might curdle or bake unevenly, which ruins the clean lines of your dots. Furthermore, make sure the dots themselves are not warm when you put them into the fresh batter. If they are warm, they might melt slightly at the edges, causing the colors to blur. Many professionals who know how to make dot cakes perfectly will chill the dots in the freezer for a few minutes to keep the edges sharp.
Dealing with Color Bleeding
A common fear when learning how to make dot cakes is color bleeding. This happens when the dye from the pre-baked dots leaches into the surrounding white batter. To avoid this, use high-quality gel pastes and make sure your first cake is fully baked. Underbaked dots are more likely to bleed. Additionally, try to avoid over-mixing the batter once the dots are inside. The more you move the batter around, the more likely you are to smear the colors. Following these small details is what separates a messy attempt from a perfect lesson in how to make dot cakes.
Creative Flavor and Color Combinations
Once you understand the basics of how to make dot cakes, you can start getting creative with flavors. You do not have to stick to vanilla. You could make a chocolate cake with bright orange pumpkin-flavored dots for Halloween, or a lemon cake with pink raspberry dots for a spring brunch. The possibilities are endless! When thinking about how to make dot cakes for specific holidays, consider using different shapes too. While dots are the classic choice, the same method works for hearts, stars, or even small trees.
Seasonal Themes
Seasonal colors are a great way to practice how to make dot cakes. For winter, try deep blue and silver dots inside a white peppermint sponge. For autumn, use shades of red, orange, and yellow. Since the “dot” part of the cake is baked first, you can actually flavor those pieces differently than the rest of the cake. Imagine a spice cake with concentrated apple-flavored dots inside. This adds a layer of complexity to your baking that goes beyond just the visual surprise. Learning how to make dot cakes is really an invitation to experiment with your favorite tastes.
Natural Coloring Options
If you prefer to avoid artificial dyes, you can still learn how to make dot cakes using natural ingredients. Beet powder can create beautiful pink and red tones, while matcha powder is perfect for earthy greens. Turmeric can provide a bright yellow, though you must be careful with the quantity to avoid an overwhelming flavor. When using natural powders in your quest of how to make dot cakes, you may need to adjust the dry ingredients slightly to account for the extra powder. It is a healthy and fun way to make your treats look and taste amazing.
Decorating the Outside of Your Dot Cake
While the inside is the star of the show, the outside of the cake should look just as good. When you finish learning how to make dot cakes, you will want a frosting that complements the internal design. A simple vanilla buttercream or a cream cheese frosting works wonders. You can even pipe small dots on the outside to give a hint of what is inside. Use a round piping tip and apply consistent pressure to create a “swiss dot” pattern. This ties the whole theme together and lets people know they are in for a “dotty” treat.
Using Sprinkles and Glazes
Another way to finish your masterpiece after mastering how to make dot cakes is with a simple glaze. A pourable sugar glaze can look very elegant, especially on a Bundt cake. You can add nonpareils (tiny ball sprinkles) to the top to mimic the dot theme. This is an easy way to beautify the cake without needing advanced piping skills. Since you spent so much time on the internal structure, a simple but clean exterior often looks the most sophisticated. The goal of knowing how to make dot cakes is to balance the effort between the hidden surprise and the outward presentation.
FAQs
Can I use a box mix for a dot cake?
Yes, you can use a box mix when learning how to make dot cakes. However, box mixes tend to be lighter and fluffier than scratch-made pound cakes. To make a box mix work, try adding an extra egg or using milk instead of water to make the batter thicker. This provides the density needed to support the dots. Many people start with box mixes to practice the assembly part of how to make dot cakes before moving on to from-scratch recipes.
Why did my dots sink to the bottom?
If your dots sank, your main batter was likely too thin or you didn’t put a base layer of batter down first. When learning how to make dot cakes, always remember to pour about half an inch of batter into the pan and bake it for 5 minutes before adding the dots, or simply ensure the batter is thick enough to hold them. Also, make sure your dots are not too large or heavy for the amount of batter surrounding them.
How do I store a dot cake?
Store your dot cake just like any other sponge cake. If it has a buttercream frosting, keep it in an airtight container at room temperature for up to three days. If you used a cream cheese frosting, it must be refrigerated. One thing to note is that the pre-baked dots might dry out slightly faster than the rest of the cake because they have been baked twice. Keeping the cake well-sealed is the best way to keep both parts moist and delicious.
Final Thoughts on Making the Perfect Dot Cake
Mastering how to make dot cakes is a journey of precision and creativity. While it takes a little more time than a standard cake, the joy it brings to those who see it is well worth the effort. By focusing on batter consistency, choosing the right colors, and following the step-by-step process, you can create a professional-looking dessert right in your own kitchen. Keep practicing, try out different shapes and flavors, and soon you will be the go-to expert for anyone asking how to make dot cakes. Happy baking!