Creating your own sensory toys is a wonderful way to spend an afternoon, and this Butter Squishy DIY Tutorial for Beginners will show you exactly how to make a soft, slow-rising treasure at home. These toys are famous for their incredibly smooth, creamy texture that mimics a stick of softened butter, providing a calming tactile experience. Whether you want to reduce stress or simply enjoy a fun craft project, making a butter squishy is easy, affordable, and deeply rewarding for crafters of all ages.
Table of Contents
What is a Butter Squishy?
The Magic of the Texture
A butter squishy is a specific type of sensory toy known for its “buttery” feel. Unlike traditional foam toys that might feel airy or light, a butter squishy has a dense, velvety consistency. This is often achieved by combining soft foam with special coatings or by using a specific type of air-dry clay. When you squeeze it, the toy resists slightly and then slowly returns to its original shape. This slow-rising action is what makes the Butter Squishy DIY Tutorial for Beginners so popular among hobbyists who love high-quality fidget items.
Why Make Your Own?
Making your own toys allows you to control the density, color, and scent of the final product. Store-bought versions can sometimes be expensive or contain chemicals you might want to avoid. By following a Butter Squishy DIY Tutorial for Beginners, you get to customize every aspect. You can make them look like actual food items, cute animals, or simple geometric shapes. If you are interested in more variations of this craft, check out this guide on butter squishy designs for more inspiration on different shapes and sizes you can try at home.
Print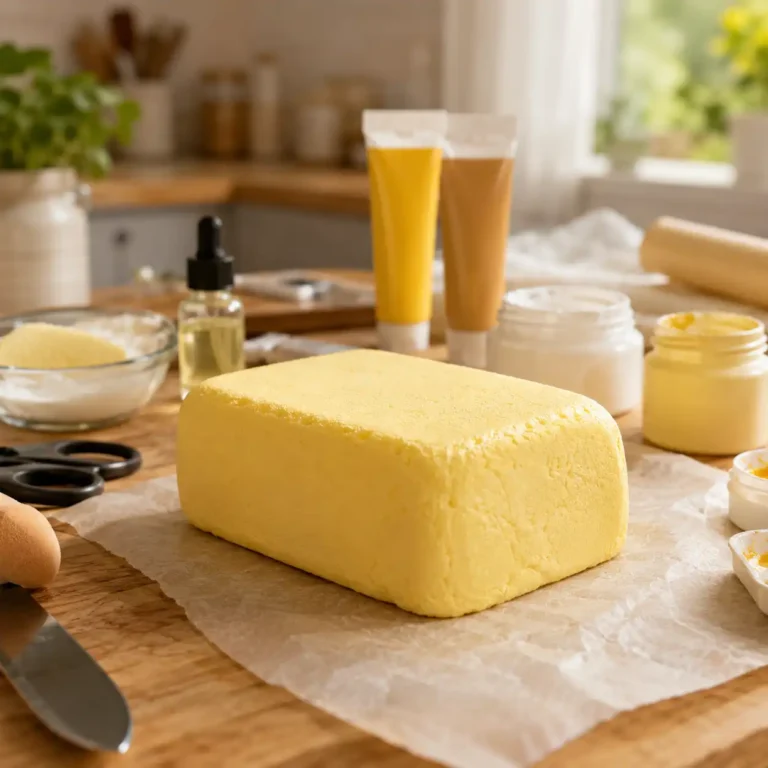
Butter Squishy DIY Tutorial for Beginners
Learn how to make a soft butter squishy using memory foam, fabric glue, puffy paint, and acrylic paint. This beginner-friendly craft tutorial includes shaping, coating, coloring, drying, scenting, and sealing steps for a smooth DIY squishy finish.
- Total Time: 4 hours 20 minutes
- Yield: 1 butter squishy 1x
Ingredients
- 1 block memory foam or high-density upholstery foam
- 2 tablespoons white fabric glue
- 2 tablespoons white or pale yellow puffy paint
- 1 tablespoon yellow, tan, or assorted acrylic paint
- 2 drops vanilla or lemon essential oil or soap scent
- 1 teaspoon cornstarch or translucent setting powder
- 1 teaspoon clear fabric sealer, optional
- 1 sheet parchment paper or wax paper
Instructions
- Step 1: Cut the Foam – Use sharp scissors or a bread knife to cut the memory foam into a basic rectangular block.
- Step 2: Refine the Shape – Trim the edges repeatedly to smooth out any jagged corners until the surface looks even.
- Step 3: Mix the Base Coating – Combine equal parts white fabric glue and puffy paint in a small bowl until smooth.
- Step 4: Apply the Primer – Use a makeup sponge to dab the mixture onto the foam, covering every pore thoroughly.
- Step 5: Initial Dry Time – Place the squishy on parchment paper and let the first coat dry for 4 hours.
- Step 6: Add Color Layers – Mix acrylic paint with puffy paint and apply 2 to 3 thin coats, allowing each coat to dry before adding the next.
- Step 7: Add Scent – Add a small amount of vanilla or lemon scent to the final paint layer, then let it dry completely.
- Step 8: Finish the Surface – Dust lightly with cornstarch or translucent setting powder to reduce tackiness.
- Step 9: Seal the Squishy – Brush on a thin coat of clear fabric sealer if you want a glossier, longer-lasting finish.
Notes
Use thin coats for the smoothest finish. Let every layer dry fully before squeezing the foam. This craft is decorative and is not edible.
- Prep Time: 20 minutes
- Cook Time: 0 minutes
- Category: DIY Craft
- Method: Foam Craft
- Cuisine: Craft Tutorial
Nutrition
- Serving Size: 1 craft
- Calories: 0
- Sugar: 0g
- Sodium: 0mg
- Fat: 0g
- Saturated Fat: 0g
- Unsaturated Fat: 0g
- Trans Fat: 0g
- Carbohydrates: 0g
- Fiber: 0g
- Protein: 0g
- Cholesterol: 0mg
Keywords: butter squishy, DIY squishy, memory foam craft, puffy paint craft, beginner craft tutorial
Essential Materials for Your Squishy Project

The Base Materials
To start your project, you will need a foundation. Most people use memory foam or high-density upholstery foam. Memory foam is great because it has a natural slow-rise quality that is perfect for a Butter Squishy DIY Tutorial for Beginners. If you don’t have foam, you can use “butter clay,” which is a mix of lightweight air-dry clay and a bit of lotion or slime. Each material offers a different feel, so you might want to experiment with both to see which one you prefer for your tactile needs.
Adhesives and Coatings
The coating is what gives the squishy its skin. Fabric paint, puffy paint, and clear silicone sealant are common choices. You will also need a strong adhesive like fabric glue if you are sticking different foam pieces together. These coatings help protect the foam and give it that signature “matte” look that many butter squishies have. In this Butter Squishy DIY Tutorial for Beginners, we recommend water-based paints to keep the project safe and easy to clean up after you are finished.
Coloring and Scenting Tools
Acrylic paints are the best way to add color to your foam base. You can mix them directly into your coatings. To make the experience even better, you can add a few drops of essential oils or soap scents. Imagine a butter squishy that actually smells like vanilla or lemon! According to Wikipedia, these sensory toys are popular because they provide a soft, tactile experience that helps people manage stress through repetitive squeezing, and adding a pleasant scent can significantly improve that calming effect.
Setting Up Your Workspace
Safety and Cleanliness
Before you jump into the Butter Squishy DIY Tutorial for Beginners, it is important to set up a clean area. Use a silicone mat or wax paper to protect your table from glue and paint. Make sure the room has good airflow, especially if you are using any strong adhesives. Keep a damp cloth nearby to wipe away any messes quickly. Since we are focusing on a beginner-friendly approach, we will stick to non-toxic materials that are safe for use indoors and around family members.
Organizing Your Tools
Have your scissors, brushes, and sponges ready before you start. Sharp detail scissors are helpful for trimming foam into precise shapes. If you are making a food-themed squishy, look at real objects for inspiration. Since many squishies look like food, you might find inspiration in the fluffy texture of butter swim biscuits easy to bake at home. Having a reference photo helps you get the proportions right, making your Butter Squishy DIY Tutorial for Beginners project look much more professional.
The Memory Foam Method: Step-by-Step
This method is the gold standard for achieving that classic slow-rise feel. It involves carving foam and applying several layers of paint and glue. Follow these steps carefully to create your first masterpiece.
- Step 1: Cut the Foam – Use sharp scissors or a bread knife to cut your memory foam into a basic rectangular block or any shape you desire for your butter squishy.
- Step 2: Refine the Shape – Trim the edges of the foam repeatedly to smooth out any jagged corners until the surface looks rounded and even.
- Step 3: Mix the Base Coating – Combine equal parts of white fabric glue and puffy paint in a small bowl to create a flexible “primer” for the foam.
- Step 4: Apply the First Layer – Use a makeup sponge to dab the mixture onto the foam, making sure to cover every pore without soaking the foam completely.
- Step 5: Let It Dry – Place your squishy on a piece of parchment paper and wait at least 4 hours for the first coat to dry completely before touching it.
- Step 6: Add Color – Mix acrylic paint with more puffy paint to get your desired shade, then apply a second and third coat, allowing for dry time between each.
- Step 7: Detail and Seal – Use a fine brush to add small details like eyes or patterns, then let the entire project cure for 24 hours to reach full squishiness.


The Clay Method: A Soft Alternative
Working with Air-Dry Clay
If you prefer a more “molded” look rather than a carved one, air-dry clay is a fantastic option for a Butter Squishy DIY Tutorial for Beginners. Look for “super light” or “marshmallow” clay. This material is incredibly lightweight and feels almost like a cloud. When it dries, it remains slightly flexible, which is exactly what you want. Designing small treat-sized toys is fun, and you can model them after your favorite healthy chocolate snacks for a realistic look that everyone will admire.
Combining Clay and Foam
For a hybrid experience, you can wrap a thin layer of light clay around a foam core. This gives you the structure of foam with the smooth surface of clay. This technique is great for beginners because it hides any mistakes you might have made while carving the foam. In this Butter Squishy DIY Tutorial for Beginners, we suggest using a tiny bit of water to smooth out the seams of the clay so the finished toy looks like one solid piece.
Comparing the Two DIY Methods
Choosing the right method depends on what tools you have and what texture you want to achieve. Use the table below to help you decide which path to take for your Butter Squishy DIY Tutorial for Beginners project.
| Feature | Memory Foam Method | Air-Dry Clay Method |
|---|---|---|
| Difficulty Level | Medium (requires carving) | Easy (molding like dough) |
| Drying Time | 24-48 hours | 12-24 hours |
| Texture | Varies (very slow rise) | Velvety and dense |
| Customization | High (paint any design) | High (mix colors into clay) |
| Durability | Very durable | Can crack if squeezed too hard |
Creative Project Ideas for Beginners
The Classic Butter Block
The simplest project for a Butter Squishy DIY Tutorial for Beginners is a yellow rectangle that looks like a stick of butter. Use a pale yellow paint mixed with a bit of white to get that creamy color. You can even wrap it in a piece of parchment paper to make it look authentic. For those who love the look of fudge, try shaping your clay into a square to mimic the best brownie recipes you enjoy making in the kitchen. This makes for a great desk toy that looks tasty but is purely for stress relief.
Scented Bread Rolls
Bread shapes are naturally squishy. You can make a round bun or a long baguette. Use light brown and tan paints to create a “toasted” look on the top of the foam. Adding a cinnamon or vanilla scent makes these feel incredibly cozy. This Butter Squishy DIY Tutorial for Beginners project is perfect for gifting to friends who love bakery items. Because the shapes are simple, they are very forgiving for people who are just starting out with foam carving.
Decorating and Finishing Touches
Using Puffy Paints for Details
Puffy paint is a secret weapon in any Butter Squishy DIY Tutorial for Beginners. It stays flexible when it dries, which means it won’t crack when you squeeze the toy. You can use it to draw “icing,” sprinkles, or cute faces. If you want a glossy finish, you can add a thin layer of clear fabric sealer over the top. Just make sure the base colors are 100% dry before you start adding these fine details, or the colors might bleed together.
Achieving the Matte Look
A true butter squishy often has a matte, soft-touch finish. If your paint is too shiny, you can lightly dust the squishy with a tiny amount of cornstarch or translucent setting powder once it is completely dry. This removes the stickiness and gives it that professional, “buttery” feel. In this Butter Squishy DIY Tutorial for Beginners, we recommend doing this step over a sink to avoid making a mess, as the powder can fly everywhere quite easily.
Maintaining Your Squishy Collection
Cleaning Your Homemade Toys
Homemade squishies can attract dust over time. To clean them, use a slightly damp cloth with just a drop of mild soap. Do not submerge them in water, as memory foam acts like a sponge and can take days to dry out, which might lead to mold. After cleaning, you can re-apply a small amount of powder to restore the smooth texture. This part of the Butter Squishy DIY Tutorial for Beginners is vital for making sure your hard work lasts for months or even years.
Repairing Cracks and Tears
If your squishy starts to show small cracks near the joints, don’t worry. You can fix them using a small amount of fabric glue or more puffy paint. Simply fill the crack, smooth it over with a toothpick, and let it dry. This keeps the squishy looking new. Regular maintenance is a part of the hobby, and knowing how to fix your creations is just as important as knowing how to make them in the first place.
Common Mistakes to Avoid
Applying Paint Too Thickly
One of the biggest hurdles in a Butter Squishy DIY Tutorial for Beginners is the temptation to put on a thick layer of paint all at once. This usually leads to a surface that takes days to dry and might peel off later. It is much better to apply three or four very thin layers. This ensures that the paint bonds well with the foam and stays flexible. Patience is the key to a high-quality DIY project.
Using the Wrong Kind of Foam
Not all sponges are created equal. Kitchen sponges are often too porous and won’t give you that slow-rise effect. In this Butter Squishy DIY Tutorial for Beginners, we emphasize using memory foam or dense cosmetic sponges. If the foam pops back instantly, it won’t feel like a “butter” squishy. Always test a small piece of foam by squeezing it before you commit to a full carving project.
Advanced Techniques for Future Projects
Creating Gradient Colors
Once you master the basic Butter Squishy DIY Tutorial for Beginners, you can try blending colors. Use a sponge to dab one color into another while they are still slightly wet. This creates a beautiful “airbrushed” look that is common in high-end collector squishies. You can use this for galaxy themes, sunsets, or realistic fruit shading. It adds a level of depth that makes your handmade toys stand out from the crowd.
Embedding Objects
Some crafters like to put a “center” inside their squishies, like a small bead or a different type of foam. This changes the way the toy feels when you reach the middle of the squeeze. While this is a bit more complex than the standard Butter Squishy DIY Tutorial for Beginners, it is a fun way to experiment with physics and sensory feedback. Just make sure whatever you embed is safe and won’t poke through the outer layer.
FAQs
How long does a DIY squishy take to dry?
Generally, you should allow at least 24 hours for the final product to cure. However, individual layers of paint can dry in about 2 to 4 hours depending on the humidity in your home. It is best to wait longer than you think you need to to avoid fingerprints.
Can I use regular school glue?
Regular white school glue is usually too stiff and will crack when the squishy is squeezed. For this Butter Squishy DIY Tutorial for Beginners, we strongly suggest using fabric glue or silicone-based adhesives which remain flexible after they have dried.
Why is my squishy not slow-rising?
This usually happens if the foam is too airy or if the coating has holes in it. A squishy rises slowly because air is trapped and can only escape or enter slowly through small pores. Make sure your paint coating is solid and covers the entire surface to improve the rise time.
Is it safe for kids to make?
Yes, as long as they use non-toxic paints and glues. Adult supervision is recommended when using scissors or any strong adhesives. This project is a great way to teach children about textures and colors while working on their fine motor skills.
Where can I get memory foam?
You can buy memory foam blocks online, or you can repurpose an old memory foam pillow (just make sure it is clean!). Some craft stores also sell specific “squishy foam” blocks that are already primed for painting, which can save you a few steps.
Conclusion
Taking the time to follow a Butter Squishy DIY Tutorial for Beginners is a rewarding path into the world of handmade toys. By choosing the right foam, applying patient layers of paint, and adding your own creative flair, you can produce a sensory tool that is just as good as anything found in a store. Remember to take your time with the carving and drying phases, as these are the most important parts of the process. Once you have finished your first butter squishy, you will likely find yourself wanting to create an entire collection of these soft, soothing companions.
Non-Edible Recipe Disclaimer: This content is intended for crafting, DIY, and entertainment purposes only. The materials and instructions shared in this category are not food recipes and are not safe for consumption. Do not eat, taste, or serve any finished project. Keep craft materials away from young children and pets, and always use supplies according to their safety labels.