There is nothing quite like the sight of a fresh glazed chocolate donut sitting on a bakery shelf, its shiny coating catching the light. Whether you enjoy one with your morning coffee or as a late-night snack, this treat brings a sense of comfort that few other pastries can match. The combination of a soft, airy dough and a rich, sugary shell creates a sensory experience that is hard to beat. In this guide, we will look at everything that makes this classic dessert so special, from its history to how you can make it in your own kitchen.
Table of Contents
The Allure of the Glazed Chocolate Donut
What makes a glazed chocolate donut so irresistible? It starts with the texture. A high-quality glazed chocolate donut offers a slight resistance when you first bite into the firm glaze, followed by the pillowy softness of the dough inside. The glaze acts as a protective barrier, keeping the moisture locked within the pastry while providing an immediate burst of sweetness. Unlike frosted donuts, which have a thick layer of icing on top, a glazed version is often dipped entirely, meaning every single bite is covered in a thin, crackly layer of chocolate goodness.
The flavor profile of a glazed chocolate donut is also a masterclass in balance. You have the deep, earthy notes of the cocoa powder used in the dough or the glaze, which are perfectly countered by the high sugar content of the glaze itself. This prevents the treat from being overly bitter or cloying. When made correctly, the donut is not greasy; instead, it feels light and satisfying. Many people find that the simple glazed chocolate donut is the gold standard by which all other donuts are measured, as it relies on fundamental baking skills rather than piles of candy toppings.
Print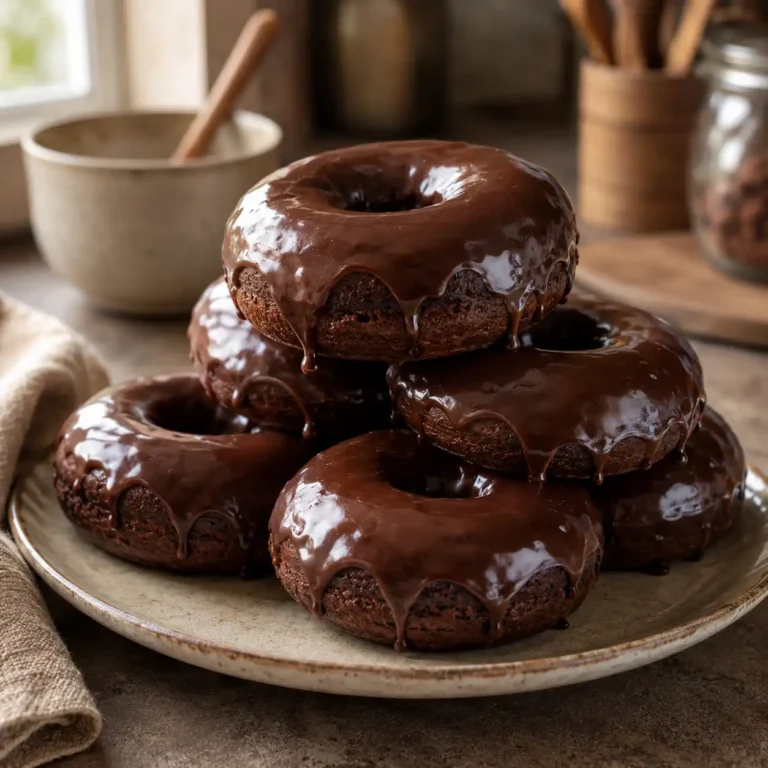
The Ultimate Glazed Chocolate Donuts (Yeast-Raised)
Experience the irresistible allure of a homemade glazed chocolate donut! This recipe guides you to create light, airy, yeast-raised donuts with a deep chocolate flavor and a shiny, sweet cocoa glaze. Perfect for your morning coffee or a delightful snack, these donuts offer a satisfying texture and balanced sweetness that makes them truly special.
- Total Time: 3 hours 30 minutes
- Yield: 12–15 donuts 1x
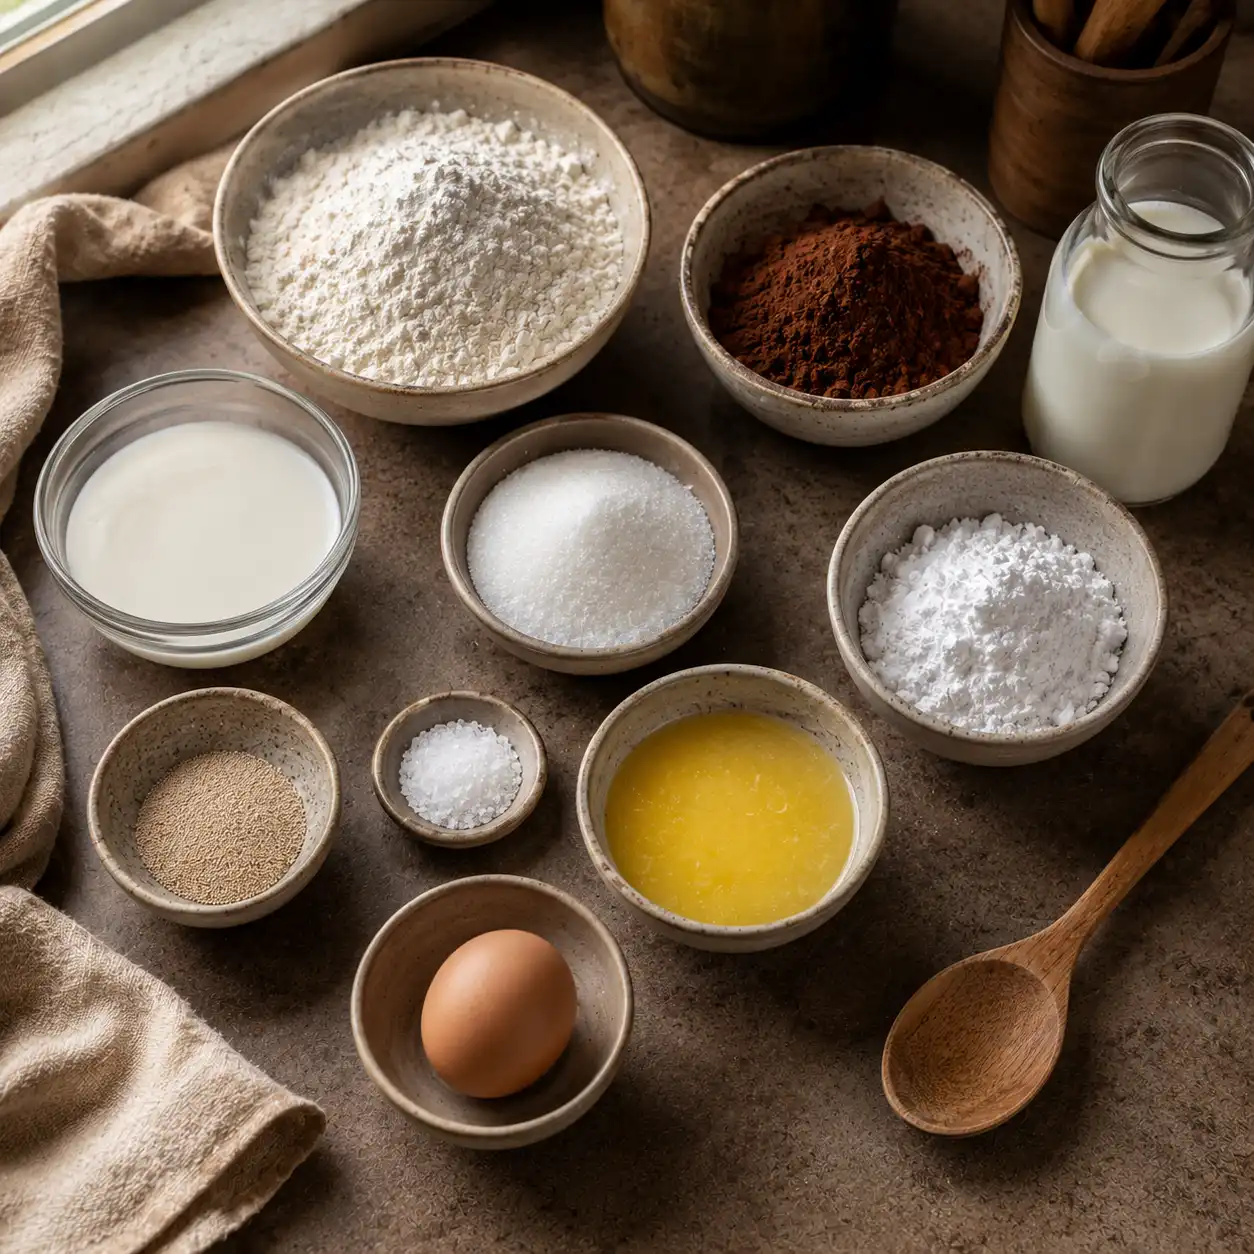
Ingredients
- 1 cup whole milk, warmed (105-115°F)
- 2 ¼ teaspoons active dry yeast (1 standard packet)
- ¼ cup granulated sugar, plus 1 teaspoon
- 1 large egg, room temperature
- 2 tablespoons unsalted butter, melted
- 3 cups all-purpose flour, plus more for dusting
- ½ cup unsweetened cocoa powder
- ½ teaspoon salt
- Vegetable oil, for frying
- 2 cups powdered sugar
- ⅓ cup unsweetened cocoa powder (for glaze)
- ¼ cup whole milk or water
- 1 teaspoon vanilla extract
Instructions
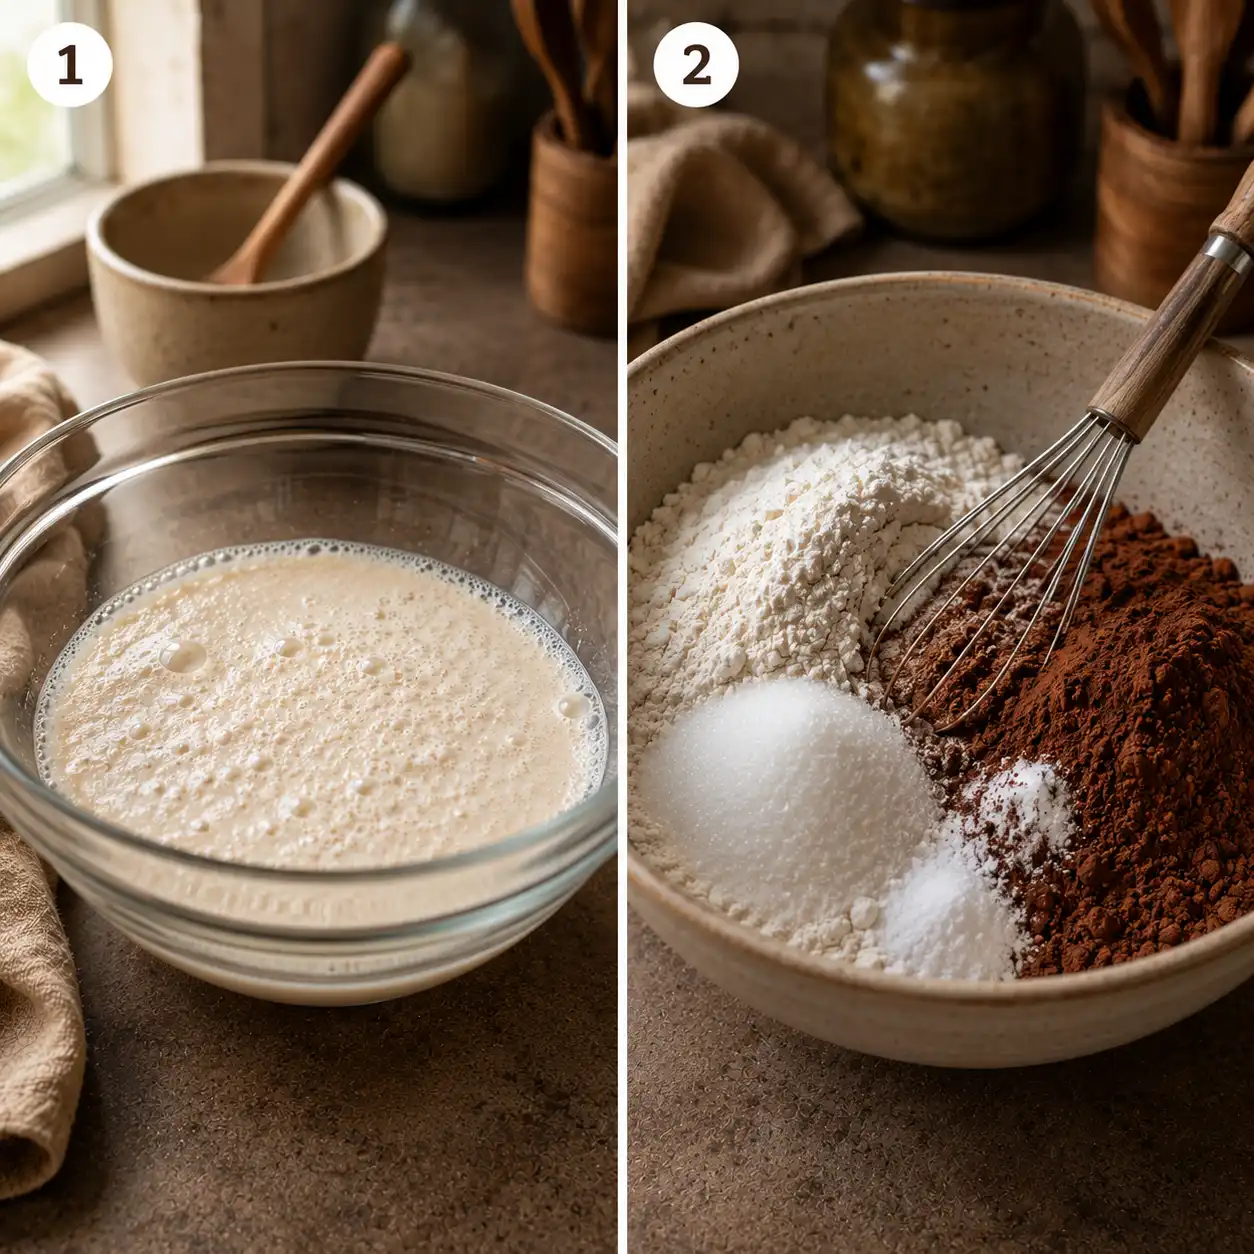
- Step 1: Activate Yeast – In a large bowl, combine warm milk and 1 teaspoon granulated sugar. Sprinkle yeast over the top and let sit for 5-10 minutes until foamy.
- Step 2: Mix Dough – Add the remaining ¼ cup granulated sugar, egg, and melted butter to the yeast mixture. Whisk until combined. In a separate bowl, whisk together flour, cocoa powder, and salt. Gradually add dry ingredients to wet, mixing until a shaggy dough forms.
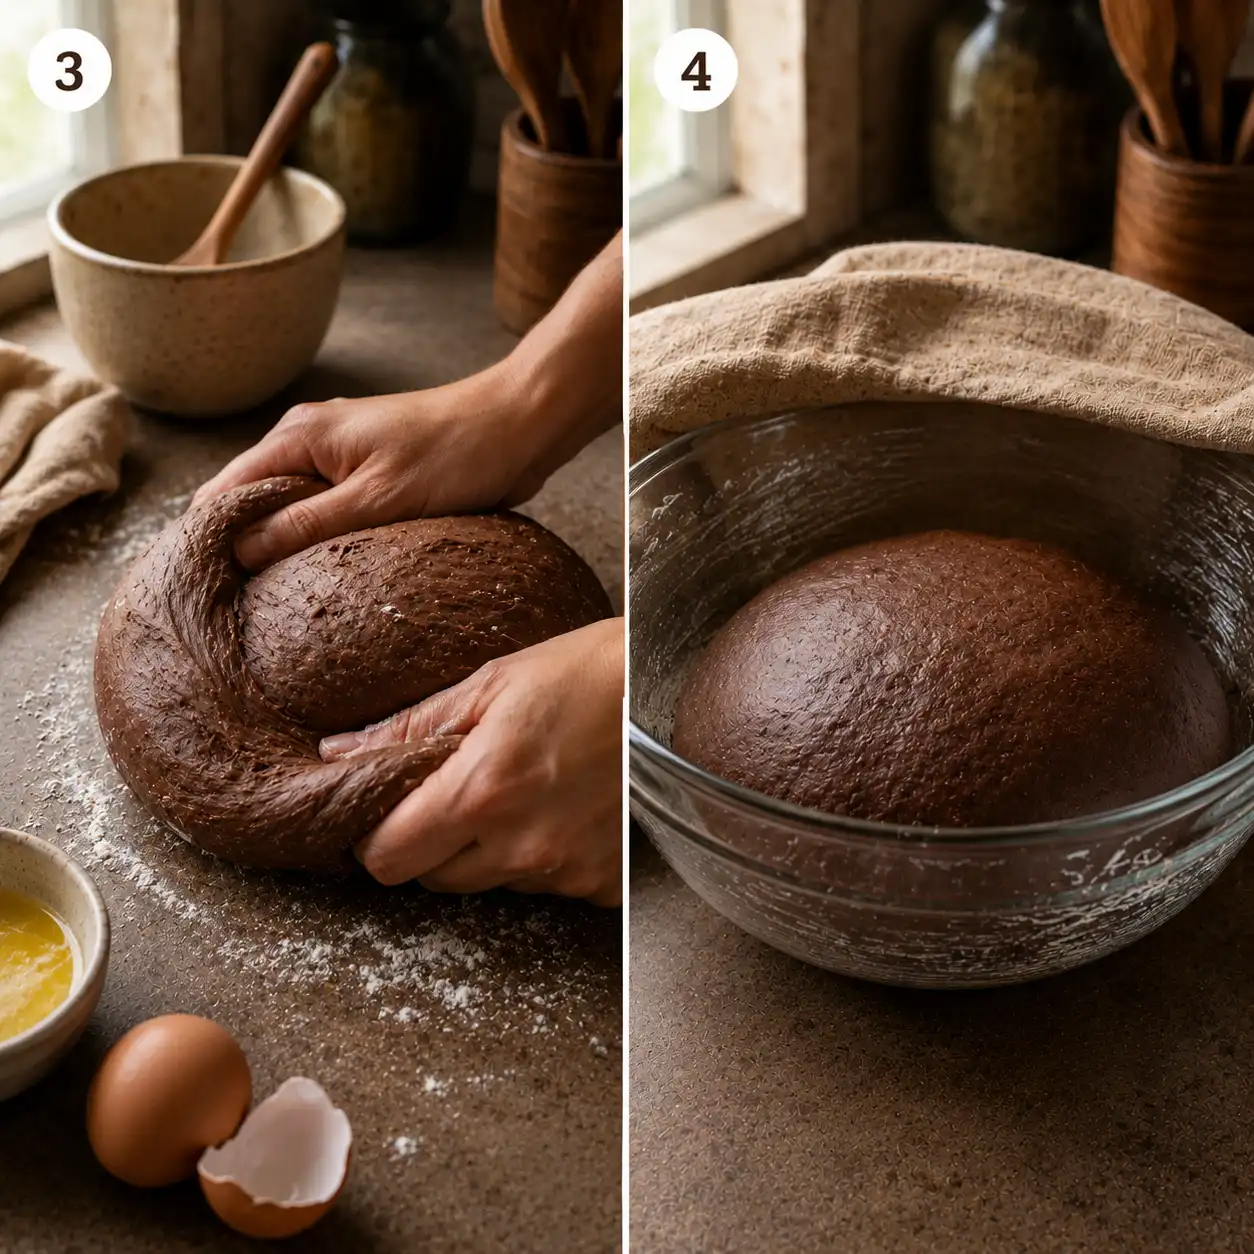
- Step 3: Knead Dough – Turn the dough out onto a lightly floured surface and knead for 5-8 minutes until smooth and elastic. It should be slightly sticky.
- Step 4: First Rise – Place the dough in a lightly oiled bowl, turning to coat. Cover with plastic wrap and let rise in a warm place for 1-1.5 hours, or until doubled in size.
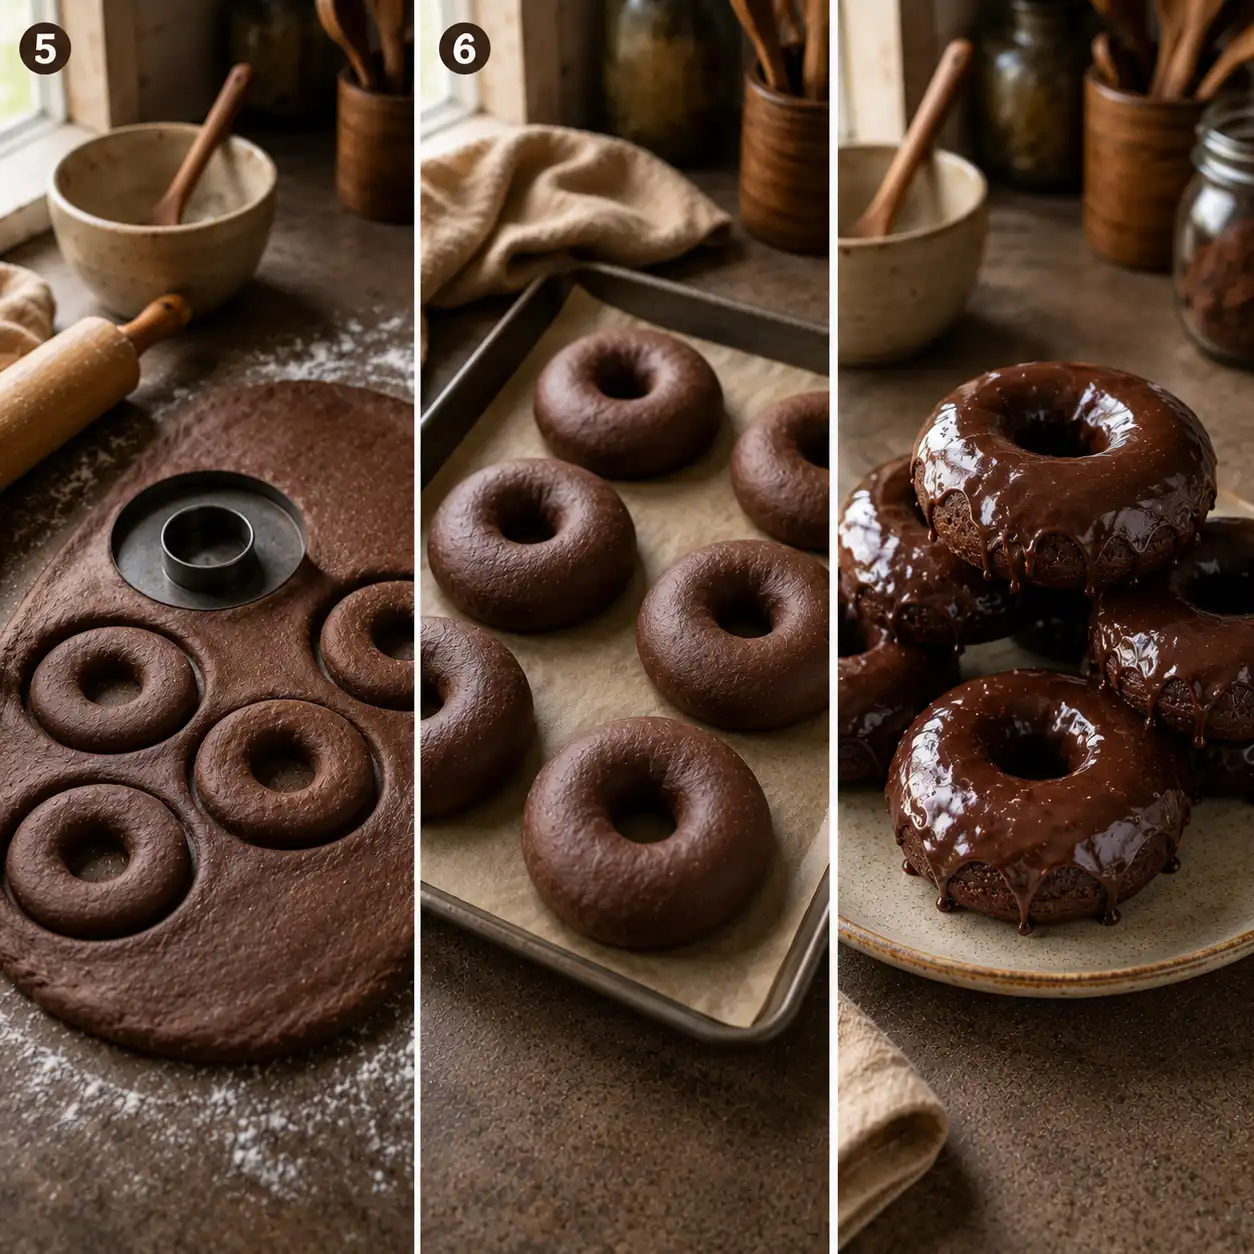
- Step 5: Roll and Cut – Gently punch down the dough. On a lightly floured surface, roll it out to ½-inch thickness. Use a 3-inch donut cutter to cut out donuts and holes. Re-roll scraps once.
- Step 6: Second Rise – Place cut donuts and holes on parchment-lined baking sheets. Cover lightly with plastic wrap and let rise for another 30-45 minutes, or until puffy.
- Step 7: Prepare Fryer – Heat 2-3 inches of vegetable oil in a large deep pot or Dutch oven to 350°F (175°C). Use a candy thermometer to monitor temperature.
- Step 8: Fry Donuts – Carefully lower 2-3 donuts into the hot oil. Fry for 1-2 minutes per side until golden brown. Donut holes will fry faster. Remove with a slotted spoon to a wire rack set over paper towels to drain.
- Step 9: Make Glaze – While donuts cool slightly, whisk together powdered sugar, cocoa powder, milk/water, and vanilla extract in a shallow bowl until smooth.
- Step 10: Glaze Donuts – Dip each warm donut into the glaze, coating both sides, and return to the wire rack to let excess drip off and glaze set. Serve immediately for best taste.
Notes
For a denser, cake-like donut, swap yeast for 2 tsp baking powder and 1 tsp baking soda, reduce rise times, and adjust liquid as needed. Ensure oil temperature is maintained for perfectly cooked donuts—too cool and they’ll be greasy, too hot and they’ll burn outside before cooking inside.
- Prep Time: 1 hour 15 minutes
- Cook Time: 20 minutes
- Category: Dessert
- Method: Frying
- Cuisine: American
- Diet: Contains dairy and gluten
Nutrition
- Serving Size: 1 donut
- Calories: 320 kcal
- Sugar: 35 g
- Sodium: 180 mg
- Fat: 18 g
- Saturated Fat: 8 g
- Unsaturated Fat: 9 g
- Trans Fat: 0.1 g
- Carbohydrates: 40 g
- Fiber: 2 g
- Protein: 4 g
- Cholesterol: 45 mg
Keywords: chocolate, donut, doughnut, glazed, yeast, fried, dessert, baking
A Brief History of This Beloved Pastry
The story of how we arrived at the modern glazed chocolate donut is quite fascinating. According to the history of the doughnut, these fried pieces of dough have been a staple in many cultures for centuries, evolving from simple fried bread to the complex pastries we see today. Originally brought to America by Dutch settlers as “oily cakes,” they were initially solid balls of dough. It wasn’t until the mid-19th century that the iconic hole was added, which helped the center cook as quickly as the outside. This change was vital for creating the uniform texture we expect in a glazed chocolate donut today.
As chocolate became more accessible to the general public in the late 1800s and early 1900s, bakers began adding cocoa to their dough recipes. The introduction of the glazed chocolate donut allowed for a more refined treat that could stay fresh longer on store shelves. The glaze helped prevent the donut from drying out, making it a popular choice for bakeries looking to sell their wares throughout the day. Today, this donut is a centerpiece in almost every donut shop across the globe, from small family-run stalls to massive international chains.
Yeast-Raised vs. Cake: Choosing Your Style
When you set out to find or make a glazed chocolate donut, you will usually have to choose between two main types: yeast-raised or cake. A yeast-raised glazed chocolate donut is light, airy, and full of large air pockets. It relies on biological leavening to rise, which gives it a slightly bread-like quality. These are the donuts that seem to melt in your mouth because they are so full of air. They take longer to make because the dough must rise at least once, often twice, before frying.
On the other hand, a cake-style glazed chocolate donut is much denser and more substantial. It uses chemical leaveners like baking powder or baking soda to get its lift. This results in a crumb that is similar to a muffin or a traditional cake. Cake donuts are often sturdier, making them perfect for dipping into a heavy chocolate glaze without falling apart. Many enthusiasts prefer the cake version when they want a deep, intense chocolate flavor, as the dense crumb can hold more cocoa powder than a light yeast dough. Both styles have their loyal fans, and the choice often depends on your mood.
| Feature | Yeast-Raised Donut | Cake Donut |
|---|---|---|
| Texture | Light, airy, and fluffy | Dense, moist, and crumbly |
| Leavening Agent | Active dry or instant yeast | Baking powder or baking soda |
| Preparation Time | 2-4 hours (includes rising) | 30-45 minutes |
| Flavor Profile | Subtle, slightly fermented | Rich, sweet, and cake-like |
Essential Ingredients for Success
To create a high-quality glazed chocolate donut, you must start with the right ingredients. For the dough, use a strong bread flour if you are making the yeast version, as the higher protein content helps create the structure needed to hold those air bubbles. If you are making a cake-style glazed chocolate donut, all-purpose flour works best to keep the texture tender. Always use high-quality cocoa powder; Dutch-processed cocoa is often preferred for its dark color and smooth, mellow flavor that lacks the acidity of natural cocoa powder.
The fats you use are equally important. While some old-fashioned recipes might call for shortening, many modern bakers prefer butter for the rich flavor it provides. Since this article avoids any pig products, vegetable oil or high-quality butter are the best choices for the dough and the frying process. For the glaze, you will need powdered sugar, a splash of milk or water, vanilla extract, and more cocoa powder.
Using a tiny pinch of salt in both the dough and the glaze will help bring out the chocolate notes and keep the sweetness from becoming overwhelming. Planning a brunch involves many choices, and looking through sweet morning treats weekend lists can give you plenty of inspiration for what to serve alongside your donuts.
How to Make a Perfect Glazed Chocolate Donut at Home
Making a glazed chocolate donut at home might seem intimidating, but it is a rewarding process that fills your house with an incredible aroma. If you love sweet starts to your day, you might also enjoy an overnight French toast casserole with berries, which offers a similar level of morning indulgence. Follow these steps to create your own chocolate masterpieces.
- Step 1: Prepare the Yeast Mixture – Combine warm milk, a tablespoon of sugar, and active dry yeast in a bowl. Let it sit for about five to ten minutes until it becomes foamy and active.
- Step 2: Mix the Dry Ingredients – In a large bowl, whisk together your flour, cocoa powder, remaining sugar, and a pinch of salt. Make sure there are no large clumps of cocoa.
- Step 3: Combine and Knead – Add the yeast mixture, melted butter, and an egg to the dry ingredients. Knead the dough for about 8 minutes until it is smooth and elastic.
- Step 4: The First Rise – Place the dough in a lightly oiled bowl, cover it with a damp cloth, and let it rise in a warm spot for about an hour or until it has doubled in size.
- Step 5: Shape the Donuts – Roll the dough out to about half an inch thick. Use a donut cutter to punch out shapes. Place them on a parchment-lined baking sheet.
- Step 6: The Second Rise – Cover the shaped donuts and let them rise again for another 30 to 45 minutes. This step is vital for that fluffy texture.
- Step 7: Heat the Oil – Fill a heavy-bottomed pot with vegetable oil and heat it to 350 degrees Fahrenheit. Use a thermometer to keep the temperature steady.
- Step 8: Fry the Doughnuts – Carefully drop two or three donuts into the hot oil. Fry for about 60 to 90 seconds per side until they are puffed and cooked through.
- Step 9: Drain and Cool – Remove the donuts with a slotted spoon and place them on a wire rack with paper towels underneath to catch any excess oil.
- Step 10: Glaze the Donuts – While the donuts are still slightly warm, dip them into your prepared chocolate glaze, turning to coat them fully.
Mastering the Chocolate Glaze
The glaze is what transforms a simple fried ring into a true glazed chocolate donut. To get that professional, shiny finish, you need to watch the temperature and consistency of your glaze. If the glaze is too thick, it will go on heavy and may crack off in large chunks. If it is too thin, it will run off the donut, leaving it looking patchy. The goal is a glaze that is thick enough to coat a spoon but thin enough to drip slowly. For those who can’t get enough of rich cocoa flavors, checking out the best brownie recipes can help you find your next favorite dessert that uses similar chocolate techniques.
When you whisk your powdered sugar, cocoa, and milk together, try to avoid creating too many air bubbles. Dipping the donut while it is still warm is a secret trick used by many pros. The warmth of the pastry helps the glaze flow smoothly over the surface, creating a thin, even layer that dries into a beautiful sheen. If you want to add a bit of variety, you can add a drop of peppermint extract or a dash of cinnamon to the glaze. These small changes can completely change the personality of your glazed chocolate donut without requiring extra work.
Storing and Reheating Your Donuts
A glazed chocolate donut is definitely at its best the moment the glaze sets, but you can keep them for a day or two if needed. To store them, place them in a single layer in an airtight container. If you stack them, the glaze may become sticky or start to dissolve into the dough. Keep the container at room temperature; putting donuts in the refrigerator can actually make them go stale faster because it pulls moisture out of the starch.
If you find that your glazed chocolate donut has lost some of its softness the next day, a quick trip to the microwave can work wonders. Just five to eight seconds on low power is usually enough to soften the dough and slightly melt the glaze, making it taste fresh again. Be careful not to overdo it, or the glaze will turn into a liquid mess and the dough will become tough once it cools back down. Sometimes you want a treat without the wait; in those cases, a chocolate mug cake microwave version satisfies that craving in minutes and offers a similar warm, chocolatey experience.
Common Mistakes to Avoid
One of the most frequent errors when making a glazed chocolate donut is frying at the wrong temperature. If the oil is too cold, the dough will absorb too much oil and become heavy and greasy. If the oil is too hot, the outside will burn before the inside is fully cooked. Always use a thermometer to keep track of the heat. Another mistake is not letting the dough rise long enough. A rushed rise leads to a dense donut that lacks the characteristic lightness of a classic glazed chocolate donut.
Over-mixing the dough is another pitfall, especially with cake donuts. If you mix the batter too much, you develop the gluten, which results in a tough, bread-like texture instead of a tender cake crumb. Mix just until the ingredients are combined. Finally, make sure your glaze is not too cold. If the glaze has sat out and formed a skin, whisk it again with a tiny drop of warm milk to restore its smooth consistency before you start dipping. These small details are the difference between a good donut and a great one.
The Sensory Experience of the First Bite
There is a specific joy in the first bite of a glazed chocolate donut. It starts with the aroma a mix of deep cocoa, sweet sugar, and the comforting scent of fried dough. When you pick it up, the glaze should feel dry to the touch but yield easily under your fingers. As you bite in, the light “crack” of the sugar coating is followed by the soft, airy interior. The chocolate flavor should hit you in waves, first from the sweet glaze and then the more subtle, earthy tones of the dough.
This experience is why the glazed chocolate donut remains a favorite across generations. It is a simple pleasure that doesn’t need fancy decorations or expensive ingredients to be perfect. Whether it is a treat for a child after a long week or a mid-morning pick-me-up for a busy professional, the consistency and familiarity of this pastry provide a small moment of happiness in a busy world. It truly is a masterpiece of the baking world.
FAQs
Can I bake these instead of frying them?
You can bake a glazed chocolate donut, but the texture will be different. It will be more like a ring-shaped cake or muffin. While still delicious, it won’t have the same crisp exterior that frying provides. If you choose to bake them, use a donut pan and bake at 350 degrees Fahrenheit for about 10 to 12 minutes.
What is the best oil for frying donuts?
Vegetable oil, canola oil, or peanut oil are excellent choices because they have high smoke points and a neutral flavor. This allows the taste of the glazed chocolate donut to shine through without any oily aftertaste. Avoid using oils with strong flavors like olive oil.
How do I make my glaze extra shiny?
To get a mirror-like shine on your glazed chocolate donut, add a teaspoon of light corn syrup or a small amount of melted butter to your glaze. This helps the sugar crystals stay small and creates a smooth surface that reflects light beautifully.
Why did my donuts turn out tough?
Toughness is usually caused by over-working the dough or adding too much flour. When measuring your flour, use the “spoon and level” method rather than scooping directly with the measuring cup, which can pack the flour down and lead to using too much.
Conclusion
The glazed chocolate donut is a timeless classic that continues to win hearts with its perfect balance of texture and flavor. By understanding the differences between yeast and cake varieties and mastering the art of the glaze, you can enjoy these treats whenever the craving strikes. Whether you buy them from your favorite local shop or spend a morning frying them at home, the glazed chocolate donut is a reminder that some of the best things in life are simple, sweet, and coated in chocolate.