
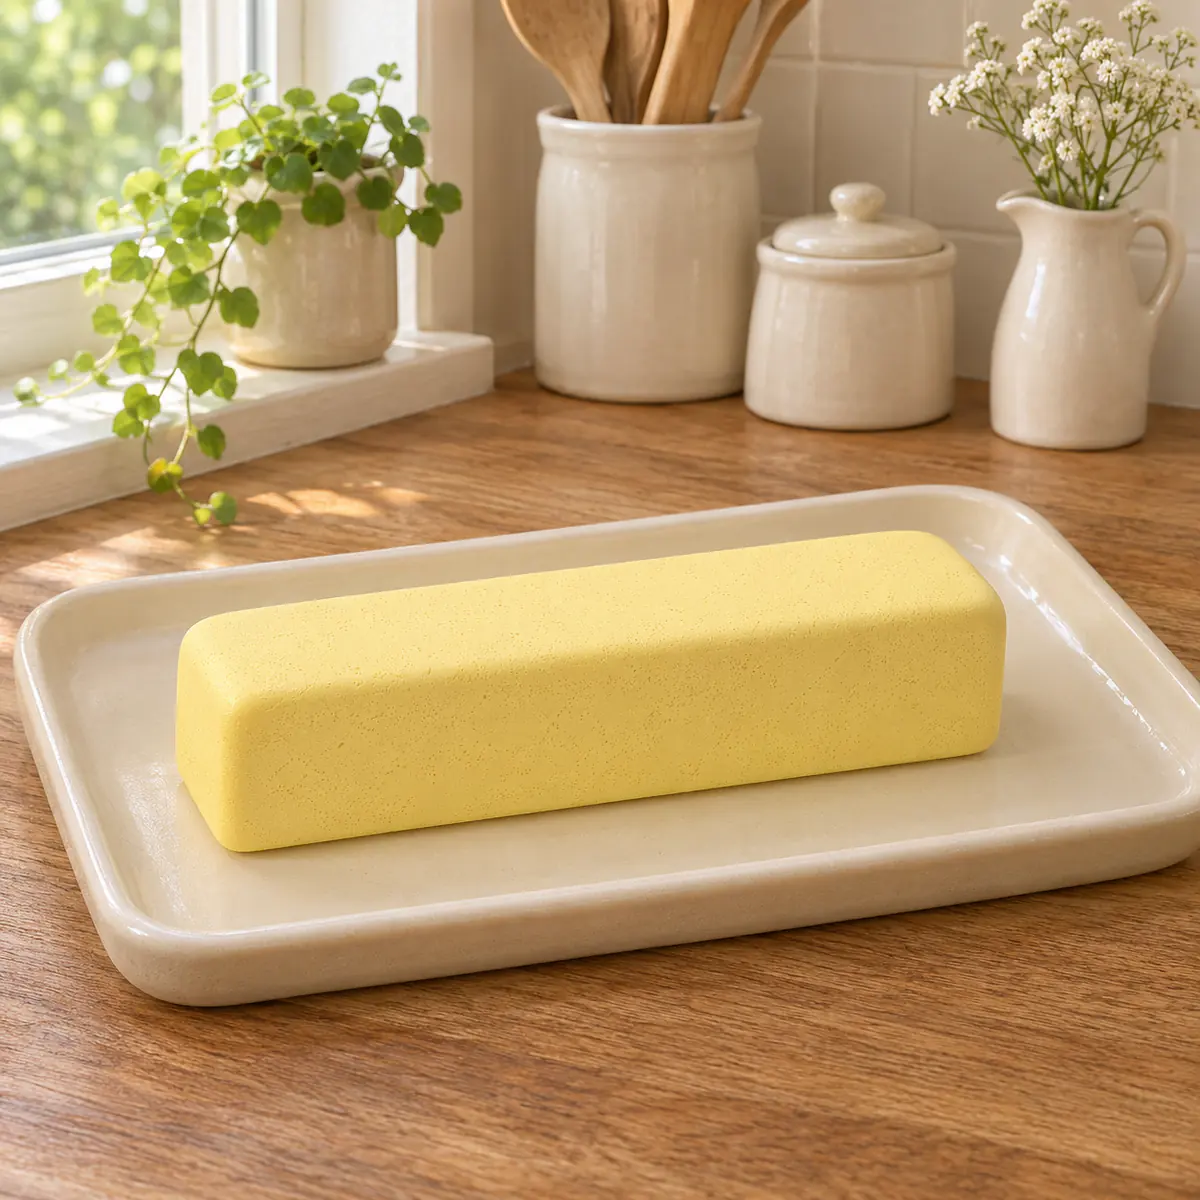
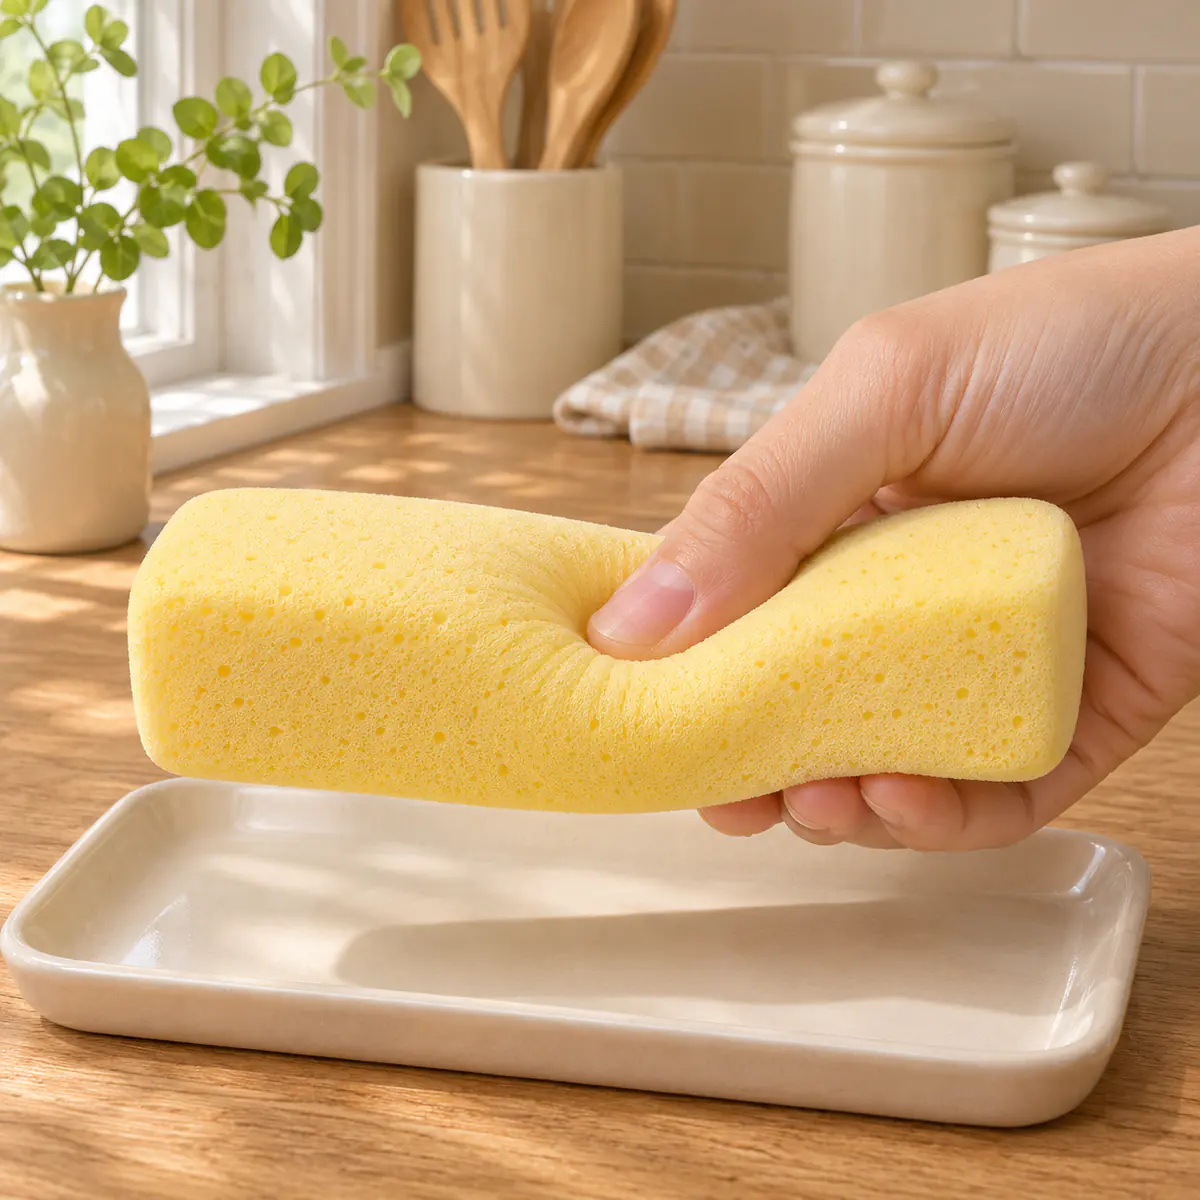
Creating your own tactile toys is a rewarding way to spend an afternoon. If you have ever wondered how to make a butter squishy at home, you are in the right place. This delightful project mimics the soft, slow-rising texture of a pat of butter, offering a soothing sensory experience that is popular with both children and adults. By mixing just a few household ingredients and simple craft supplies, you can craft a custom toy that feels amazing in your hands. Let us walk through the process of building your very own butter-themed creation today, ensuring you have all the knowledge needed to get started.
Table of Contents
Understanding the Basics of Squishy Crafting
Choosing Your Materials for Success
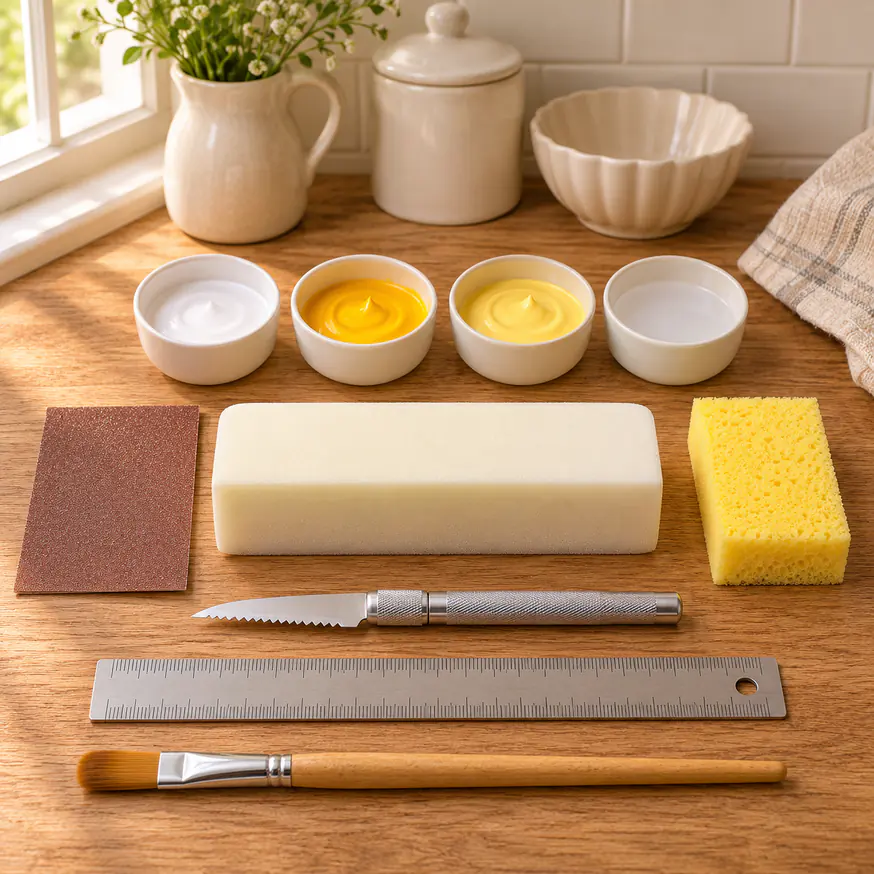
To learn how to make a butter squishy, you must first gather materials that provide the right density. High-quality memory foam or slow-rise polyurethane foam works best for this project. Many crafters prefer soft upholstery foam because it holds shapes well and remains malleable after painting. If you are interested in other creative home projects, you might also like trying a healthy banana bread recipe to reward yourself after your craft session. Always remember to work in a well-ventilated area when using adhesives or paints. Using the correct foam grade is the most important factor; look for “slow-rise” foam specifically, as standard upholstery foam might be too bouncy and fail to hold its shape when squeezed.
Safety and Preparation
Before you begin the physical shaping, ensure your workspace is clean. When considering how to make a butter squishy, safety is paramount. Keep sharp craft knives away from small children and keep your surface covered to prevent messes. Much like learning the proper technique for perfect hard-boiled eggs requires patience, your squishy project needs time to dry correctly. Investing in the right tools, such as fine-grit sandpaper, will help you achieve the smooth, rounded edges that give the butter shape its authentic look. A clean workstation prevents dust and debris from sticking to the paint while it is wet, which is vital for a professional result.
The Step-by-Step Creation Process
Shaping and Painting Your Toy
Once you have your foam block, you can start the transformation. Here is how to make a butter squishy using seven clear phases:
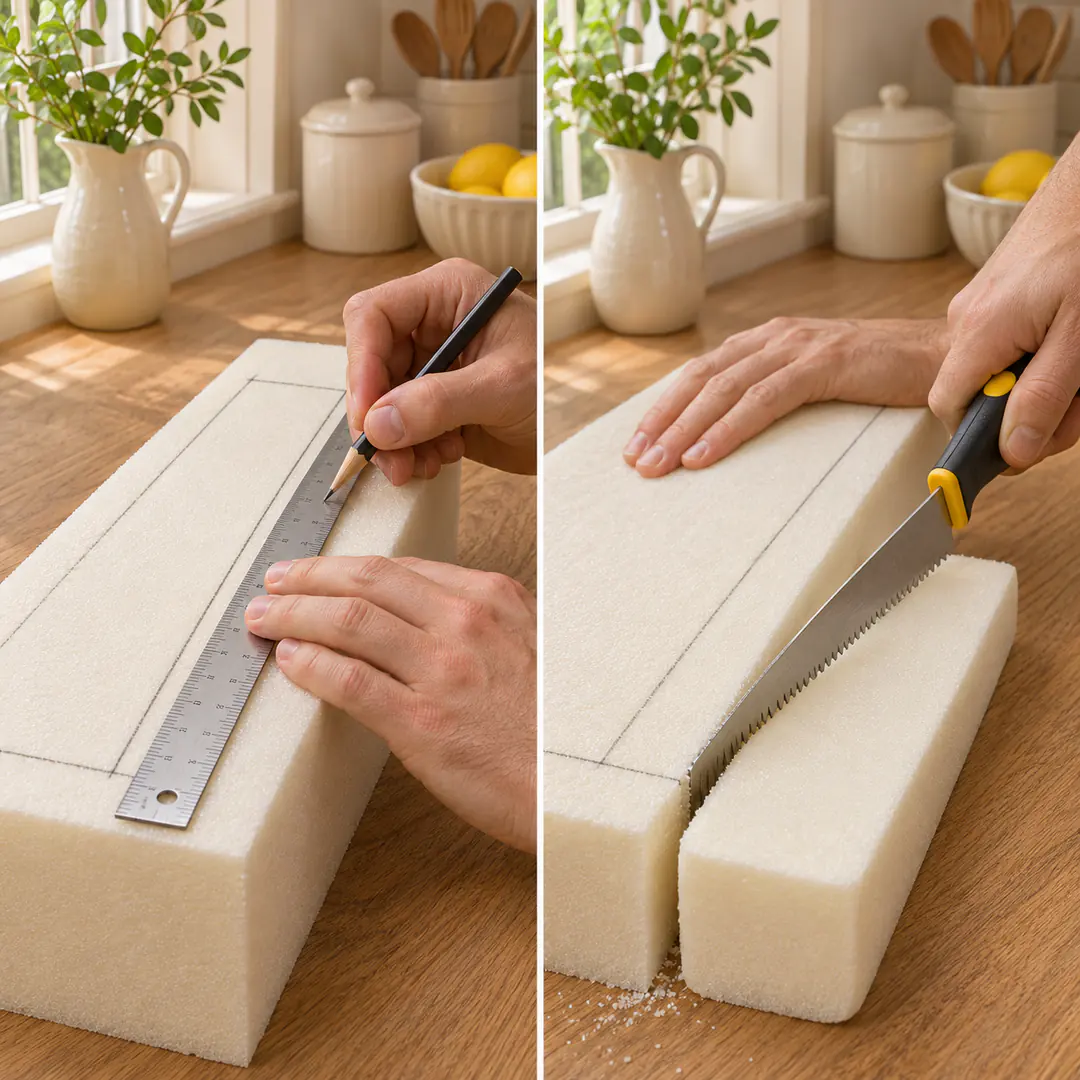
- Step 1: Measuring the Foam – Use a ruler to mark a rectangle about the size of a standard butter stick on your foam block.
- Step 2: Cutting the Block – Use a sharp serrated knife to carefully saw through the foam, maintaining straight lines for a professional finish.
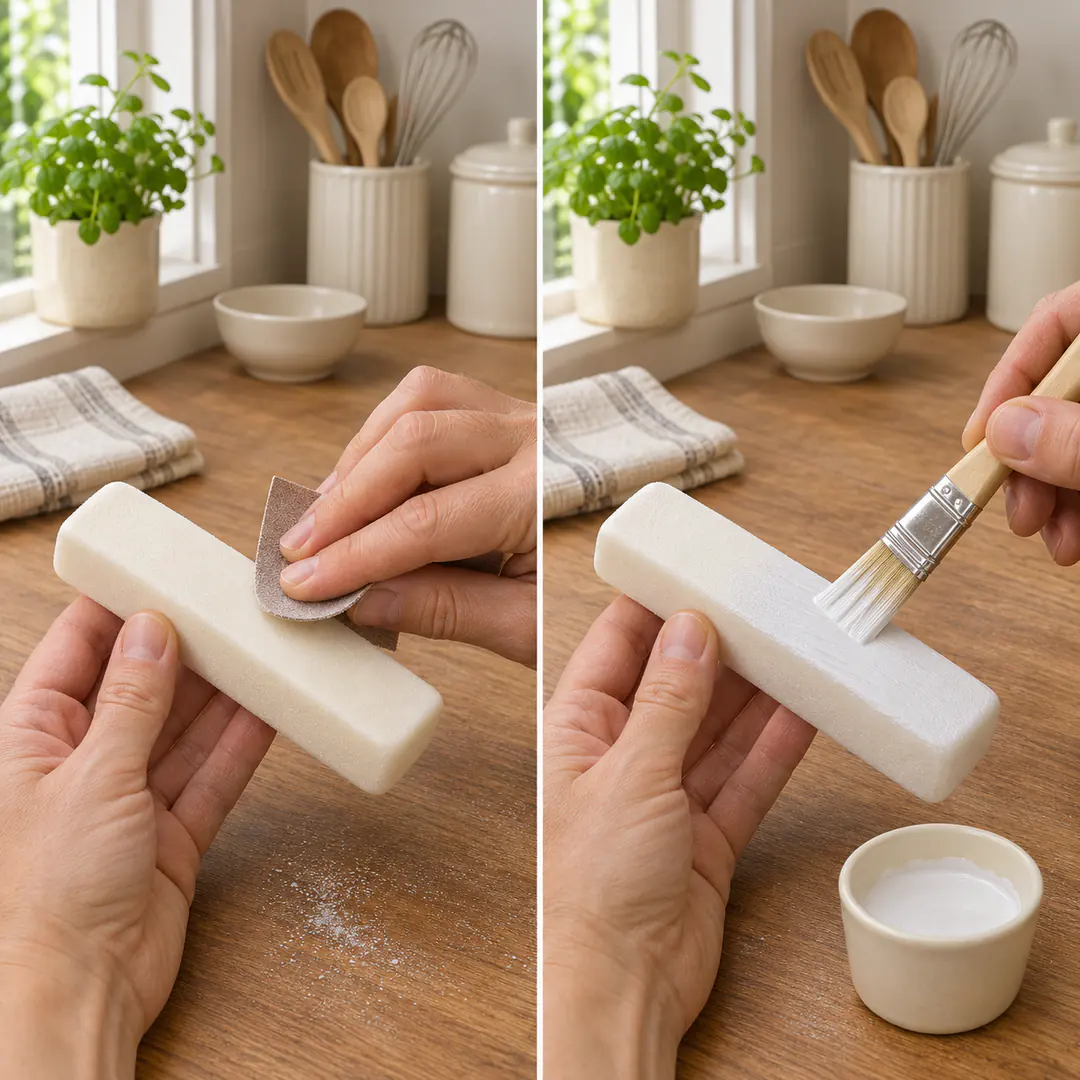
- Step 3: Refining the Edges – Use fine-grit sandpaper to gently buff the sharp corners until they are slightly rounded and smooth.
- Step 4: Applying Primer – Coat the foam with a thin layer of white flexible primer to seal the pores and provide a base for your yellow color.
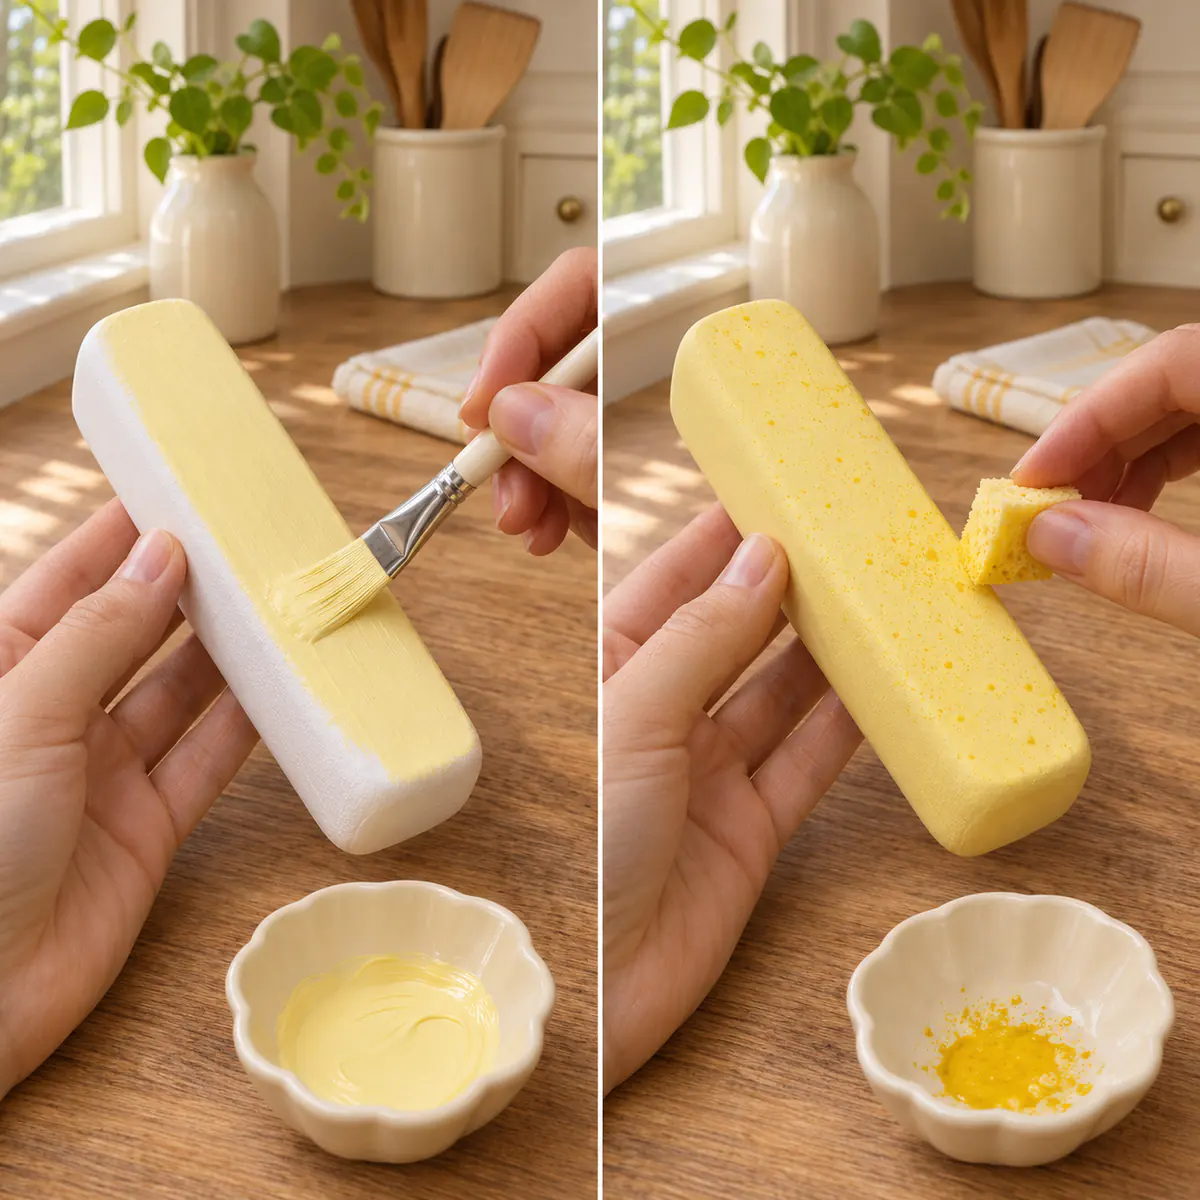
- Step 5: Painting the Surface – Apply a high-quality acrylic paint mixed with a fabric medium, which keeps the paint from cracking when the squishy is squeezed.
- Step 6: Adding Texture – Dab a slightly darker shade of yellow with a sponge to create a realistic look that mimics natural dairy products.
- Step 7: Final Drying – Allow the squishy to sit undisturbed for at least twenty-four hours to ensure the paint layer has cured completely.
Following these instructions on how to make a butter squishy will result in a professional-looking toy. If you find yourself hungry during the drying time, you might enjoy a snack like pecan pie dip with greek yogurt to keep your energy up. Always allow ample drying time, as a “tacky” surface is a common issue for beginners who rush the curing process.
Refining Your Squishy Crafting Skills
Why Texture Matters
The secret to knowing how to make a butter squishy that feels realistic lies in the density of the foam. If the foam is too firm, it won’t bounce back; if it is too soft, it might tear easily. Seek out medium-density foam for the most satisfying tactile response. For further insights on how foam reacts to different materials, check out this guide on polyurethane foam properties to understand the science behind your project. Understanding the chemical structure helps you choose a foam that retains its shape after hundreds of squeezes.
Advanced Painting Techniques
If you want to move beyond the basics of how to make a butter squishy, consider adding details like a “wrapper” texture or a printed logo. You can create a paper wrap using a non-toxic glue stick to secure it to the base. If you enjoy creative DIY projects, you could even try making a high fiber gelatin gummies recipe as a fun experiment in your kitchen. Adding these personal touches makes your squishy a one-of-a-kind creation that stands out from store-bought versions. You can also mix a tiny amount of glitter or pearlescent powder into your final yellow coat to give it a slight sheen that resembles high-quality butter.
Comparing DIY Squishies to Store Versions
Cost and Customization
When you master how to make a butter squishy, you save money and gain complete control over the aesthetics. Mass-produced toys often feature harsh chemicals or cheap dyes that may fade quickly. By creating your own, you choose the color intensity and the level of softness. It is helpful to research toy safety standards provided by government agencies to ensure your DIY materials are non-toxic and suitable for use in your home environment. DIY projects allow you to audit every material that enters your home, which is a major advantage for families with sensitive individuals.
| Factor | DIY Butter Squishy | Store-Bought Squishy |
|---|---|---|
| Cost | Low | Medium to High |
| Customization | High | Low |
| Material Quality | Verified by You | Unknown |
| Assembly Time | 24 Hours (Curing) | Immediate |
Troubleshooting Common Crafting Issues
Fixing Paint Cracks
If your butter squishy develops cracks after a few squeezes, your paint likely lacked enough flexibility. Always add a fabric medium to your acrylic paint to ensure it stretches along with the foam. Learning how to make a butter squishy is a continuous process of refinement. If the paint feels sticky, it might just need a dusting of cornstarch to lose the tacky finish, leaving your toy soft and pleasant to handle. Do not use standard house paint, as it lacks the elasticity required for foam surfaces.
Dealing with Foam Tears
If you accidentally tear your foam while shaping it, do not despair. A small amount of fabric glue or specialized foam adhesive can mend the gap seamlessly. When you learn how to make a butter squishy, you learn how to recover from small mistakes. The beauty of this craft is that small imperfections often add to the handmade charm of the final product, making your butter toy look uniquely crafted. If a piece breaks off, use a sharp blade to trim the jagged edges before gluing it back together; this makes the seam nearly invisible.
Tips for Longevity and Care
To keep your creation in top condition, avoid exposing the squishy to direct sunlight for long periods, as this can cause the foam to yellow and the paint to become brittle. Store your squishy in a cool, dry place away from heat sources. Because the paint surface is delicate, treat the toy with care rather than pulling on it or using long fingernails, which can puncture the foam and lead to surface degradation over time. If you notice a dull appearance after weeks of use, a quick, light brushing with a dry, soft-bristled brush can remove surface dust without needing soap or water.
Why Tactile Projects Are Beneficial
Many individuals turn to tactile projects because they offer a constructive outlet for stress. The repetitive motion of shaping, painting, and drying allows the mind to quiet down. Engaging in the manual labor required to understand how to make a butter squishy provides a sense of accomplishment that is often lost in digital hobbies. By focusing on the physical texture of the foam, you are practicing mindfulness, which is a powerful tool for emotional balance. Whether you are crafting for yourself or creating gifts for friends, the process remains just as valuable as the finished item.
Conclusion
Mastering how to make a butter squishy is an enjoyable way to express your creativity. By following these steps from picking the right foam to applying the perfect shade of paint you create a fun object that provides endless sensory satisfaction. This hobby proves that simple materials can be turned into something delightful with just a little patience and care. Keep practicing your techniques, and soon you will be able to craft squishies of all shapes, sizes, and colors for friends and family to enjoy. The journey from a block of raw foam to a butter-inspired sensory toy is a testament to the joy of hand-made projects.
FAQs
Is it difficult to learn how to make a butter squishy?
Not at all! With basic materials like foam and paint, most people can learn how to make a butter squishy in just a few attempts. The hardest part is simply waiting for the paint to dry fully before playing with your new toy, as patience is key to a smooth finish.
What type of paint should I use?
Use high-quality acrylic paint mixed with a fabric medium. This combination is essential because it allows the paint to stretch when you squeeze the foam, preventing it from cracking or flaking off over time. You can experiment with different yellow tones to get that perfect “butter” look.
How long does the project take?
While the actual cutting and painting take about an hour of active work, you must plan for the paint to cure for at least twenty-four hours. This makes it a great two-day project for a weekend activity. Rushing the drying process is the most frequent reason for failure.
Can I wash my DIY squishy?
It is best to avoid submerging your squishy in water, as it can damage the paint and affect the structural integrity of the foam. If it gets dusty, use a dry, soft brush or a light dusting of cornstarch to clean the surface gently. Keep it away from wet surfaces to maintain the integrity of your hard work.


