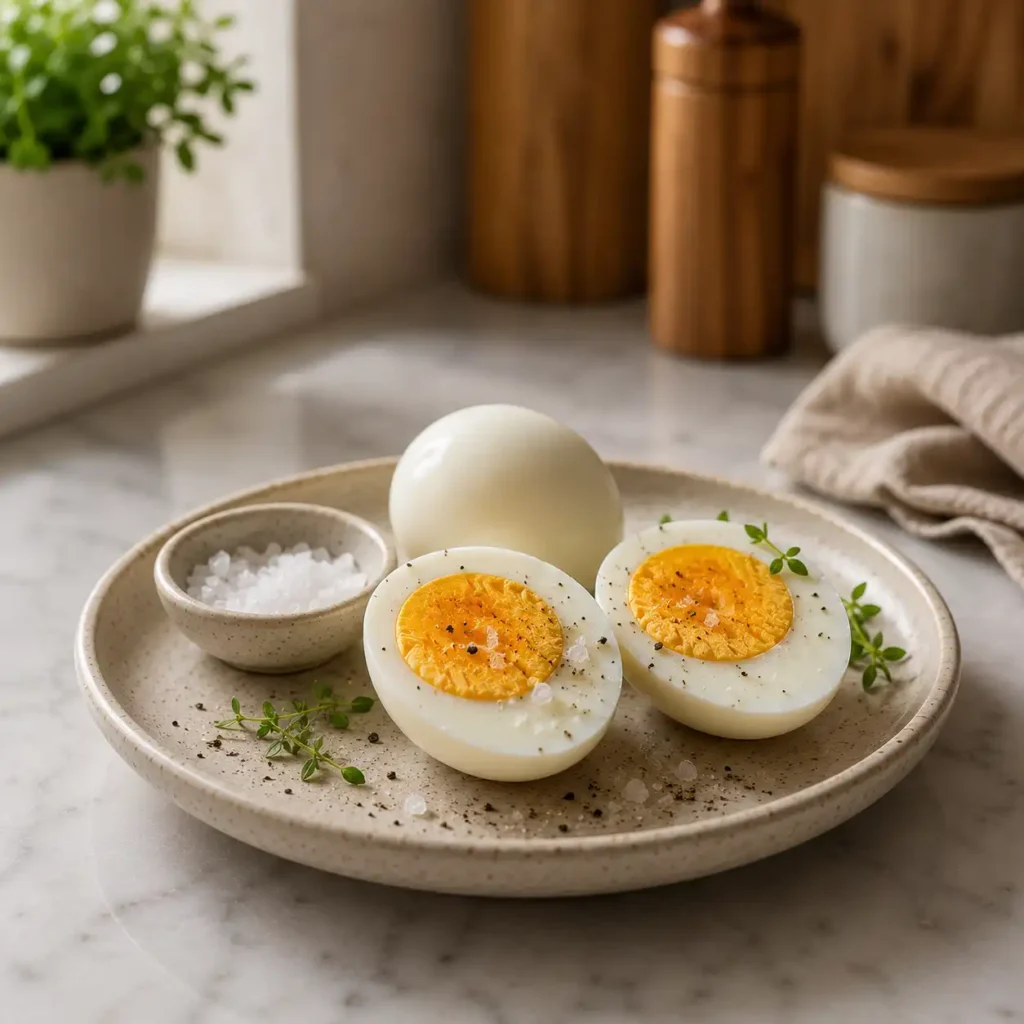
Creating perfect hard boiled eggs can seem deceptively simple, yet many home cooks encounter challenges ranging from stubborn shells to yolks with an unsightly green ring. This detailed guide cuts through the guesswork, presenting a scientific and practical approach to consistently achieving ideal results. Whether you aim for a fully set yolk, creamy and bright, or a slightly softer center, understanding the methods and variables will transform your approach. Prepare to produce eggs that peel cleanly and taste superb, suitable for any culinary application from quick snacks to elaborate salads.
Table of Contents
The Science Behind a Perfectly Cooked Egg
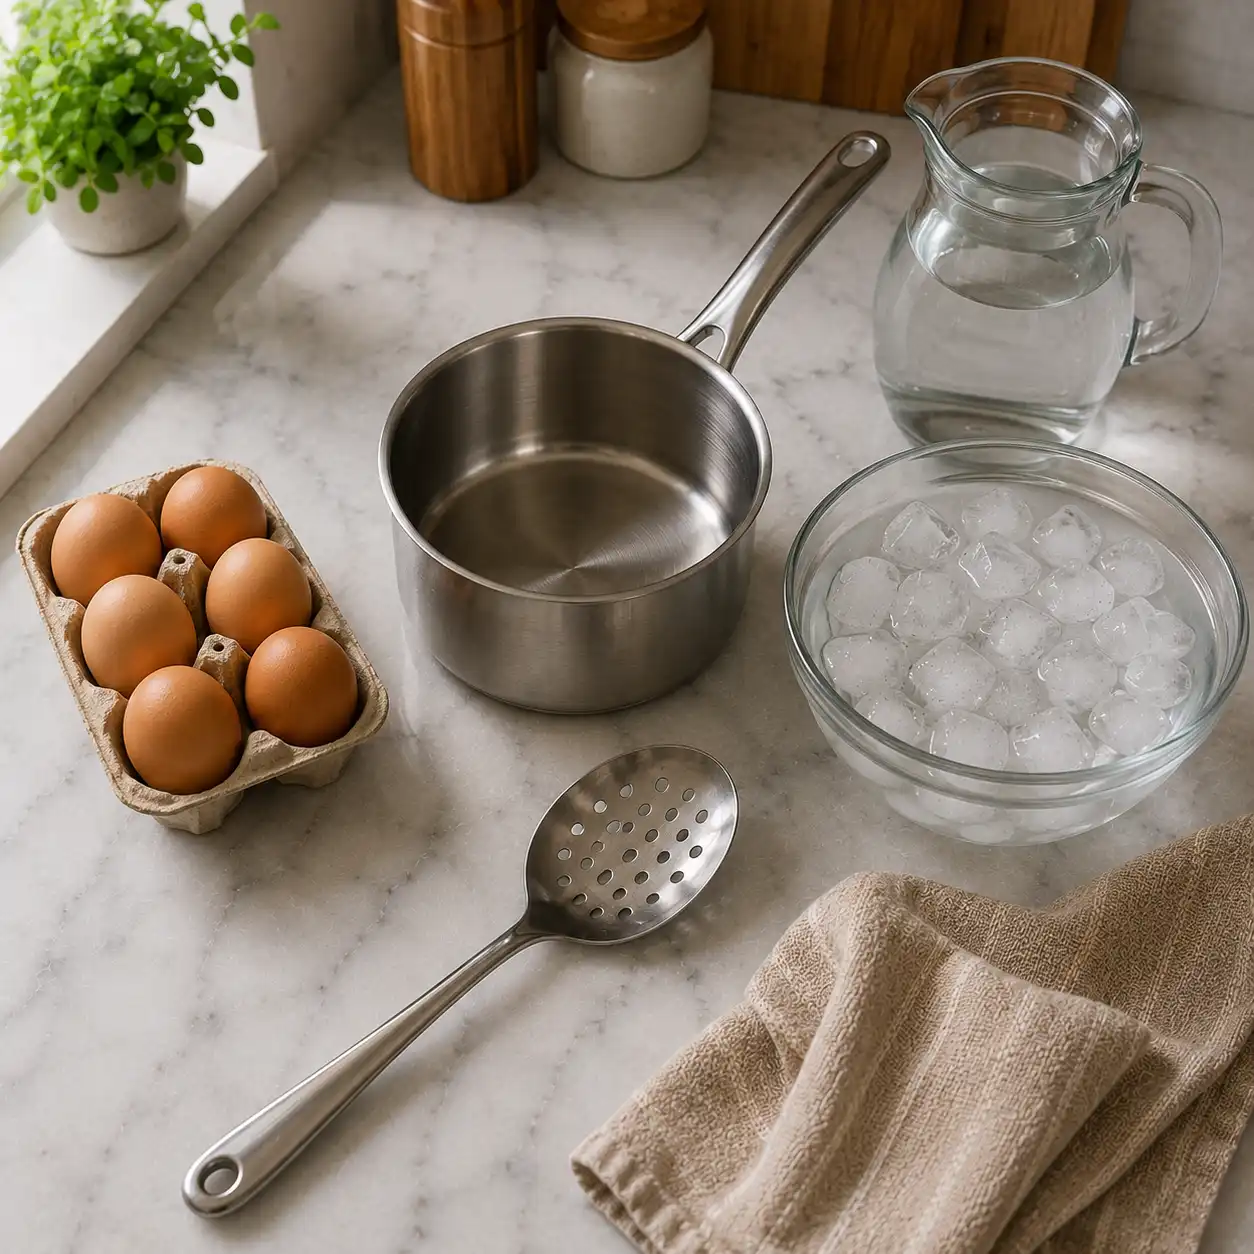
The transformation of a raw egg into a hard-boiled delicacy is a fascinating process rooted in basic chemistry. An egg consists primarily of protein and water. When heat is applied, the proteins in both the white (albumen) and the yolk begin to denature and coagulate. This process is irreversible and dictates the texture of the cooked egg. The white, mainly composed of ovalbumin, coagulates at a lower temperature than the yolk, which contains vitellin. Precision in cooking time and temperature management is paramount to avoid rubbery whites or crumbly, chalky yolks, which are common pitfalls when attempting perfect hard boiled eggs.
Understanding Protein Denaturation
As heat permeates the egg, the tightly coiled protein molecules unravel and then re-form, linking together to create a solid structure. This is protein denaturation. In the egg white, this happens relatively quickly, transitioning from clear liquid to an opaque solid. The yolk requires a higher temperature and a longer duration to solidify completely. Overcooking causes excessive cross-linking, resulting in a rubbery texture in the white and a dry, crumbly yolk. Moreover, excessive heat can lead to a reaction between sulfur compounds in the egg white and iron in the yolk, creating iron sulfide, which manifests as the undesirable grayish-green ring around the yolk.
The Role of Temperature and Time
Controlling the cooking temperature is as vital as managing the duration. A gentle, consistent heat allows the proteins to set gradually, producing a tender white and a smooth yolk. Rapid, high-temperature boiling can cause the egg whites to become tough and can lead to uneven cooking. The precise timing depends on the egg’s starting temperature, its size, and your desired yolk consistency. Achieving perfect hard boiled eggs means finding the sweet spot where the white is firm but yielding, and the yolk is fully set but still moist and vibrantly colored. For a deeper understanding of the general science of food, Wikipedia offers an excellent overview of eggs as food, detailing their composition and culinary uses.
Print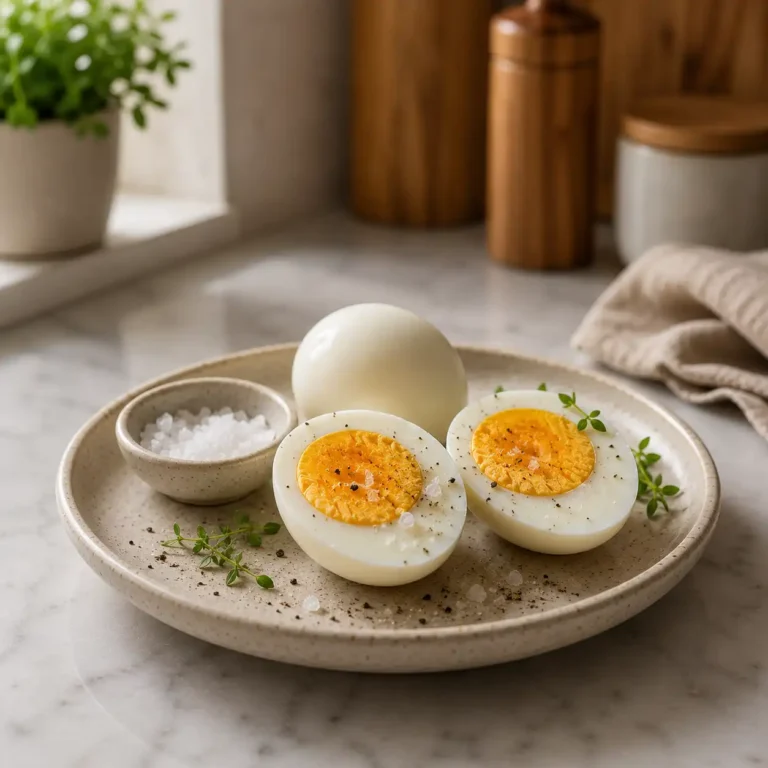
Mastering the Art of Perfect Hard Boiled Eggs
This detailed guide presents a scientific and practical approach to consistently achieving perfect hard-boiled eggs. Learn to produce eggs that peel cleanly and taste superb, suitable for any culinary application, without stubborn shells or unsightly green yolks.
- Total Time: 25 minutes
- Yield: 6 servings 1x
Ingredients
- 6 large eggs
- Water
- Ice
Instructions
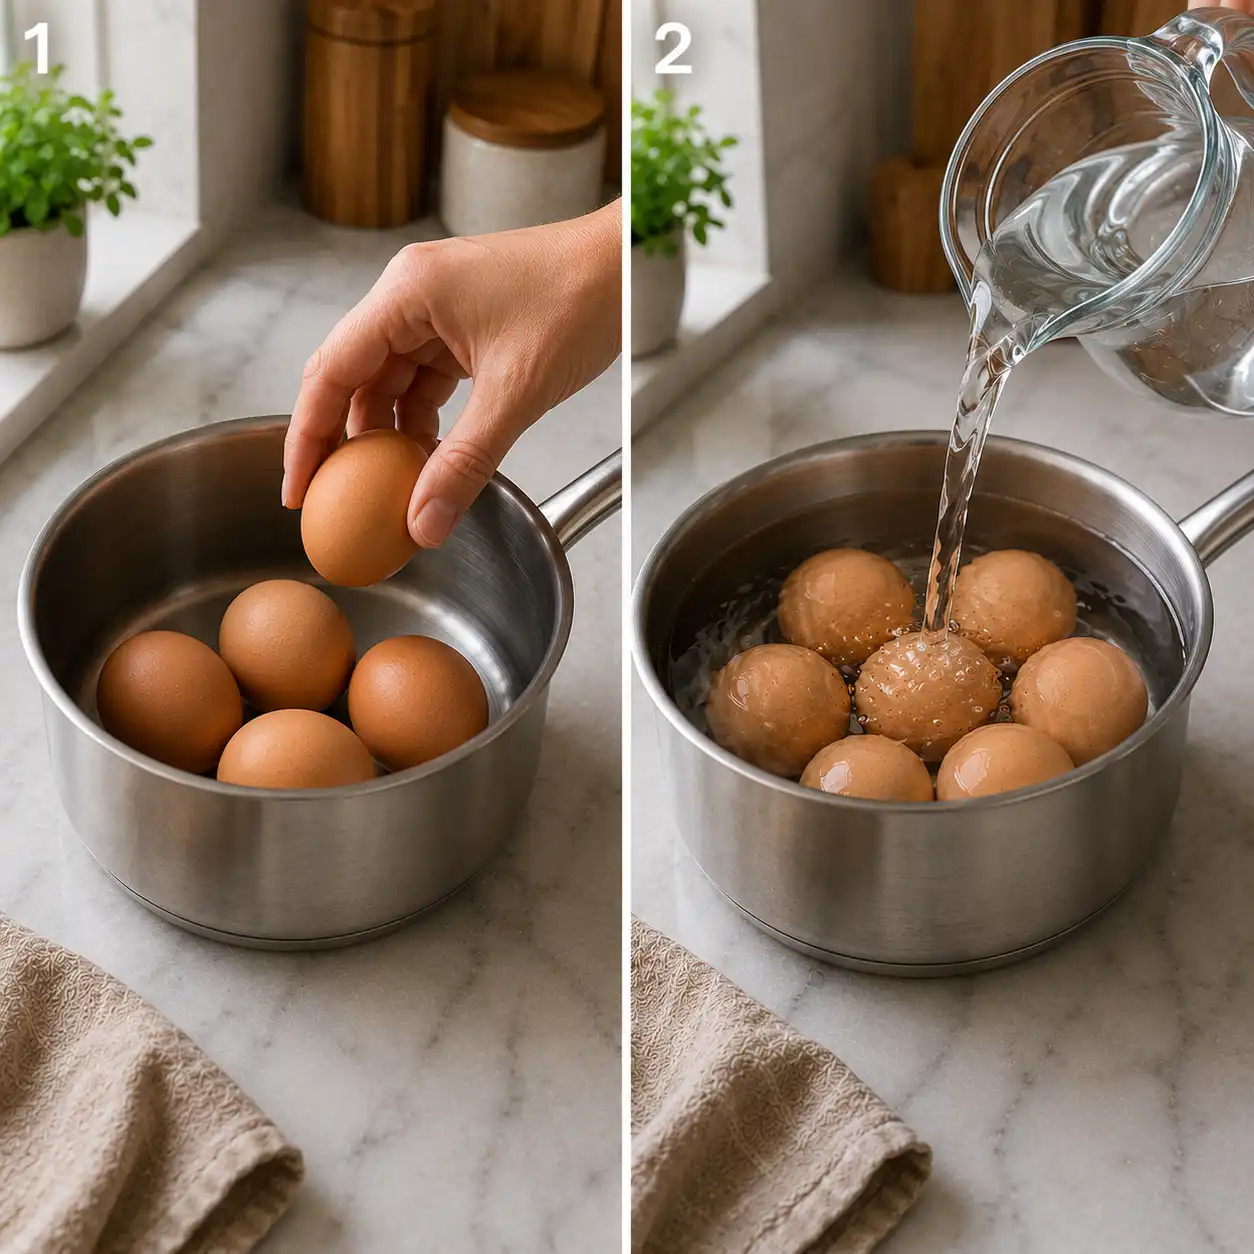
- Step 1: Prepare Eggs – Place eggs in a single layer at the bottom of a saucepan.
- Step 2: Add Water – Cover the eggs with cold water, ensuring there is about one inch of water above the eggs.
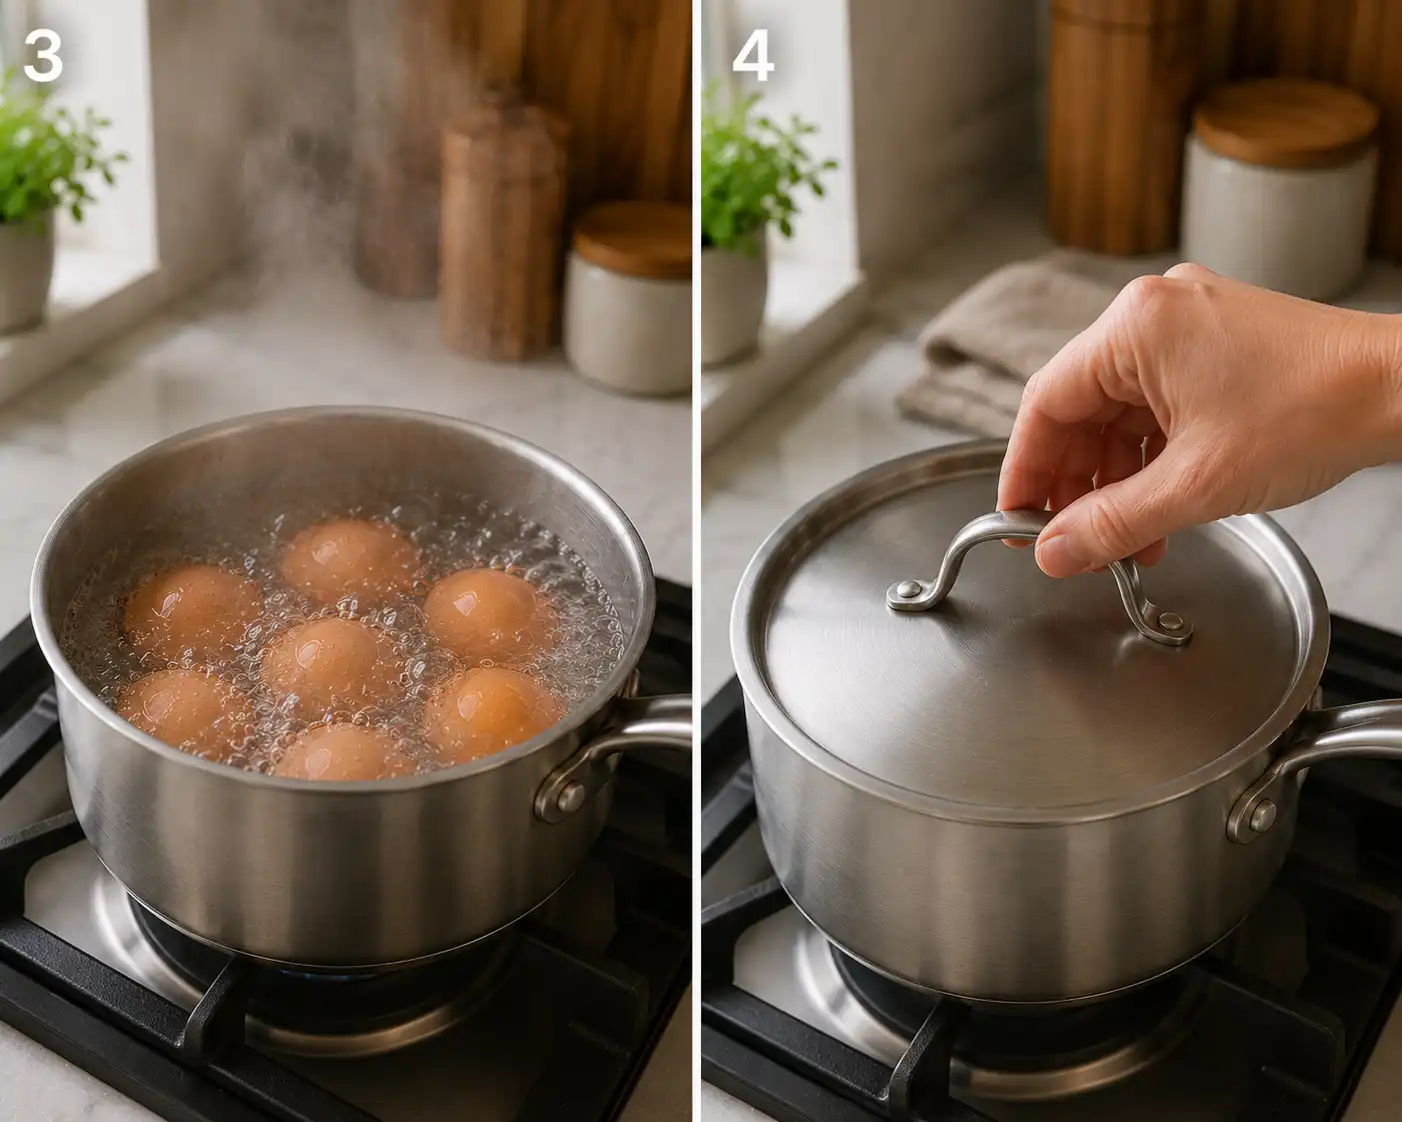
- Step 3: Bring to Boil – Place the saucepan over high heat and bring the water to a rapid, rolling boil.
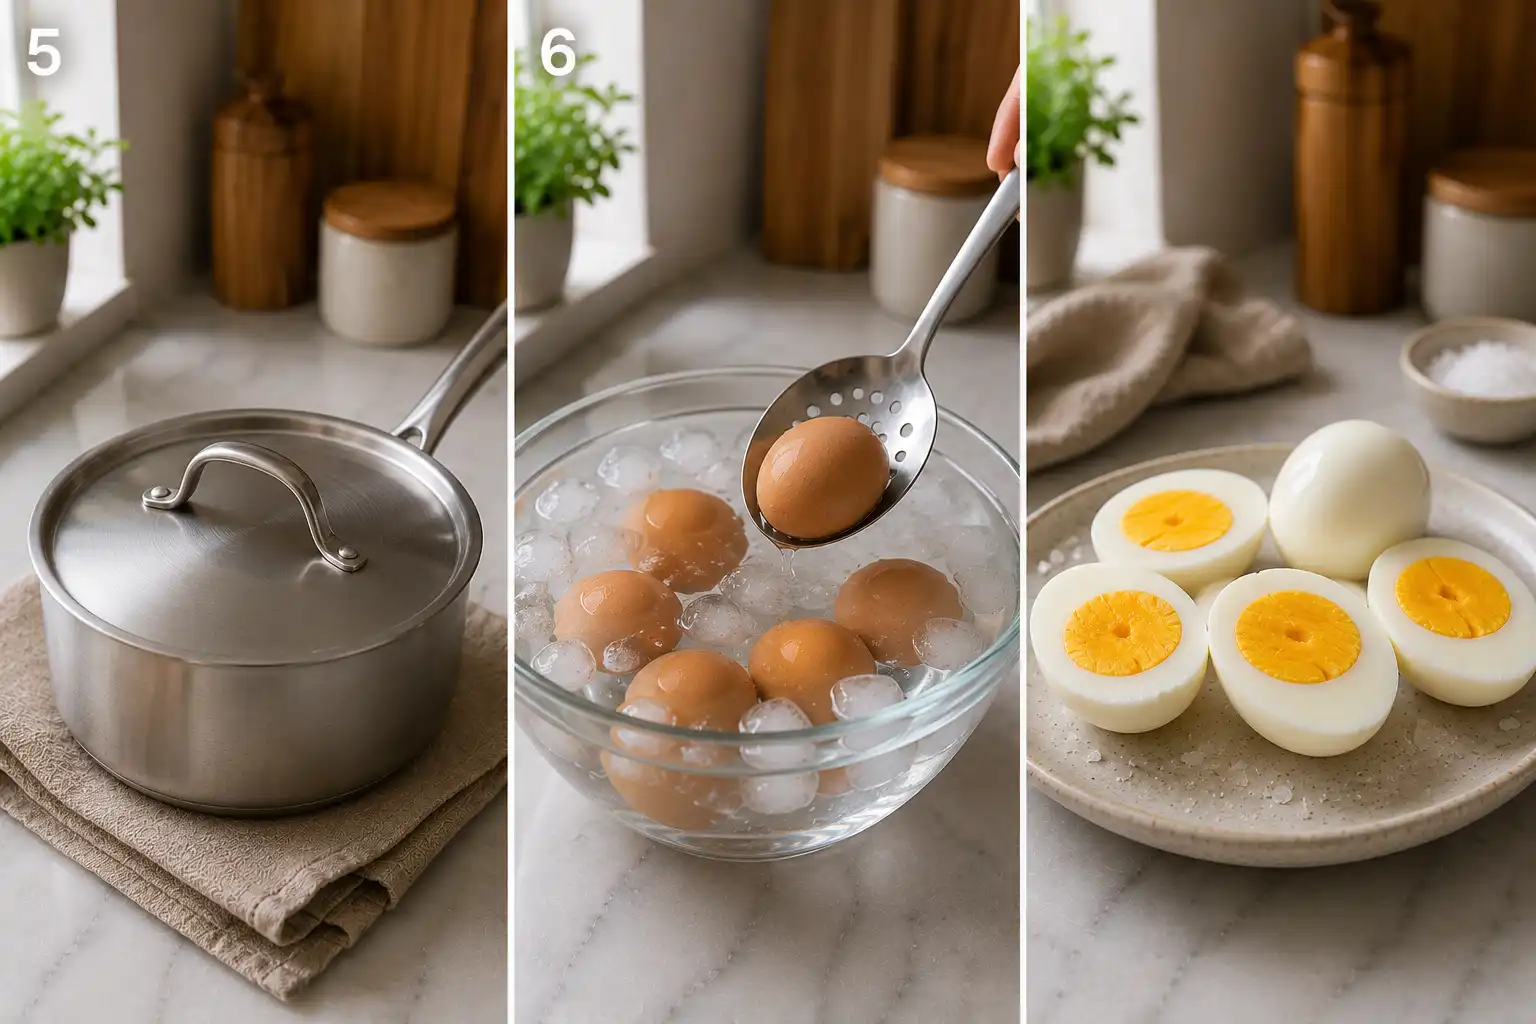
- Step 4: Cook Eggs – Once boiling, immediately remove the saucepan from the heat. Cover it tightly with a lid and let the eggs sit in the hot water for 9-12 minutes, depending on your desired yolk firmness (9 minutes for slightly softer, 12 minutes for fully firm).
- Step 5: Prepare Ice Bath – While the eggs are cooking, prepare a large bowl filled with ice and cold water.
- Step 6: Chill Eggs – Using a slotted spoon, carefully transfer the cooked eggs from the hot water directly into the prepared ice bath. Let them cool completely for at least 5-10 minutes.
- Step 7: Peel and Serve – Once thoroughly chilled, gently tap and roll each egg on a hard surface to crack the shell all over. Peel the eggs under cold running water for easier removal. Serve immediately or store in the refrigerator for up to one week.
Notes
Using older eggs (a week or so old) can make them easier to peel. Cooling eggs rapidly in an ice bath halts the cooking process, preventing the unsightly green ring around the yolk and making them easier to peel. Adding a pinch of salt or a splash of vinegar to the water can sometimes help prevent cracks, though the rapid cooling is key.
- Prep Time: 2 minutes
- Cook Time: 12 minutes
- Category: Breakfast, Snack, Side Dish
- Method: Boiling
- Cuisine: Universal
- Diet: Vegetarian, Gluten-Free
Nutrition
- Serving Size: 1 large egg
- Calories: 78 kcal
- Sugar: 0.6 g
- Sodium: 62 mg
- Fat: 5.3 g
- Saturated Fat: 1.6 g
- Unsaturated Fat: 2.7 g
- Trans Fat: 0.1 g
- Carbohydrates: 0.6 g
- Fiber: 0.1 g
- Protein: 6.3 g
- Cholesterol: 186 mg
Keywords: hard boiled eggs, perfect eggs, easy peel, breakfast, snack, egg salad, protein
Common Challenges and How to Solve Them
Even seasoned cooks sometimes encounter issues when making hard boiled eggs. The most frequent complaints revolve around peeling difficulties, the greenish ring around the yolk, and an unappetizing rubbery texture. Addressing these problems requires understanding their root causes and applying specific techniques that counter them. With the right approach, these common frustrations can become a thing of the past, making your quest for perfect hard boiled eggs a consistent success.
Preventing the Green Ring
The green-gray ring around the yolk is a clear sign of overcooking. It forms when hydrogen sulfide from the egg white reacts with iron in the yolk at high temperatures. While harmless, it detracts from the egg’s appearance and can slightly alter the flavor. To avoid this, cook eggs for the minimum time necessary to achieve your desired doneness and cool them immediately after cooking. Rapid cooling halts the chemical reaction, preserving the yolk’s natural yellow hue and contributing to perfect hard boiled eggs.
Achieving Easy Peeling
Difficult-to-peel eggs are a universal annoyance. Fresh eggs are notorious for sticking to their shells because the albumen adheres strongly to the inner membrane. As eggs age, they become more alkaline, and the pH change causes the membrane to separate more easily from the white. While very fresh eggs are great for scrambling or poaching, slightly older eggs (around 7-10 days old) are ideal for hard boiling. Another trick for easier peeling involves rapidly cooling the eggs in an ice bath immediately after cooking. This rapid temperature change causes the egg to contract, pulling away from the shell, making for perfect hard boiled eggs that peel like a dream.
Avoiding Rubbery Whites and Dry Yolks
The key to tender whites and creamy yolks lies in gentle cooking and precise timing. Overcooking is the primary culprit for rubbery whites and dry, chalky yolks. Boiling eggs aggressively at a rolling boil for too long will toughen the proteins. Instead, opt for a gentler simmer or steaming method. An ice bath after cooking is crucial not only for stopping the green ring formation but also for immediately stopping the cooking process, thereby preventing overcooking and maintaining the desired texture for perfect hard boiled eggs.
The Best Methods for Perfect Hard Boiled Eggs
There are several methods for cooking hard boiled eggs, each with its proponents and advantages. The stovetop method remains the most popular and accessible, offering versatility for different doneness levels. However, alternative methods like steaming and pressure cooking provide consistent results, particularly for those looking for minimal fuss or high-volume preparation. No matter the method, careful attention to timing and post-cooking care is essential to achieving perfect hard boiled eggs.
Stovetop Method: Cold Start vs. Hot Start
The stovetop method offers two main approaches: the cold start and the hot start. The cold start involves placing eggs in a pot, covering them with cold water, bringing to a boil, then simmering or letting them sit. This method is forgiving and reduces cracking. The hot start involves adding eggs to already boiling water. While more prone to cracking, it offers greater precision in timing, especially for softer yolks. Both methods can lead to perfect hard boiled eggs with the right technique.
Cold Start Stovetop Method for Hard Boiled Eggs
- Step 1: Place Eggs in Pot – Carefully place eggs in a single layer at the bottom of a saucepan. Do not overcrowd; give them space.
- Step 2: Cover with Water – Cover the eggs with cold water by about an inch. Make sure all eggs are fully submerged.
- Step 3: Bring to Boil – Place the pot on the stove over high heat and bring the water to a full rolling boil.
- Step 4: Remove from Heat & Cover – As soon as the water reaches a boil, immediately remove the pot from the heat. Cover the pot with a lid.
- Step 5: Let Eggs Sit – Allow the eggs to sit in the hot water for the recommended time based on your desired doneness (see table below).
- Step 6: Ice Bath – Once the time is up, use a slotted spoon to transfer the eggs to an ice bath (a bowl of ice water) immediately. Let them cool for at least 5-10 minutes. This stops the cooking process and makes peeling easier.
Hot Start Stovetop Method for Hard Boiled Eggs
- Step 1: Boil Water – Bring a pot of water to a rolling boil.
- Step 2: Add Eggs Gently – Carefully lower eggs into the boiling water using a slotted spoon or spider.
- Step 3: Reduce Heat to Simmer – As soon as the eggs are in, reduce the heat to a gentle simmer. Do not let the water boil aggressively, as this can cause cracking.
- Step 4: Cook for Desired Time – Cook for the recommended time (see table below) for your desired doneness.
- Step 5: Ice Bath – Immediately transfer the cooked eggs to an ice bath for 5-10 minutes to halt the cooking and aid in peeling.
For those interested in balancing protein with other nutritional goals, incorporating eggs into high-protein, low-carb meals is an excellent choice. Hard boiled eggs are a versatile addition, providing essential nutrients without excess carbohydrates.
Steaming Method
Steaming is another fantastic way to prepare perfect hard boiled eggs. This method subjects the eggs to a consistent, gentle heat, which reduces the chances of cracking and often results in easier-to-peel shells. Place eggs in a steamer basket over an inch or two of boiling water, cover, and steam for about 10-15 minutes depending on desired firmness. Similar to the stovetop methods, an immediate ice bath after steaming is crucial for stopping the cooking and assisting with shell removal, leading to reliably perfect hard boiled eggs.
Instant Pot / Pressure Cooker Method
The Instant Pot or pressure cooker method has gained popularity for its consistency and ease of peeling. The “5-5-5” rule is a common guideline: 5 minutes pressure cook, 5 minutes natural release, 5 minutes in an ice bath. This method often results in shells that practically slide off, making it a favorite for those who prepare large batches of hard boiled eggs. The controlled high-pressure steam provides even cooking, making it simpler to achieve perfect hard boiled eggs without constant monitoring.
Cooking Times for Perfect Hard Boiled Eggs
The following table provides general guidelines. Adjust times slightly based on egg size and desired yolk consistency. Extra-large eggs may require an additional minute.
| Yolk Consistency | Cold Start (Sit Time) | Hot Start (Simmer Time) | Steaming Time | Instant Pot (Low Pressure) |
|---|---|---|---|---|
| Soft-Boiled (Jammy Yolk) | 6-7 minutes | 6-7 minutes | 7-8 minutes | N/A |
| Medium-Boiled (Creamy, Set Edges) | 8-9 minutes | 8-9 minutes | 9-10 minutes | N/A |
| Hard-Boiled (Fully Set, Moist) | 10-12 minutes | 10-12 minutes | 12-14 minutes | 5 minutes cook, 5 min NPR |
Note: For Instant Pot, after the 5-minute natural pressure release (NPR), quick release any remaining pressure before transferring to an ice bath. This method consistently provides perfect hard boiled eggs that are easy to peel.
Peeling Your Perfect Hard Boiled Eggs
Even with the best cooking methods, peeling can still be a hurdle. However, with the right technique, you can minimize shell fragments and torn whites. The ice bath is your first line of defense, causing the egg to shrink slightly and separate from the shell membrane. Following this with a gentle, calculated peeling approach will yield smooth, unblemished perfect hard boiled eggs ready for consumption.
The Tapping and Rolling Technique
- Step 1: Crack Gently – After cooling in an ice bath, gently tap the wide end of the egg on a hard surface to crack the shell.
- Step 2: Roll Evenly – Roll the egg between your palms or on the counter with gentle pressure to create a network of fine cracks all over the shell.
- Step 3: Peel Under Water (Optional) – Start peeling from the wide end, where the air pocket is typically located. Peeling under a thin stream of cool water can help wash away small shell fragments and assist in separating the membrane from the egg white, making the process smoother for perfect hard boiled eggs.
- Step 4: Remove Shell Segments – Remove the shell in larger segments, taking care not to tear the white. If the membrane sticks, try peeling from a different spot.
Storing and Serving Perfect Hard Boiled Eggs
Once you’ve achieved your perfect hard boiled eggs, proper storage and creative serving suggestions will help you get the most out of your efforts. Hard boiled eggs are a versatile ingredient, fitting into many meals and snacks, and their convenient nature makes them excellent for meal prepping. Storing them correctly will keep them fresh and ready for when hunger strikes or a recipe calls.
Storage Best Practices
Store perfect hard boiled eggs in the refrigerator. If unpeeled, they typically last for up to one week. Keeping them in their shells offers better protection from absorbing refrigerator odors and helps maintain their moisture. Peeled hard boiled eggs should be stored in an airtight container with a damp paper towel to prevent them from drying out, and they are best consumed within 2-3 days for optimal freshness and texture. Proper storage is key to enjoying your perfect hard boiled eggs safely.
Creative Serving Ideas
Perfect hard boiled eggs are much more than just a snack; they are a culinary cornerstone. Slice them for quick, protein-rich additions to salads, like a keto Cobb salad, which frequently features them. Mash them with mayonnaise and seasonings for classic egg salad sandwiches, or chop them to mix into a delightful chicken salad recipe for added texture and flavor. They also make a fantastic garnish for soups, a wholesome component of bento boxes, or a simple side dish to complement a healthy green smoothie for breakfast. The possibilities are vast for incorporating these nutritious powerhouses into your diet.
Nutritional Benefits of Hard Boiled Eggs
Beyond their culinary versatility, perfect hard boiled eggs pack a powerful nutritional punch. They are an excellent source of high-quality protein, which is essential for muscle repair, growth, and overall bodily functions. Eggs also provide a wealth of vitamins and minerals, including vitamin D, B vitamins (B12, B6, folate, riboflavin), selenium, zinc, and iron. The yolk contains choline, a vital nutrient for brain health, and antioxidants like lutein and zeaxanthin, beneficial for eye health. With relatively few calories, hard boiled eggs offer substantial satiety, making them an ideal food for managing hunger and supporting a balanced diet.
A Complete Protein Source
Eggs are considered a “complete protein,” meaning they contain all nine essential amino acids that the human body cannot produce on its own. This makes them a highly efficient and bioavailable protein source. Consuming perfect hard boiled eggs regularly can contribute to a feeling of fullness, which can be advantageous for weight management. Their protein content also helps in stabilizing blood sugar levels, preventing the energy crashes often associated with carbohydrate-heavy meals. This makes them an intelligent addition to various dietary plans.
FAQs
How long should I boil eggs for perfect hard boiled eggs?
For fully cooked yet creamy yolks, cook eggs for 10 to 12 minutes depending on their size and the cooking method. Immediately transfer them to an ice bath to stop the cooking process.
Why do hard boiled eggs get a green ring around the yolk?
The green-gray ring forms when eggs are overcooked. It results from a reaction between sulfur in the egg white and iron in the yolk. Using the correct cooking time and cooling the eggs in ice water prevents this.
What is the easiest way to peel hard boiled eggs?
Use eggs that are about 7 to 10 days old rather than very fresh eggs. After cooking, place them in an ice bath for at least 5 to 10 minutes before peeling for the best results.
Should I start with cold water or boiling water?
Both methods work well. A cold start is more forgiving and reduces cracking, while a hot start offers more precise control over yolk consistency.
Can I make perfect hard boiled eggs in an Instant Pot?
Yes. The popular 5-5-5 method works well: pressure cook for 5 minutes, allow a 5-minute natural release, then cool the eggs in an ice bath for 5 minutes.
How long do hard boiled eggs last in the refrigerator?
Unpeeled hard boiled eggs can be stored in the refrigerator for up to one week. Peeled eggs should be kept in an airtight container and are best eaten within 2 to 3 days.
Are hard boiled eggs healthy?
Yes. Hard boiled eggs are an excellent source of high-quality protein, vitamins, minerals, choline, and antioxidants. They are also filling and can fit into many healthy eating plans.
Why are my hard boiled egg whites rubbery?
Rubbery whites usually mean the eggs were overcooked. Gentle cooking and removing the eggs to an ice bath as soon as they’re done helps maintain a tender texture.
Can I prepare hard boiled eggs ahead of time for meal prep?
Absolutely. Hard boiled eggs are ideal for meal prep because they store well in the refrigerator and can be added to salads, sandwiches, grain bowls, or enjoyed as a quick snack throughout the week.
Which cooking method makes hard boiled eggs easiest to peel?
Steaming and pressure cooking are often considered the easiest methods for peeling. Combined with an ice bath, these methods help the shell separate cleanly from the egg.
Conclusion
Achieving perfect hard boiled eggs is a culinary skill that, once mastered, becomes an invaluable asset in any kitchen. By understanding the science of protein coagulation, controlling cooking temperatures and times, and applying effective peeling techniques, you can consistently produce eggs with tender whites and creamy, vibrantly colored yolks. From a quick, nutritious snack to a versatile ingredient in countless dishes, these expertly prepared eggs will undoubtedly become a staple in your diet. Embrace these techniques, and enjoy the delicious, simple satisfaction of a perfectly hard boiled egg every time.