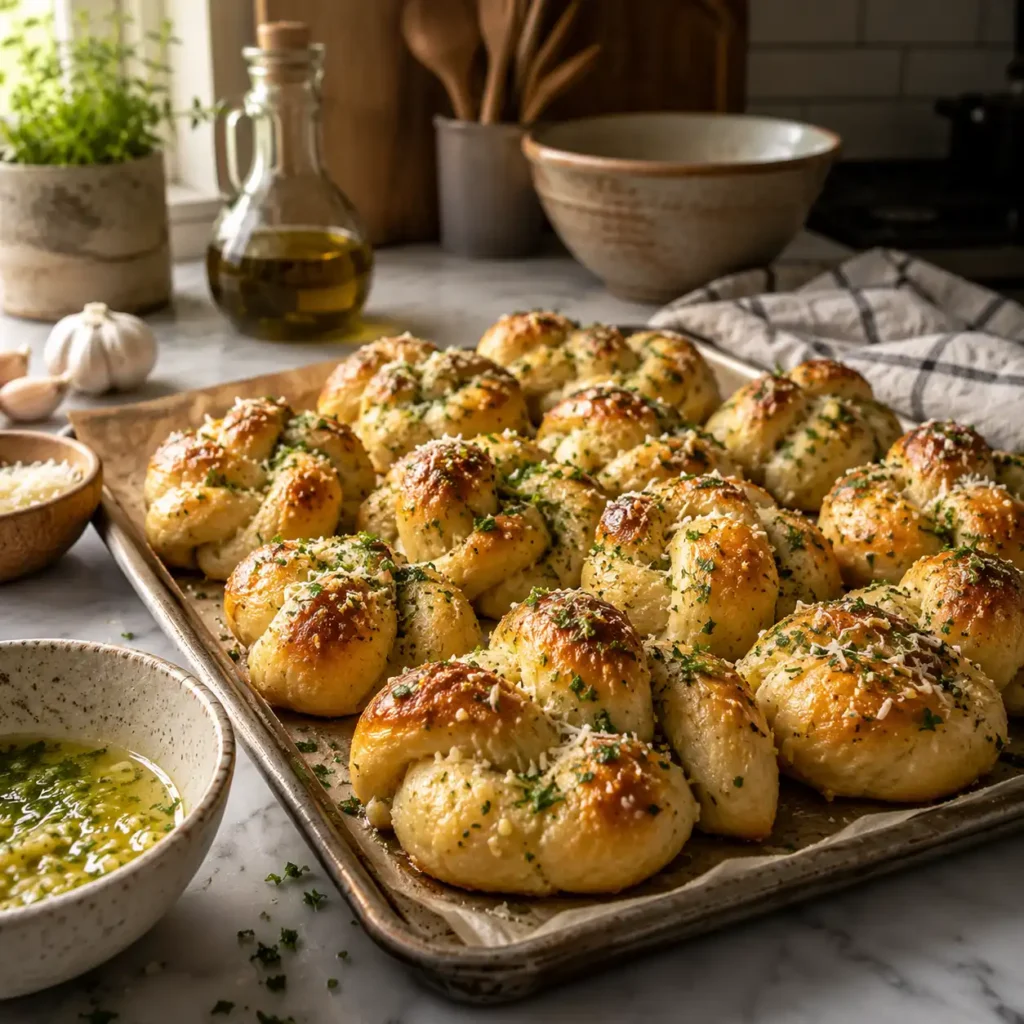
Few kitchen aromas match the irresistible scent of fresh bread mingling with pungent garlic and rich butter. Making homemade garlic knots allows you to bring the authentic pizzeria experience right into your own kitchen, providing a level of freshness and customization that store-bought options simply cannot match. Whether you are preparing a side for a family pasta night or looking for the perfect appetizer for a weekend gathering, these golden, herb-flecked treats are always a crowd favorite. Mastering the technique requires a bit of patience, but the results are incredibly rewarding for any home baker.
Table of Contents
The Foundation of Quality Homemade Garlic Knots
Choosing the Right Flour for Your Dough
The texture of your homemade garlic knots depends largely on the protein content of your flour. Bread flour is often the preferred choice for professional bakers because its high protein levels create a strong gluten network. This results in a chewy, elastic crumb that holds its shape well during the knotting process. However, all-purpose flour is a suitable alternative if you prefer a slightly softer, more tender bite. When mastering homemade garlic knots, the foundation begins with the dough. You can find a reliable pizza dough recipe that works perfectly for this purpose, providing the right elasticity and chewiness required for beautiful shapes.
Understanding the Role of Yeast
Active dry yeast and instant yeast are the two most common types used in home kitchens. Active dry yeast requires proofing in warm water with a pinch of sugar to confirm it is alive, while instant yeast can be mixed directly into the dry ingredients. Temperature is critical during this stage; water that is too hot will kill the yeast, while water that is too cold will prevent it from waking up. For those interested in the chemistry of fermentation, King Arthur Baking’s guide to yeast provides deep insights into how temperature and moisture affect dough rise, making it easier to predict your baking timeline accurately.
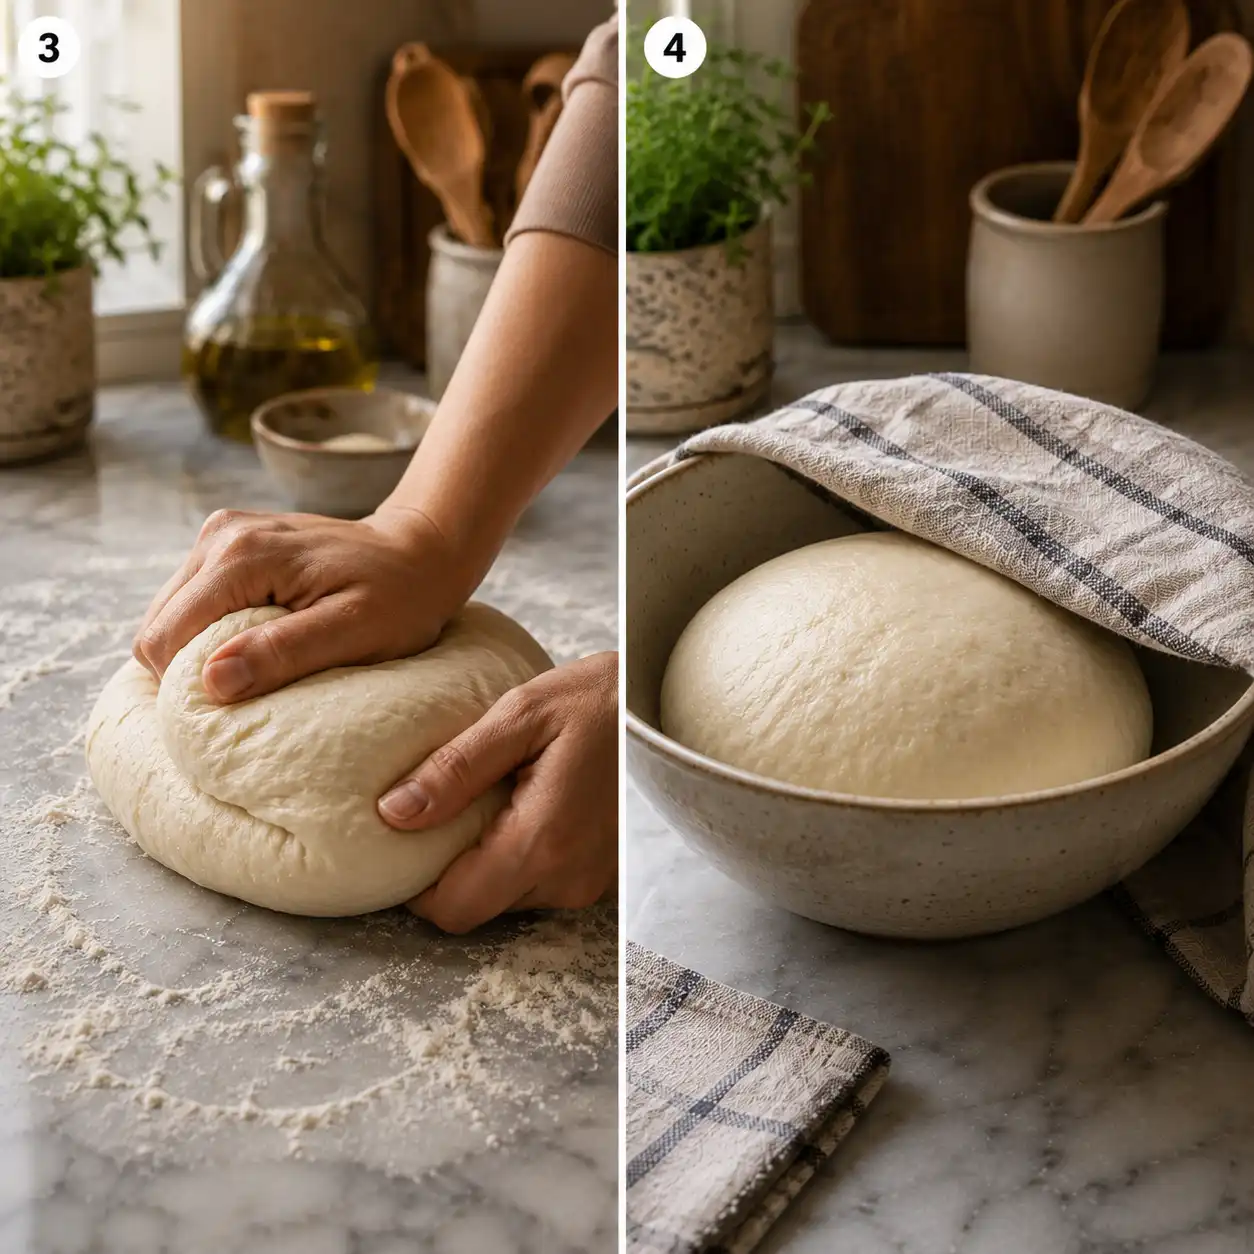
The Importance of the First Rise
Allowing the dough to rise in a warm, draft-free environment is essential for developing flavor and texture. During this period, the yeast consumes sugars and releases carbon dioxide, which causes the dough to expand. This process, known as bulk fermentation, gives the bread its airy structure. A successful first rise should see the dough double in size, typically taking between one to two hours depending on the ambient temperature. If you rush this stage, your homemade garlic knots may turn out dense and heavy rather than light and fluffy. Proper proofing makes certain that the interior of the knot is soft enough to soak up the garlic butter later.
Print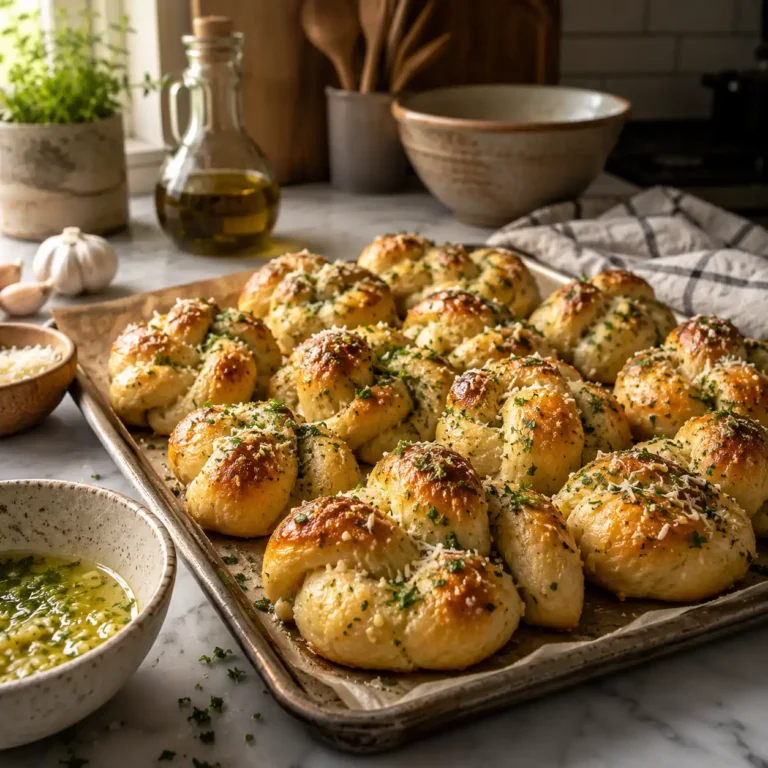
The Ultimate Guide to Perfect Homemade Garlic Knots
Master the art of homemade garlic knots, bringing the authentic pizzeria experience right into your kitchen. These golden, herb-flecked treats are a crowd-pleasing side or appetizer, offering superior freshness and customization.
- Total Time: 2 hours 15 minutes
- Yield: 12–16 knots 1x
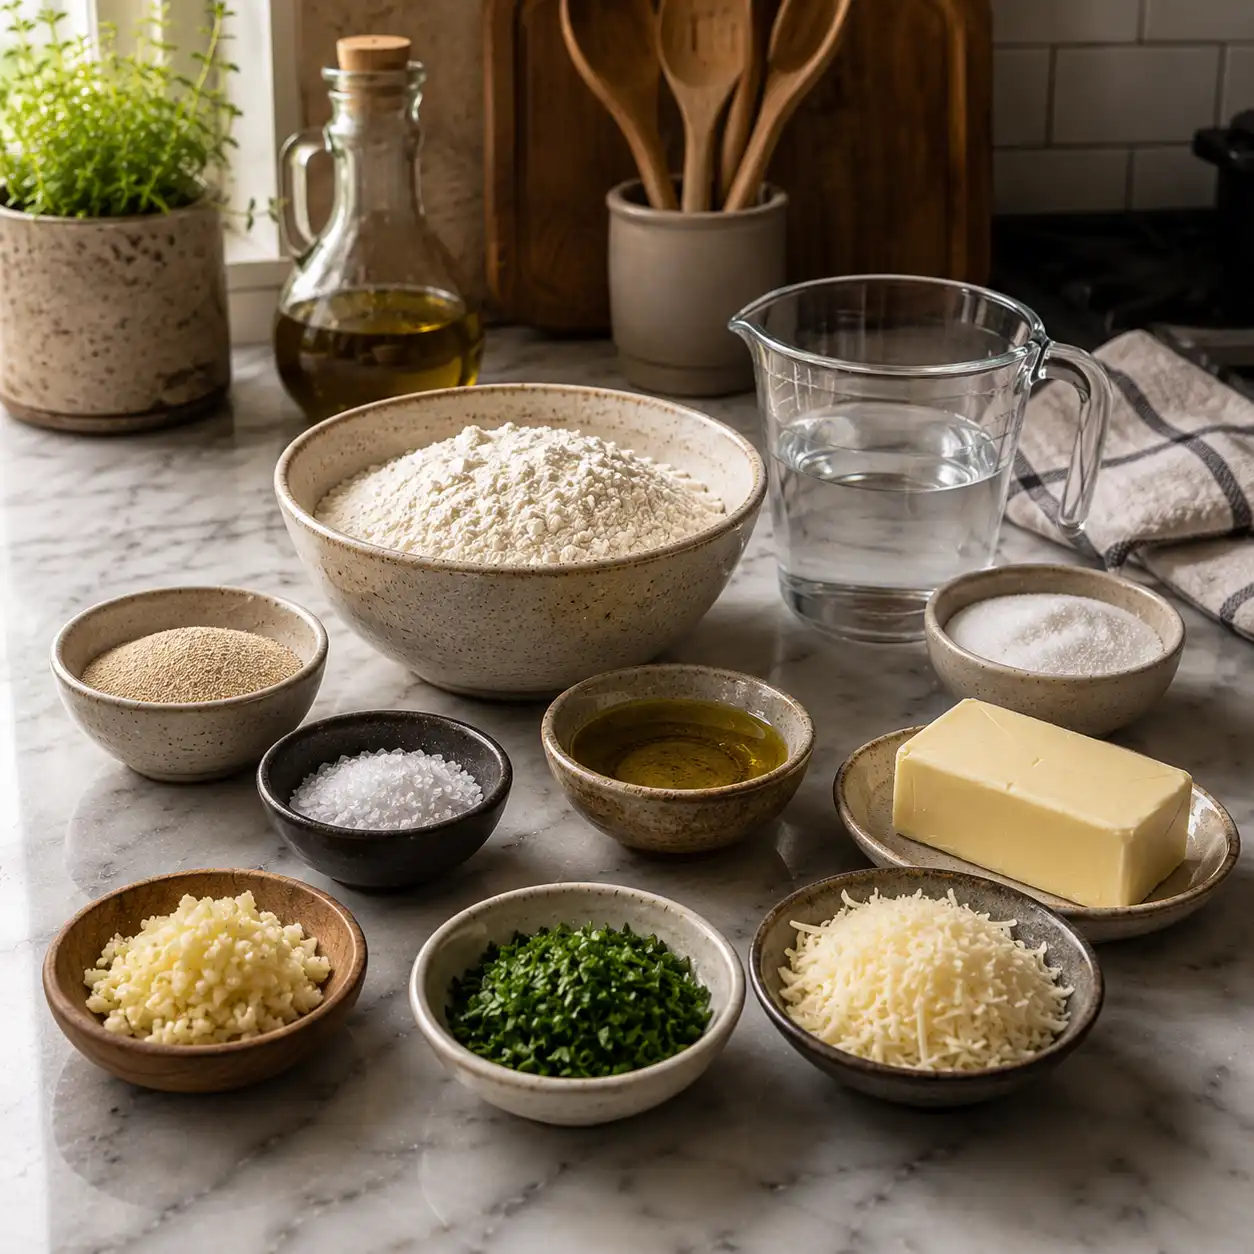
Ingredients
- 1 cup warm water (105-115°F)
- 1 tsp granulated sugar
- 2 ¼ tsp active dry yeast (1 packet)
- 2 ½ cups all-purpose flour, plus more for dusting
- 1 tsp salt
- 2 tbsp olive oil, plus more for bowl
- ½ cup unsalted butter, melted
- 4–5 cloves garlic, minced
- ¼ cup fresh parsley, chopped
- ¼ cup grated Parmesan cheese
- ½ tsp red pepper flakes (optional)
Instructions
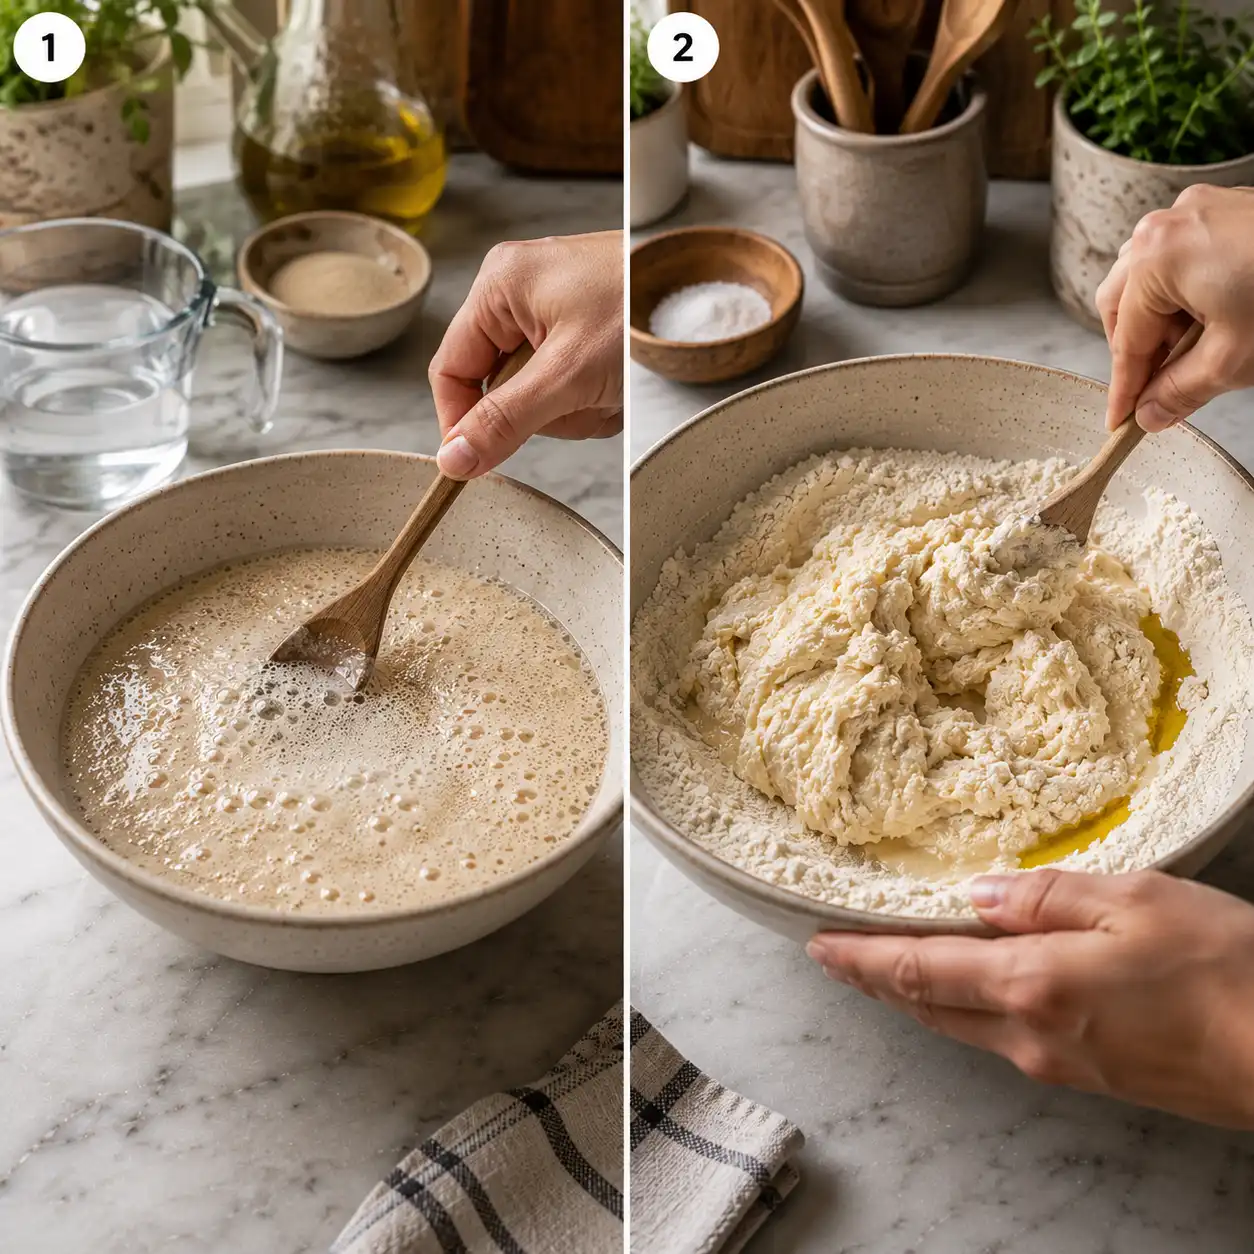
- Step 1: Activate Yeast – In a small bowl, combine warm water and sugar, then sprinkle yeast over. Let sit for 5-10 minutes until foamy.
- Step 2: Prepare Dough – In a large bowl, whisk together flour and salt. Pour in the yeast mixture and 2 tbsp olive oil. Mix until a shaggy dough forms.
- Step 3: Knead Dough – Turn the dough out onto a lightly floured surface and knead for 8-10 minutes until smooth and elastic.
- Step 4: First Rise – Place the dough in a lightly oiled bowl, turn to coat, cover with plastic wrap, and let rise in a warm place for 1-1.5 hours, or until doubled in size.
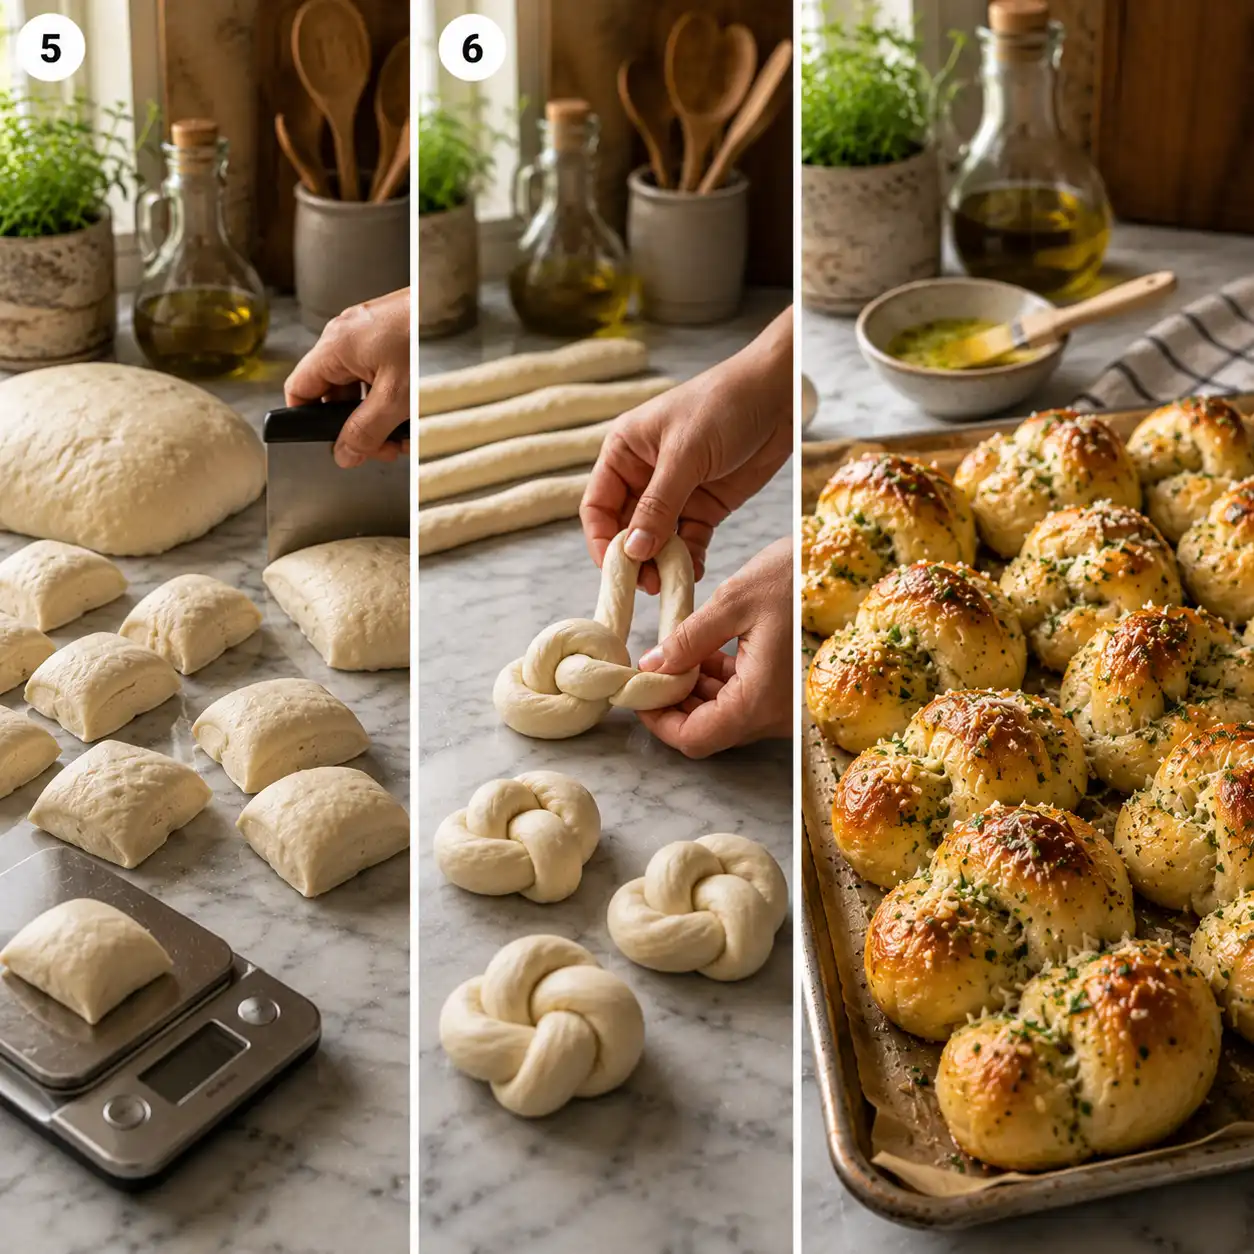
- Step 5: Shape Knots – Punch down the dough. Roll it into a roughly 12×8 inch rectangle. Cut into 1-inch wide strips, then tie each strip into a knot.
- Step 6: Second Rise – Arrange knots on a parchment-lined baking sheet, cover loosely, and let rise for another 30-45 minutes.
- Step 7: Bake Knots – Preheat oven to 375°F (190°C). Bake for 12-15 minutes, or until golden brown.
- Step 8: Prepare Garlic Butter – While knots bake, melt butter in a small saucepan. Stir in minced garlic, chopped parsley, and red pepper flakes (if using).
- Step 9: Finish Knots – Remove knots from oven. Immediately brush generously with the garlic butter mixture and sprinkle with Parmesan cheese. Serve warm.
Notes
For the best results, ensure your water temperature is correct for activating the yeast. Don’t rush the rising process; patience will result in fluffier knots. Freshly minced garlic and parsley make a significant difference in flavor.
- Prep Time: 30 minutes
- Cook Time: 15 minutes
- Category: Appetizer, Bread, Side Dish
- Method: Baking, Kneading
- Cuisine: Italian-American
- Diet: Vegetarian
Nutrition
- Serving Size: 1 knot
- Calories: 180 kcal
- Sugar: 2g
- Sodium: 250mg
- Fat: 8g
- Saturated Fat: 4g
- Unsaturated Fat: 3g
- Trans Fat: 0.1g
- Carbohydrates: 22g
- Fiber: 1g
- Protein: 5g
- Cholesterol: 15mg
Keywords: garlic knots, homemade bread, pizzeria style, garlic butter, appetizer, side dish
The Science of Garlic Infusion and Flavor
Fresh Garlic vs. Garlic Powder
For the most authentic flavor, fresh garlic is non-negotiable. Fresh cloves contain sulfur compounds that release a sharp, spicy aroma when crushed or minced. While garlic powder can be used in a pinch, it lacks the complexity and “bite” that defines a high-quality knot. When using fresh garlic, it is important to mince it very finely or use a garlic press so that the flavor spreads evenly throughout the butter coating. The infusion of fresh garlic into the butter is what makes these knots stand out, much like the seasoning used in garlic butter chicken bites skillet dishes, where the garlic is the star of the flavor profile.
Preparing the Herb Butter Glaze
The glaze is more than just melted butter; it is a carefully constructed emulsion of fat, aromatics, and herbs. Using high-quality unsalted butter allows you to control the sodium levels of your homemade garlic knots. Simmering the minced garlic in the butter over low heat for a few minutes softens the harshness of the raw garlic and allows the oils to permeate the fat. Be careful not to brown the garlic, as burnt garlic becomes bitter and can ruin the entire batch. Adding fresh parsley at the very end provides a pop of color and a grassy freshness that cuts through the richness of the butter.
The Role of Salt and Cheese
Salt is a vital flavor builder in both the dough and the topping. In the dough, it regulates yeast activity and strengthens gluten; in the topping, a sprinkle of sea salt or kosher salt makes the garlic flavor more prominent. Many bakers also choose to add finely grated Parmesan or Romano cheese to their homemade garlic knots immediately after they come out of the oven. The residual heat from the bread allows the cheese to adhere to the butter, creating a savory crust. Avoid using pre-shredded cheeses that contain anti-caking agents, as these will not melt as smoothly as cheese grated directly from a block.
Step-by-Step Instructions for Homemade Garlic Knots
Preparing the Dough and Shaping
Consistency is key when portioning your dough. If the pieces are of different sizes, they will bake at different rates, leading to some knots being overcooked while others remain doughy in the middle. Using a kitchen scale to measure equal portions of dough (roughly 40 to 50 grams each) is the best way to achieve uniform results. Once portioned, you will roll each piece into a long rope before tying it into a simple overhand knot. This shape creates many nooks and crannies that are perfect for catching and holding the garlic butter during the final stages of preparation.
- Step 1: Activate Yeast – Combine warm water, sugar, and yeast in a bowl and let it sit until it becomes foamy and fragrant.
- Step 2: Mix Ingredients – Add the flour, salt, and a tablespoon of olive oil to the yeast mixture, stirring until a shaggy dough forms.
- Step 3: Knead Dough – Knead the dough on a floured surface for about 8 to 10 minutes until it becomes smooth, elastic, and bounces back when poked.
- Step 4: First Rise – Place the dough in a lightly greased bowl, cover it with a damp cloth, and let it rise in a warm spot for 90 minutes.
- Step 5: Divide and Roll – Punch down the risen dough and divide it into 16 equal pieces, then roll each piece into an 8-inch rope.
- Step 6: Tie the Knots – Form a loop with each rope and tuck the ends through the center to create the classic knot shape.
- Step 7: Second Rise – Arrange the knots on a parchment-lined baking sheet and let them rise for another 30 minutes to regain their fluffiness.
- Step 8: Bake and Glaze – Bake at 400°F (200°C) for 12 to 15 minutes, then immediately toss them in the prepared garlic butter mixture while hot.
Pro Tips for Texture and Appearance
The Secret to the Perfect Golden Crust
Achieving a beautiful golden-brown color requires the right oven temperature and air circulation. A hot oven is necessary to create “oven spring,” which is the final burst of rising that happens in the first few minutes of baking. The golden-brown crust of the bread is the result of the Maillard reaction, a chemical process explained by Exploratorium’s culinary science resources, which details how proteins and sugars react under heat to produce complex flavors and colors. For an even deeper color, some bakers brush the knots with a light egg wash or a bit of plain melted butter before they enter the oven.
Avoiding the Common Pitfall of Soggy Knots
One common mistake is applying the garlic butter too early or using too much liquid. If the knots are soaked in butter before they are fully baked, the fat can inhibit the rise and lead to a greasy, heavy texture. The best method is to bake the knots until they are fully structured and browned, then toss them in the garlic mixture while they are screaming hot. The heat from the bread will help the butter soak in just enough to add flavor without compromising the structural integrity of the knot. Always drain any excess butter from the bowl after tossing to keep the bottoms from becoming mushy.
Incorporating Variations and Toppings
While the classic garlic and parsley combination is hard to beat, homemade garlic knots are a versatile canvas for other flavors. You might consider adding a pinch of crushed red pepper flakes for heat or swapping the parsley for rosemary or thyme for a more earthy profile. For a decadent twist, stuff a small cube of mozzarella into the center of the dough before tying the knot. Baking these treats is a great addition to your collection of savory brunch breads weekend traditions, offering a warm and buttery option for family gatherings that guests will talk about long after the meal is over.
Serving and Storage Recommendations
The Best Dipping Sauces for Garlic Knots
While homemade garlic knots are delicious on their own, a high-quality dipping sauce can make the experience even better. A classic marinara sauce, rich with tomatoes and basil, provides a bright acidity that balances the heavy butter and garlic. For something different, a creamy Alfredo sauce or a spicy arrabbiata can offer a new perspective. While marinara is the traditional choice, serving these with a cool tzatziki recipe can provide a refreshing contrast to the rich, buttery bread, especially if you are serving them as part of a Mediterranean-themed appetizer spread.
How to Reheat for Maximum Freshness
Bread products tend to go stale quickly as the starch molecules recrystallize. If you have leftovers, avoid using the microwave, as it often makes the bread rubbery or creates hard spots. Instead, the best way to revive homemade garlic knots is in a toaster oven or a conventional oven set to 350°F (175°C). Wrap the knots loosely in aluminum foil to prevent them from drying out and heat them for about 5 to 8 minutes. This gentle warming process softens the butter and restores the fluffy texture of the interior, making them taste almost as good as the moment they first came out of the oven.
Storing for Later Use
If you plan to eat the knots within 24 hours, they can be stored in an airtight container at room temperature. For longer storage, freezing is the best option. You can freeze the knots either before or after baking. If freezing before baking, tie the knots and freeze them on a tray before transferring them to a bag; when ready to eat, let them thaw and rise before proceeding with the baking steps. If freezing after baking, make sure they are completely cool before sealing them in a freezer bag. They will stay fresh for up to two months when kept at a consistent freezing temperature.
Comparison of Garlic Preparations
| Garlic Type | Flavor Profile | Best Use Case | Texture Impact |
|---|---|---|---|
| Finely Minced Fresh | Sharp, pungent, and traditional | Stirring into warm butter for tossing | Adds small, flavorful bits to the surface |
| Roasted Garlic Paste | Sweet, mellow, and caramelized | Mixing directly into the dough | Provides a smooth, integrated flavor |
| Garlic Powder | Mild, consistent, and salty | Emergency substitution or dry rub | No change to texture; very uniform |
| Slivered Garlic | Bold and intense when bitten | Garlic-heavy specialty knots | Creates crunchy, potent garlic chips |
FAQs
Can I use store-bought pizza dough for this?
Yes, store-bought dough is an excellent time-saver. Make sure to let the dough come to room temperature before you try to work with it. Cold dough is difficult to stretch and will likely snap back, making it nearly impossible to tie into knots. Giving it an hour on the counter will make the shaping process much easier.
Why are my garlic knots tough?
Toughness is usually caused by over-kneading the dough or adding too much flour. When you add too much flour, the hydration level drops, leading to a stiff and dry bread. Only add enough flour to keep the dough from sticking to your hands. Additionally, make sure you are not over-baking them, as losing too much moisture will also result in a hard texture.
Can I make these vegan?
Absolutely. You can easily adapt this recipe by substituting the butter with a high-quality olive oil or a vegan butter alternative. Most standard bread doughs are naturally vegan as they only contain flour, water, yeast, salt, and oil. For the cheese topping, you can use nutritional yeast or a vegan parmesan substitute to maintain that savory flavor profile.
How do I get the knots to stay tied?
The key is the length of the dough rope. If the rope is too short, you won’t have enough slack to tuck the ends in securely. Aim for a rope that is at least 8 inches long. If the dough is resisting and shrinking back, let it rest for 5 minutes to allow the gluten to relax, then try stretching it again. A relaxed dough is much more cooperative during shaping.
Conclusion
Creating homemade garlic knots is a culinary skill that brings immense satisfaction to both the baker and those lucky enough to eat them. By focusing on the quality of your dough, the freshness of your aromatics, and the precision of your baking technique, you can produce a side dish that rivals any professional bakery. These knots represent the perfect balance of soft, chewy bread and bold, savory seasoning. With the steps and tips provided, you are now ready to master this classic comfort food and make it a staple in your own kitchen rotation.
1 thought on “The Ultimate Guide to Perfect Homemade Garlic Knots”